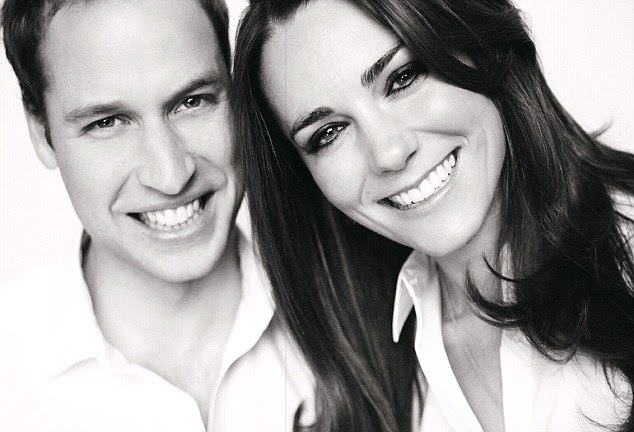
memories of New York ... and friendship

Friday, May 27, 2011

"Let us be grateful to people who make us happy, they are the charming gardeners who make our souls blossom."

... a beautiful quote to brighten up this rainy spring day. 

I took this photo last spring when I was in New York with my friend, Karen.
I won a trip to New York to see the Martha Stewart show and I took Karen with me as my guest ... I wrote about our trip here.

Karen and I had a great time and I am so happy that I was able to take her with me ... it is a trip that I will remember fondly ... forever. I was looking through all of the photos that we took of our trip last night ...  we both shot a lot of pictures as we walked around New York City ... this is one of my favourite pics of Karen ...
I added the quote "we do not remember the days ... we remember the moments" to this picture.
Karen and I both loved the flowers that were for sale on the streets ... I would take photos of the shop fronts and she would take close ups of the flowers. I caught her off guard as she was taking a photo of some of the flowers ... I remember calling her name and this is the shot that I got as she looked over at me ... Karen, smiling as always.

Karen is not feeling very well right now and I know that she will not able to read this post ... but I wanted to let her know that I am glad that she is my friend.


Book of Me ... my first pages ...

Monday, May 23, 2011

I recently joined a scrapbooking group called "Book of Me Club" ... we are meeting at Scrapbook Queens once a month to work on a scrapbook about ourselves. I am creating my book from a Tim Holtz's Grungeboard  book. I have decided that each "topic" will have two pages and one of the pages will always be a digital collage. I love making digital collages right now ... it's a great way to use all of the images that I have been collecting from The Graphics Fairy as well as ones that I have created myself. You can see the digital collage that I created for this month's topic above!

The Graphics Fairy is a wonderful source for very old (royalty free) images that can be used for any of your crafting, home decorating or digital projects. Karen, THE Graphics Fairy, is so kind to share her images with us {for free!} and if you ask nicely ... you can request if she has images that you have not been able to find on her site ... she has helped me out a couple of times!


So here is my first two pages ... you can see that I printed my digital collage on the right side to fill the whole page (5x7) and I used an assortment of vintage findings and scrapbooking elements to pull together the other page.


The old library pocket was from a Hardy Boys book that I purchased from a library book sale near our cottage a few years ago ... remember when they used a date stamp to tell you when the book was due and you could see how many other people had read the book before you ... that was cool ...


and the little eiffel tower charm that I added to the tab on the grungeboard was from a key chain that I purchased in Paris when I was there with my daughter on a school trip a few years ago. I have been saving that charm for something special ... I'm so glad that it has finally found a home!

If you are into scrapbooking ... traditional, digital or hybrid ... I hope that you will think about creating a book about "yourself" too. I'm going to try to post each month what I have been doing ... to keep me on track and perhaps ... to inspire you too!!
Have a great week.

scrabble tile charm tutorial

Wednesday, May 11, 2011

I have been playing with my scrabble tiles and came up with a new way to make my scrabble tile charms that I thought that I'd share with you. I've been making these for a while using premade "glaze drops" but I have figured out a way to make them without the glaze drops and I'm equally as happy with the final results.

Here's what you will need to make these scrabble charms ... scrabble tiles, bails, diamond glaze (i.e. Inkssentials glossy accents), a strong adhesive (i.e. E-6000), small xacto knife, self healing cutting board, small emery board, pencil, clear piece of acetate and a picture. I decided to use some of  my old Archie comic books for this tutorial. You can use small photographs or anything paper/art that is small enough to fit on the scrabble tile.
Step 1. Trace around a scrabble tile on a piece of acetate. Cut the acetate with your xacto knife so that you have the exact template of the scrabble tile. I used a permanent black marker to go around the edges of the acetate template ... it is small and easy to "lose" when you are working.
Step 2. Next you will use the acetate template to figure out where you want to crop your picture. Once you are happy with the image, trace around the template with a pencil and cut out with an xacto knife on your self healing mat.
Step 3. Apply a small amount of diamond glaze to the back of the scrabble tile ... I put the picture on the back of the tile because I want to be able to see the letter on the other side when I'm finished ...
... spread the diamond glaze around on the back of the tile so that it covers that back entirely but does not go over the sides. You don't need a lot of diamond glaze for this part ... just a thin layer. Then place your picture on top of the glaze, press down and wipe off any diamond glaze off the edges (if any comes out). Allow this to dry for about a half an hour.
Step 4. If your picture is a little larger than your scrabble tile don't worry because this step will straighten that out. Using an emery board, you will lightly sand (with small downward strokes) the four edges of the tile to remove any excess paper.
Step 5. Now you are ready to add a top coat of diamond glaze ... simply add a layer of glaze right ontop of your image. You want to cover the entire image but be careful not to put on too much glaze that it starts to run over the sides. This layer will take many hours to dry ...
... trust me ... many hours. If you touch it to see if it is dry and it isn't ... don't worry about that mark that you just made. Once the glaze is completely dry, you can apply another thin layer of glaze to the entire image and that will cover up the finger print!
Step 6. Now we just need to attach a bail to the back of the scrabble tile if you want to use this tile for a necklace, bracelet or earrings. Using a strong adhesive such as E-6000, attach the bail to the top of the scrabble tile and allow it to dry according to the directions on the package. And now you are done!
Here's a few of my charms for girls that want to be Betty or Veronica ... I always wanted to be Betty! I think that I'm going to make a charm bracelet with the whole gang.
I have made these scrabble tiles with photographs, digial art, maps and books and I'm sure that there are lots of other good ideas out there for finding images to use on these scrabble tiles.

These are great to make with the kids too ... depending on how young they are you may have to do the cutting steps with scissors instead of the xacto knife. I hope that you enjoyed this tutorial and are tempted to make one or two for yourself.

new classes

Friday, May 6, 2011


So happy that spring is finally here ... and summer is just around the corner. I am soooo looking forward to weekends at the cottage with family and friends. With that in mind ... I have just updated my class website with my new classes for the rest of this month and June.

I have three new classes that will be offered in June ...


"live, laugh, love" is going to be a fun and inspiring mixed media workshop that will teach you all of the techniques that I used to create the Judy lampshade that I talked about here.  The finished project would make a nice piece of wall art for a child's room.


"enjoy life ... this is not a dress rehearsal" is another mixed media project that I just loved designing. It's a mix of everything that I love ... a great quote, fashion and vintage details. In this class we will use a Tim Holtz judy and combine it with linen, ribbon, lace and vintage rhinestones to make our own "little black dress".


And this last class is a special one because I am only going to offer it one time and for five people. I've been making these funky bracelets for about a month now ... I was very inspired by Ann Tatum whom I read about in my current issue of  Somerset Studio's GreenCraft magazine. Ann has been making jewellery from vintage findings and her measuring tape bracelets inspired me to finally use the Tim Holtz measuring tape ribbons that I had been holding onto just waiting for that "perfect" project. In this class I'll share with you how I adapted Ann's original idea to create my own versions of these unique little bracelets. Because we will be using some of my vintage findings in this project, I only have enough materials to make five of this exact design.

All of my samples are on display at Scrapbook Queens now ... I just updated my little area at the front of the store!

There is still room in three of classes on Saturday May 14th ... Scrapbook Queens will be celebrating National Scrapbook Month in the store that day with a Queens Crop as well ...


I will be taking time off from teaching this summer but plan to start some new classes in the fall ... I'll keep you posted on those dates and new projects sometime in August!

If you are in Mississauga this Saturday be sure to check out Scrapbook Queens' Garage Sale ... I dropped off a couple of boxes of goodies yesterday and I noticed a lot of great stuff!

Have a wonderful Mother's Day this weekend!

Ohhh ... I almost forgot to tell you! If you like the digital scrapbooking elements that I used to show you my new June classes ... you can find them at Design House Digital! They have a free blog hop for this amazing kit ...


The Design House Digital website is down right now ... too much traffic? ... but you can get to the blog hop by visiting Robyn Meierotto's blog and "hopping" from there to the other great digital artists' blogs! This kit is great ... lots of great colours and elements ... I'm going to use it to digitally scrapbook my Mother's day pictures!

Wills + Kate ... all we need is LOVE is all we need

Friday, April 29, 2011

(illustration is from Google's home page this morning)
I got up a little early this morning to watch William and Katherine's wedding ... my husband thought that I was crazy but I didn't really care. I wanted to see Diana's sweet little boy get married.

I can still remember getting up early to watch Diana and Charles' wedding many years ago. Diana and I were both born in the summer of 1961 and she died on the day of my 36th birthday (another day that I remember, sadly). I always thought that Diana was a wonderful Mother and it is so nice to see that her boys have grown up to be such nice ("normal") young men.

I think that Diana would have loved the wedding ceremony and the kiss(es) on the balcony.

I was cutting wedding invitations this morning for a friend's daughter's wedding as I watched the wedding on television ... the invitations needed to be cut and it seemed like the thing to do ... especially as I waited to see the royal couple come out onto the balcony at Buckingham Palace. I guess that I will now have the memory of cutting wedding invitations in my pajamas as a part of this day. 

I hope that you have a lovely day!

(element from my "eat cake and party on" digital kit ")  

easter postcard from Paris

Thursday, April 21, 2011

Happy Easter everyone! This adorable little postcard is from my collection of vintage cards. I picked this one up in Paris a few years ago when I was there with my daughter on a school trip. I forgot all about it until I was going through some amazing royalty free Easter images on the Graphics Fairy blog. 

Karen .. aka "the Graphics Fairy" ... always has some amazing images that can be used for crafting projects. And I just noticed that Karen has added two more blogs that she promotes crafts and diy projects that have used images from her blog ... you can view them here and here!

I have been incredibly busy the past couple of weeks and unable to do any Easter projects myself or with the kids ... but here's a couple of ideas that I've seen lately and I would like to try if I have time on the weekend ...

This first one is from the Scrapbook and Cards Today's blog. There are some sweet downloads for Easter cards and scrapbook pages and there's lots of project how to's.


I also loved the Easter wreath that was featured on craftaholics anonymous ... the tutorial is by Catherine at Design Editor and it's just too cute. I am going to have to stock up on these little chicks for next year.

Have a wonderful Easter weekend and don't eat too much chocolate! 

Scrapfest in Kitchener ... oh what fun!

Monday, April 11, 2011

I have not been blogging much for the past two weeks ... I was so busy getting ready for Scrapfest in Kitchener last weekend that there was barely time to do anything else. Scrapfest is over now but I am still charged up after meeting so many wonderful people at the show. It was the first time for Scrapbook Queens to have a booth at a show so it was very exciting ... and a little overwhelming for all of us but we had a great time! I could not get over how many nice people there were to talk to ... both attending the show and exhibiting at the show ... it really was a lot of fun.

Here's a picture of our Booth on Friday night just before we started packing up for the evening ... thanks to Sue Sykes for taking the photo of our booth and this next one of us ...
This was our Scrapbook Queens "set up crew" ... from right to left ... {princess}Gabriella, {queen}Irena, {king} Joe, Deneen and myself. Thanks again Sue for taking these pictures ... we love your articles in Canadian Scrapbooker magazine!

Here's a shot that I took of my product display ... my glass charm necklace kits were a big hit as was my judy floor lamp with the floral shade. And as promised, I will include some additional pictures of the lamp in this post for everyone that was interested in taking pictures of it.

My digital "eat cake" kit on cd that I launched at Scrapfest along with my glass charm necklace kits are now for sale at Scrapbook Queens. I'll do another post later in the week about the digital kit! For anyone looking for my glass charm necklace tutorial you can find it here.
Here's a picture of my lamp showing the apron and some of the shade. I hung 24 different charms from the bottom of the shade to show some of my art.

We did a draw for one of my glass charm necklace classes at the show ... if you did not win the class you will have another chance to win one of my necklace kits if you follow Scrapbook & Cards Today magazine. I meet the magazine's publisher, Catherine Tachdjian at the show (she bought two of my charm necklace kits!) and I donated one for a giveaway on the Scrapbook & Cards Today blog. Good luck!!
Here is another shot of the lampshade and charms ... 
and another close up of the paper flowers and butterfly. So many people asked if I would do a workshop to make one of these shades ... it took me three nights to complete the shade and I really don't want to work out what it would cost me to reproduce it. But I am going to try to work on a project that will use the elements I created to decorate the shade on a smaller scale that can be made into a workshop. I have a few ideas that I think will work so once I have created a final piece I'll let you know more!
... one more pic ... this one is of the "brooch" that I added to the apron ... I created it with a couple of my vintage rhinestone pieces, some scraps of ribbon and a Tim Holtz crown. I just adore the Maya Road black organza and satin ribbons that I added to the apron ... they are two of my favourite ribbons right now and I have a feeling that they will be finding their way into a lot of my projects in the near future! 

That's all for now ... if you didn't visit us at Scrapfest on the weekend ... I think that Scrapbook Queens and I are going to be at another event in June and I will let you know more about that as the details unfold!
Have a great week!