Showing posts with label banners and bunting. Show all posts

diy party decor favourites and a couple of ideas for how to display them

Wednesday, March 23, 2016


Do you like to host parties? I do. I love party decorations and diy party decor projects. I have a few favourite diy party projects that I tend to make over and over because they are not only easy to make but they are also inexpensive.

 I am always trying to come up with new ways to display my party decorations so that I am not marking my walls or furniture and I'm going to share a couple of my ideas with you today. So let's get this party started ...


My number one go to diy party decoration - tissue paper pompoms. Tissue paper comes in so many colour options and best of all it is inexpensive. There are so many ways to make tissue paper pompoms. They can be hung from the ceiling or mounted flat to the wall, change up the size, use different colours of tissue to create an ombre effect or cut the ends like I did to create tissue paper flowers. 

When you combine tissue paper flowers with other large paper decorations you can create an amazing party backdrop. This is how I created my tissue paper flower pompoms:


1. You will need 6 sheets of tissue paper. The size of tissue is up to you so make these as large or small as you want. You will use two sheets each of three different colours to recreate my sample.
2. Accordion fold all of the tissue paper as shown above until you are left with one bundle of tissue about 1" wide.
3. Separate the three colours and cut each color as shown above - longest (outside) tissue has a pointed edge, middle tissue is shorter and has a rounded edge, and the shortest (inside) tissue has a fringe edge.
4. Open all of the tissue paper bundles and layer them together as shown.
5/6. Refold the tissue paper layers and add a twist tie to the centre as shown.
7. Open the tissue paper to create your flower one side at a time. 
8. The back of this pompom is flat for hanging on the wall.
 

A  neutral backdrop of kraft, white and gold paper party decorations gets a pop of colour with these pink tissue paper flower pompoms. I could easily remove the tissue paper flowers and replace them with pompoms in a different colour to reuse this backdrop for another party.


My secret for displaying this large grouping of paper party decorations was this large piece of pegboard. The paper decorations were tied to the board using baker's twine. I can set this display up days before the party and all I have to do is lean the pegboard against the wall when it's time to set up for the party. No nails or hooks required.


Tissue paper tassel garlands are my other go to diy party decoration. They are simple to create and you can make the garlands as long or short as you'd like. I also love that the garlands are extremely light so it makes displaying them a breeze. 

I came up with this way to display my tissue paper tassel garlands so that I don't have to worry about using tape on my walls or furniture. Here's what you will need: mason jars, wooden dowels, sand and clothespins.


I spray painted my mason jars gold and and added a band of gold glitter so that you would not see the sand inside of the jars.


I could have just used plain wood clothespins but I decorated mine with scraps of decorative paper and resin flowers.


I glued the clothespins to one end of the wood dowels as shown above. Put one wood dowel into each mason jars that has been filled with sand. 


Clip the tissue paper tassel garlands to the wood dowels as shown above and space the jars so that the garland hangs nicely. Depending on the length of the dowels, you can add this display to a table top or where ever you want!


Tissue paper tassel garlands are easy to create. These ones were created using Martha Stewart's ombre tissue paper but you can do this same technique with solid or printed tissue paper as well.


You can cut your tassels by hand or you can use the Martha Stewart tassel cutter like I did to get even cut tassels. You can check out this Martha Stewart YouTube video to see this amazing tool in action.


Here's a really quick look at how to make a tassel: (left to right) cut the edges of your tissue as shown, roll the tissue and then twist at the middle. Fold the tassel in half and then twist once more to create a loop for hanging.


I wanted to add a little glitter to my tassels so I used gold glitter tape just below the loop. The glitter tape does not stick to itself very well so you will have to use a little adhesive on the end of the glitter tape. 


You can cover the entire pegboard with decorations if you want. Just remember to leave one edge of the pegboard flat so it will sit on a flat surface.


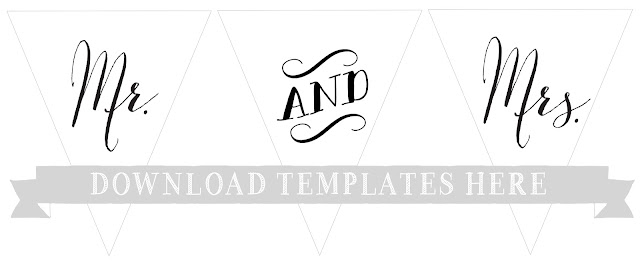
chalkboard bunting tutorial and free "Mr. & Mrs." download

Friday, November 22, 2013

chalkboard bunting tutorial by Lorrie Everitt | lorrieeverittstudio.blogspot.ca

Chalkboard + Love = Wedding {bunting}

Planning a wedding and looking for some diy ideas to personalize your special day? Here's a fun little project that you can make in an afternoon. Turn plain canvas bunting into a chalkboard bunting using Martha Stewart's chalkboard paint. Here's how I created mine ... 
chalkboard bunting tutorial by Lorrie Everitt | lorrieeverittstudio.blogspot.ca

Gather your supplies: 3 canvas or linen banners, Martha Stewart’sblack multi-surface chalkboard acrylic craft paint, foam brush, chalk, chalkboard marker, white tracing paper, ribbon or twine, paint brush optional.

Note: my template download was created to fit a large triangle canvas bunting shape - you may need to adjust the size of the template to fit your canvas bunting.

Step 1. Paint both sides of each canvas banner with two or three coats of black chalkboard paint. Allow to dry completely at least 1 hour between coats.

Step 2. Allow paint to cure completely at least 24 hours. Condition chalkboard canvas by lightly rubbing chalk over the surface and wipe with a soft, dry cloth to remove chalk.

Step 3. Download file for type and print out on regular paper. Cut out triangular shapes and place the type templates over each banner. Place tracing paper between the template and canvas banner. Trace the lettering with a pencil.

Step 4. Use a chalk marker to retrace the lettering on each banner. Chalk markers are available in a variety of different sizes. I wanted my chalk lettering to look like calligraphy so I used used a paint brush to apply the liquid chalk. Simply create a “puddle” of chalk liquid by pressing down on the chalkmarker on a smooth surface. You can see my tutorial to do this here.

Step 5. Tie ribbon or twine of your choice to each triangle to create the bunting.

The reason that I like to use chalk markers is that it can be removed with water if you make a mistake while you are working. Once the ink is dry it will not rub off when you touch it.  

https://sites.google.com/site/creativbagblog/holiday-2013/chalkbunting_mr%26mrs.pdf?attredirects=0&d=1

Download the template here.

Looking for more diy bunting ideas for your wedding? Check out this post from Weddingbells! It features four more of my diy bunting projects. 

http://www.weddingbells.ca/diy-wedding-ideas/6-easy-diy-wedding-bunting-projects-free-templates/?utm_medium=email&utm_campaign=Weddingbells+Newsletter+November+22+2013&utm_content=Weddingbells+Newsletter+November+22+2013+CID_80ae3ac2be11fb56b9b135042910639a&utm_source=Newsletters&utm_term=6%20Easy%20DIY%20Wedding%20Bunting%20Projects%20%20Free%20Templates


Maybe you are not planning a wedding  but love the idea of chalkboard bunting? Here's another idea for the chalkboard bunting!
chalkboard bunting tutorial by Lorrie Everitt | lorrieeverittstudio.blogspot.ca
I designed this bunting to use in a photograph with my daughters for our holiday cards. It is going to be hanging on the fireplace mantle in our family room very soon! 
I will share the template for the words "twenty thirteen" in my next post if you are interested. 


It's a banner day - my submission!

Friday, May 17, 2013

"Start everyday like it's your birthday" banner by Lorrie Everitt
I read about an exhibition on Oh My! Handmade Goodness this week that inspired me.

The exhibition is called "It's a Banner Day" and it is hosted by Hygienic resident artist, Patti Murphy and local artist Kat Murphy. Patti and Kat have invited artists - designers, photographers and artists from all over the world - to participate in this exhibit. Everyone is asked to create a banner that represents an artful message of hope, good news, happiness and/or success. The banners will all be strung together to decorate the gallery. 

This is my submission!

My banner started out as a graphic design that I created on my computer using a mix of fonts, one of my favourite bird illustrations and photo that I took of my chalkboard to use as the background. I printed the completed graphics onto professional photo paper and was prepared to stop there because I have so much on the go with work, family and volunteer projects right now. But after cutting out my printed banner and looking at the simple one dimensional banner, my "mixed media" side took over and I lost all control. The next thing I knew, I was pulling mixed media supplies out of the cabinets in my studio. Glue, brushes, boxes of paper, scraps of vintage and new ribbons, jars of coloured buttons, and spools of sewing threads were littered all over my table in a matter of minutes. 

Everything just seemed to fall into place and an few hours later as I was packaging up my completed submission. I realized when I was driving to the post office that the extra time I spent on this project made me feel happy. It was as if I had spent an afternoon at the spa getting pampered. I felt wonderful, relaxed and ready to dive into my "to do list".  

If you are interested in finding out more about this exhibition you can find it here on the "It's a Banner Day" website.


If you are thinking about submitting a banner yourself ... there's still time! You can get all of the details regarding submissions and to download the templates here

It's a Banner Day Exhibition with artists Patti Murphy and Kat Murphy.
If you are looking for more of my project ideas don't forget that I also blog for Creative Bag.
I just posted some free downloads there that can be used for wedding and party packaging projects. 

Storybook banner tutorial

Sunday, January 27, 2013


I saw the idea for these storybook banners on Pinterest earlier this week and I knew that it would be a great project for my daughter and I to make for her bedroom. My daughters and I have adore Golden Books and collected quite a few of them over the past few years. We like to make them into dream journals

As you can see, to create our book banner we used a children's book with lots of colourful illustrations. If you use a book with just text you could embellish the book pages to match your decor, colours, party theme or whatever.


This simple project can be created in less than an hour and requires very few materials and tools. 
Here's what I used for this project: a Golden children's book, twill tape (I used about 3' for mine), a disappearing ink marker, a piece of paper to create a template, pencil, scissors and sewing machine. 

1. Remove the cover of the book. Cut all pages so they are the same size. You can use a paper cutter for this part if you have one. 
2. Create a template for the shape of the bottom edge of the banner pages from the blank paper. Use the template and a pencil to trace the banner shape onto the bottom of each page and cut out.
3. Arrange the pages the way that you want to see them in the finished banner. There are two sides for each page so if you are using children's books with illustrations you will want to see what they will look like before you start sewing them together. 
4. Next, you will want to create a loop at each end of your twill tape and make sure that each banner page is evenly spaced out along the twill tape. To do that I used a disappearing ink marker to indicate on the twill tape where to make the loops and where to position each banner page. I positioned the pages so that the top edge of the banner page lined up with the top edge of the twill tape. The disappearing ink will "disappear" in a few hours so don't wait too long to do the next step.
5. Now you are ready to start sewing. I did a zigzag stitch at the top of the twill tape and stitched continuously along the twill tape and added the banner pages as indicated along the way. Once all of the banner pages where zigzag stitched to the twill tape, I did another row of straight stitching along the bottom edge of the twill tape so that the twill tape sits flat for hanging. The last bit of stitching that needs to be done is to create and stitch a loop at both ends of the twill tape for hanging.
If you use all 12 pages of a Golden children's storybook you can arrange the pages to tell  a story. If you don't want the banner to be as long as mine, just select the pages that you want and adjust the length of the twill tape. 

{birthday} bunting tutorial

Friday, February 11, 2011

It's been another busy week for me ... more birthday celebrations, teaching a mixed media canvas class and test printing wedding invitations ... I'm looking forward to just hanging out with friends tonight!

I thought that I'd share with you a fun little project my daughter and her friend, Alexis made with me recently. This is a fabric bunting that can be used as a decoration for birthday parties, showers or any holiday celebration ... like maybe Valentine's day! This is a great "beginner" sewing project so you may want to try it with older kids as I did. My daughter Robyn made hers so that we could hang it up for her sister's 17th birthday this week ... Alexis made hers to use at her 13th birthday party last weekend.

Here's what you will need: assorted fabrics, wide ribbon, scissors (regular and pinking), a fast fade fabric marker, cardboard (to make a pattern), ruler, straight pins, thread and sewing machine.

I bought 5 different Amy Butler fabrics for our bunting ... I  love Amy's colours and prints! You don't need a lot of fabric for this project so I bought "fat quarters" of each print from a quilting store ... a fat quarter is one yard cut into 4 large squares - you could also just purchase 1/4 of a yard of each fabric. The Amy Butler fabrics are a little expensive (about $18 yard) so to keep costs down I used  an expensive solid fabric (about $6 yard) for the back of each triangle since our bunting would be hung so that the backs are not really visible. I was able to make 2 six foot long buntings and I still have fabric left over for other projects.

I wanted all of the triangles to be the same size so I made a template out of cardboard. Here's how I made my triangle template: (a) Draw a line 7" across ... this will be the top of the triangle. (b) On that 7" line find your half way mark (3 1/2"). (c) From your centre point, draw another line that is 11" long ... you now have a "T". (d) Now draw your triangle and cut it out. 

I traced around our template directly onto the fabric using a quick fading fabric marker - the ink disappears in about 24 hours ... it's like magic! None of our prints had a pattern that was one direction so I was able to flip the triangle template so we had almost no fabric waste as you can see in my photo!

We wanted 10 triangles in our buntings - two of each of the five different Amy Butler fabrics. We also had to cut 10 solid backings so we had to cut out 20 triangles in total.
This photo shows the next three steps ...
1. We pinned the wrong sides (one patterned front, one solid back) together for all 10 of our triangles.
2. Next we used our sewing machine to straight stitch the two longest sides of each triangle ... we could have sewn the top too but it wasn't necessary so we didn't bother.
3. After all of the triangles were sewn together, we used the pinking scissors to trim the edges of the two longest sides to give a decorative "zig-zag" edge (if you don't have fabric pinking scissors or prefer a straight edge, just trim with regular scissors!)

Next we need to sew our triangles onto a long, wide piece of ribbon - our ribbon was 6' long. I found a ribbon in the colour that we liked but it was a little thin and somewhat see through so I sewed a piece of lace onto the ribbon along one edge as you can see in the photo. 
The next step is to pin the triangles to the back of the ribbon. The triangles were placed so that they were touching each other and lined up about 1/2 way along the ribbon. I started to pin the triangles working from the middle of the ribbon and working out to the end of the ribbon so that I had some extra ribbon at each end for hanging.
The next step is to sew all of the triangles onto the ribbon ... we did two lines of straight stitching ... one at the top of the triangles (about 1/2 way through the ribbon) and again at the bottom edge of the ribbon so that the triangles would lay flat when hanging.

To finish the ends of the ribbon, simply turn the ends over to form a loop to hang and sew the ends in place using your sewing machine and you are done.
The girls added large buttons at each end of their bunting to hide the stitching from their loops ... a nice decorative touch with the lace. We hung Robyn's bunting on our fireplace mantle so I used some twine on the loops and hung the bunting from heavy candle sticks. I think that we are going to hang this in Robyn's bedroom over her bed later on ... she did a great job and just loves it.
Robyn made Haley a pillow from some of the fabric scraps ... we used the cuttlebug to cut flowers and I created the "love like crazy" graphics as an iron on. The back of the pillow is one of our favourite Amy Butler fabrics. It was Robyn's first pillow and she is dying to make another one for herself .... maybe this weekend!
And I made Haley this little mixed media canvas piece after teaching my class on Tuesday ... the denim pocket was from one of her baby outfits ... Haley knew it as soon as she opened her present. The words on the side of the photo say "always believe in fairytales".

I hope that you try to make one of these ... maybe add words to spell out something or keep it simple like I did and reuse it after your celebration for an everyday decoration! 


I'll be linking up at in-the-studio-sneak-peek-friday today!