Showing posts with label photography. Show all posts

Use up your craft stash inspiration - part two.

Sunday, August 21, 2016


I can't believe how long I have hung onto some of my crafting supplies. Take for example a jar full of colourful clamp file paper clips and an old potato masher. They have been in my cottage crafting stash for over ten years. 


I know that I have had these items for at least ten years because it was in 2006 that I created the potato masher photo holder (above). I purchase two potato mashers at a garage sale near our cottage and I always intended to make the second potato masher into a recipe card holder. 


So this weekend, I finally got around to making my recipe card holder. It took me about ten minutes to make and I'm going to show you how I did it. 

Here's what you will need: an old potato masher with a wood handle, a metal clamp file paper clip, a 1/4" screw, a screw driver and a pair of pliers.


Step One. Pre-drill a small hole in the handle of the potato masher so it will be easier to add the screw. I made a quick hole using a nail and hammer.


Step Two. Using a pair of pliers, bend open one side of the metal clamp file paper clip as shown above. Bend it just enough so you can add the screw into one of the holes.


Step Three. Screw the metal clamp file paper clip in place on the wood handle. Bend the clamp file paper clip back into shape using the pliers and that's it ... you're done! 


Now I am thinking that it would be fun to make a few more of these to use for entertaining. They would make interesting sign holders for a food bar.


Here's one more photo so you can see what they look like from the side. By the way, I glued my photos and recipe cards to drink coasters so they will not bend easily. 


Simple Daily DIY - twine challenge project

Wednesday, June 8, 2016


I'm taking part in the Simple Daily DIY challenge during the month of June. Have you heard about it? The first challenge was all about twine/jute. I created this unique photo display box using supplies I already had on hand.


My supplies - a wood shadow box (mine was purchased at Ikea a number of years ago), a birch branch wood slice (my Dad cut a bunch of these for me but they are easy to find), a screw eyelet, twine/jute, a photo and scrapbook paper. 


I measured the top of my shadow box to find the centre and drilled a hole in that spot. The hole was just large enough so I could feed the two ends of the twine through it. 

I left my shadow box with the natural unfinished wood but you could easily paint it at this point if you wanted to. 


I used a round paper punch to crop an old family photo so it would fit on my birch branch slice. I added the screw eyelet to the top of the birch slice and then glued the photo onto the birch slice so it would hang straight.


To suspend the branch slice in the box: 
1. centre a long piece of twine through the screw eyelet and tie a quick knot close to the screw eyelet, 2. feed both ends of the twine through the hole of the shadow box, 3. figure out where you want the branch slice to hang inside the box and tie a knot at the top of the box to keep it in place. I tied a bow at the top of the box and trimmed the twine to finish.

Note: As you are working with the placement of the branch slice inside the box, you may need to adjust the angle of the screw eyelet so that the branch faces forward. Just give it a little twist until you are happy with the placement.


I cut a  piece of scrapbook paper to fit the back of the shadow box to complete.

 I used a kraft and gold foil dot pattern to match my home decor. Instead of using a pattern paper background I could have added another photo as a background. For example, a scenic water/sky photo would have added to the boating theme and complimented the colours in my family photo. Another idea is to add sand or beach glass inside the bottom of the shadow box.

If you try this project I'd love to see what you made! Add your own spin to make it your own. I'm on Instragram and you can tag me at @lorrieeveritt or #lorrieeverittstudio. 

 You can view Sustain My Craft Habit's YouTube video here to find out more about the Simple Daily DIY Challenge. 


Handmade photo cards for Valentine's Day and a free printable

Friday, February 12, 2016


handmade photo cards for Valentine's day and a free printable | Lorrie Everitt Studio

What could be more personal and thoughtful than giving your sweetheart a Valentine card that you created yourself? It's so easy to make keepsake cards for the holidays or a special occasion using your photos and some basic card making tools.

handmade photo cards for Valentine's day and a free printable | Lorrie Everitt Studio

For Valentine's Day I am giving my husband this handmade card. I created it using a picture that was taken of us at the Eiffel Tower last year. The card took less than an hour to make because I was able to print the photo at home on my photo printer. The hardest part about making the card was trying to decide which photo to use!

handmade photo cards for Valentine's day and a free printable | Lorrie Everitt Studio

Photo cards don't have to be really complicated to look good. So keep it simple!

handmade photo cards for Valentine's day and a free printable | Lorrie Everitt Studio

Gather your materials: blank cards and envelopes, photos, glue dots or two-sided tape, decorative tape, scissors, ruler and a pencil. It's also nice to have a large paper cutter, paper punches, cardstock, scrap paper, stamps, ink pads and ribbons.

You can purchase blank cards at most arts and craft stores or make your own using cards using cardstock. 

To help get you started on making your own handmade card for Valentine's Day, I created a free download with six different love themed sayings.

handmade photo cards for Valentine's day and a free printable | Lorrie Everitt Studio

 I prefer to cut my photos using large paper punches or my paper cutter because I can quickly and easily crop photos into perfect shapes.

My tip for using paper punches - position your photo in the paper punch so that you can see what you are cutting out before you punch.

For the best results, always use glue dots or two-sided tape to attach your photo to your card. Washi tape and glitter tape make nice decorative elements to use on your cards.

handmade photo cards for Valentine's day and a free printable | Lorrie Everitt Studio

If you prefer not to cut your photos, another option is to cut a hole on the card front using the paper punches and add your photo to the inside of the card as shown above.

handmade photo cards for Valentine's day and a free printable | Lorrie Everitt Studio

I created this free printable with saying that are suitable for Valentine's day, wedding or  anniversary cards. Simply download the file and print the second page onto cardstock. Cut the sayings out and add them to your handmade cards.

handmade photo cards for Valentine's day and a free printable | Lorrie Everitt Studio

Like the idea of creating more cards using your photos? Want a little more inspiration? Check out Roam New Roads and my video tutorial for handmade photo cards.


Set up a photo backdrop to take pictures of family and friends

Sunday, December 20, 2015


set up a photo backdrop to take photos of family and friends | Lorrie Everitt Studio

Last year my husband's Grandmother asked me to take some photos of her with all of her grand and great grand children when we were together for the holidays. She knows that I always have my camera on hand and love to take photos.

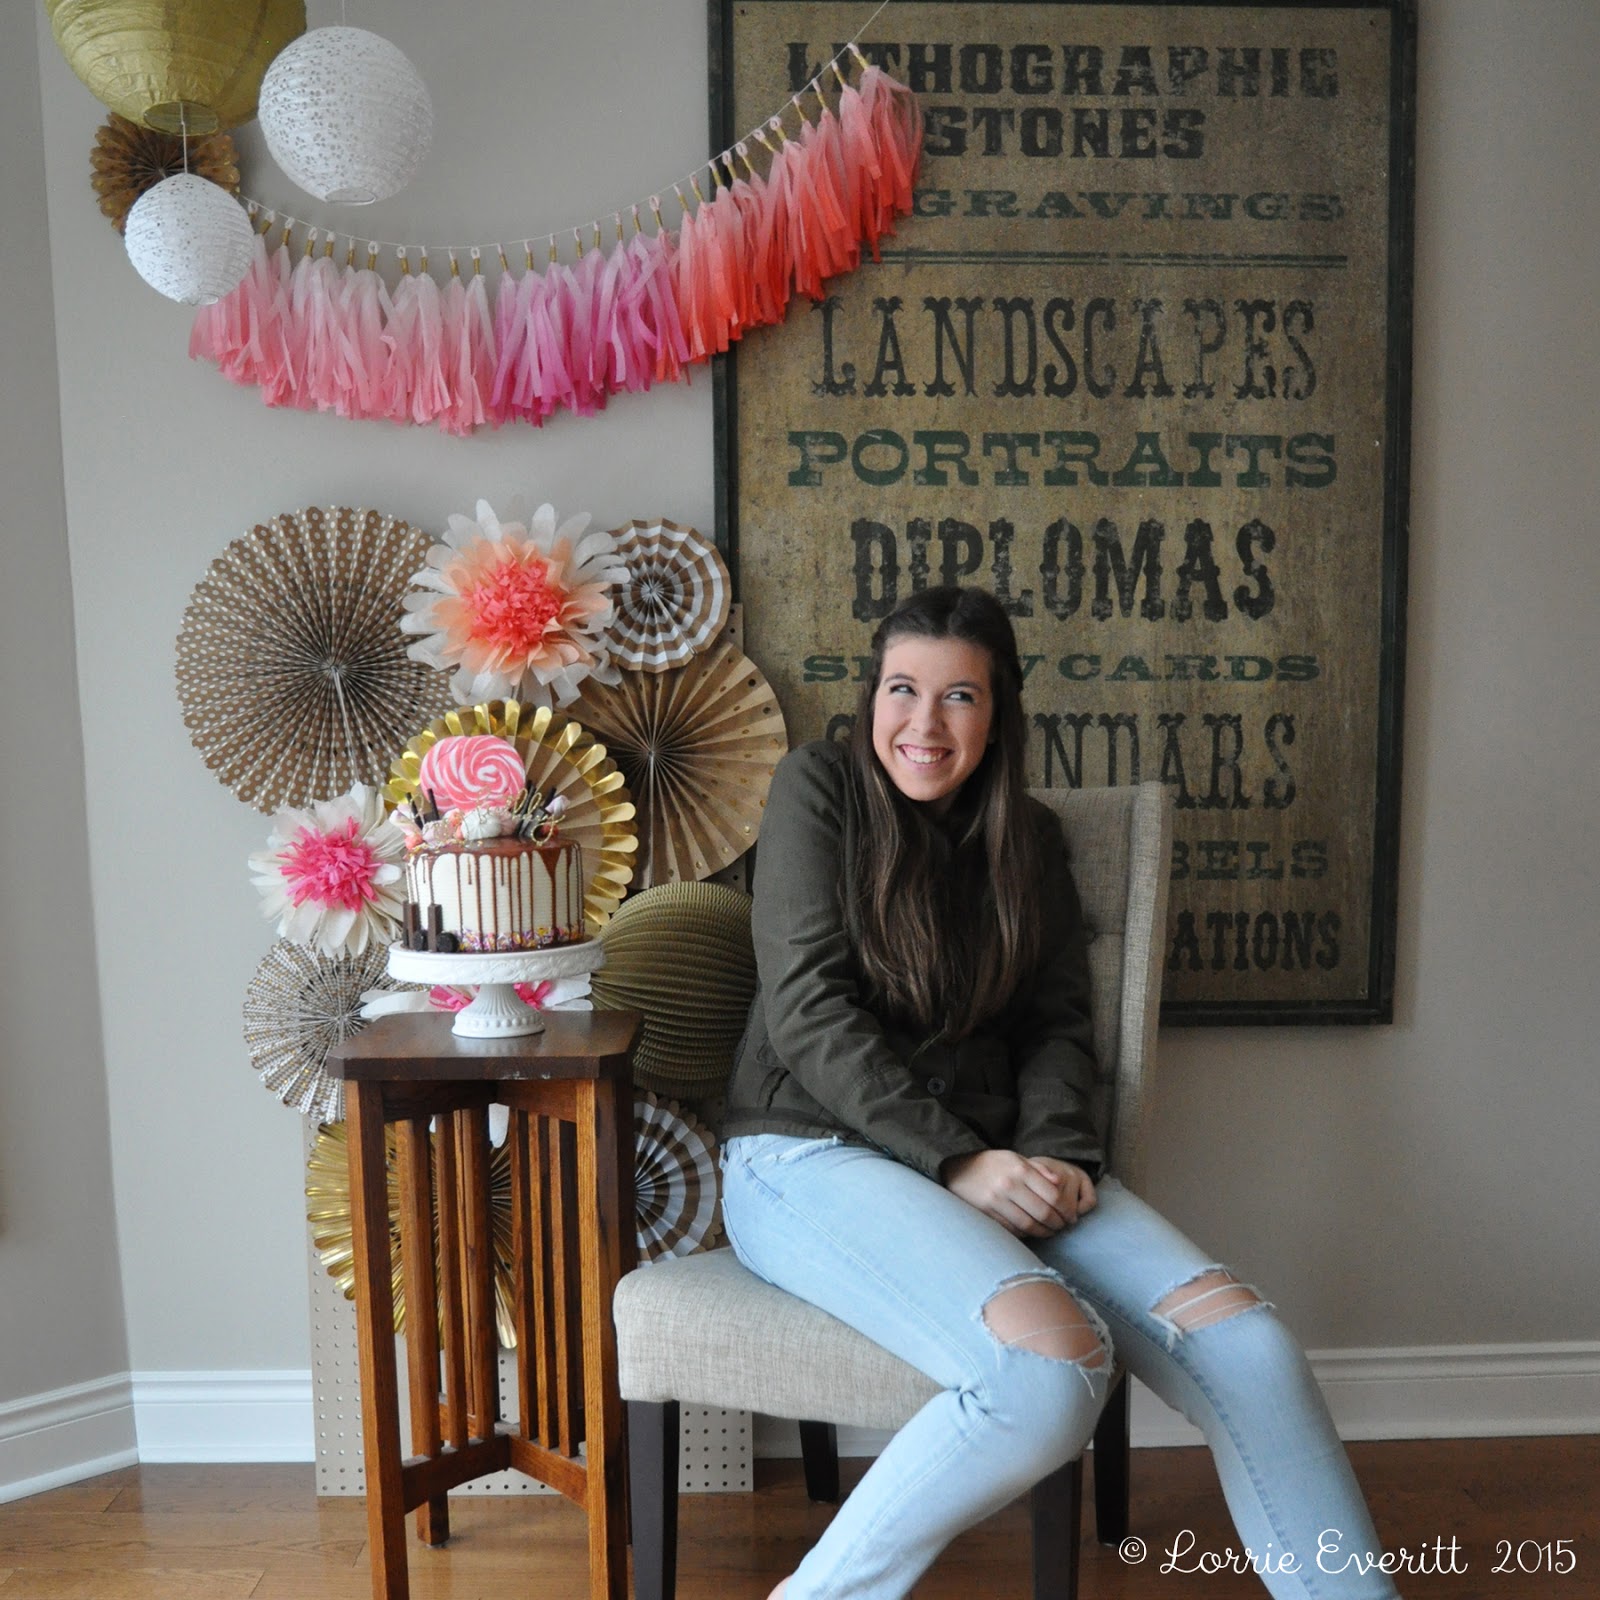
We celebrated Grandma's 99th birthday this weekend and I decided to surprise her by setting up a photo backdrop in my kitchen so I could photograph her with everyone at the party.
set up a photo backdrop to take photos of family and friends | Lorrie Everitt Studio

I knew that the natural light in the kitchen would be the best spot to photograph at the time of day that I would be shooting. I made an assortment of paper and tissue paper elements to hang as a backdrop and hung some paper lanterns. I was going to cover up my vintage sign with a canvas drop sheet but I liked the look of it with the paper decorations and it became part of the set up. 

set up a photo backdrop to take photos of family and friends | Lorrie Everitt Studio


I used a chair and a small table with Grandma's birthday cake as props. I tested the set up with my daughter before the birthday guests arrived to make sure that back drop was going to work for both sitting and standing.


set up a photo backdrop to take photos of family and friends | Lorrie Everitt Studio


Grandma loved the photo backdrop and was so happy to have her photo taken with everyone. We had a lot of fun taking the photos and you can tell from all of the smiles when you look at the pictures.


set up a photo backdrop to take photos of family and friends | Lorrie Everitt Studio


A little later in the day, I surprised Grandma again by presenting her with a gallery frame filled with photos that I had just shot and printed at home. She left the party with not just memories of the day but something that she could hang in her home right away. 


set up a photo backdrop to take photos of family and friends | Lorrie Everitt Studio


This diy concept is a fun idea for more than just birthday parties! I would do this for a baby or bridal shower, wedding or anniversary party and of course, during the holidays.

The best part for me was being able to print the photos right away so I could frame them and present them as our gift. I really like that my Canon Pixma Pro-100 photo printer can print photos up to 13" x 19" because I can purchase almost any frame that I want and I know that I won't have to worry about the photo size.

Here's a few more of the photos that I shot at the party ...

set up a photo backdrop to take photos of family and friends | Lorrie Everitt Studio

I posted this collage photo on Instagram after the party was over ... 

set up a photo backdrop to take photos of family and friends | Lorrie Everitt Studio

and here's a close up of the birthday cake that I decorated and used as a "prop" in some of the photos.

I hope that you have the opportunity to take lots of photos in the next few days with your family and friends.

Smile!


personalize holiday cards and gifts with photos

Wednesday, December 16, 2015

personalize holiday cards and gifts with photos | Lorrie Everitt Studio

Are you ready for the holidays? The countdown is on! My cards are in the mail, I've started gift wrapping many of our gifts and I can't wait to start my holiday baking this weekend. 

I take photos of my family all year round and for the past 21 years I have tried to incorporate a few of my favourite photos into my holiday crafting projects. Today I'm going to share with you a couple of the things that I did with my photos this year.  

personalize holiday cards and gifts with photos | Lorrie Everitt Studio

I shot photos of my daughters on the beach of Lake Erie this summer and I was originally planning to use one of the pictures on the front of our Christmas cards as I always do. But I ended up doing something a little different this year. I purchased these holiday cards and personalized them on the inside with my photos.

personalize holiday cards and gifts with photos | Lorrie Everitt Studio

I cropped and re sized my photo to fit the inside of my cards and added a holiday message using Photoshop. I didn't have a lot of spare time to make my cards so I printed my photos at home on my Canon PIXMA Pro-100. I love my photo printer because the photos look like they were professionally printed and I know that the colours won't fade over time.

personalize holiday cards and gifts with photos | Lorrie Everitt Studio

I set up my photos so I could print twelve at a time on 13"x19" sheets of photo paper. I cut the photos out using my large paper cutter. You could use scissors to trim your pictures but a paper cutter is quicker and your finished photos look more professional.

personalize holiday cards and gifts with photos | Lorrie Everitt Studio

My premade Christmas cards had rounded corners so I used the Crop-a-dile corner chomper to round the corners on my photos as well. I really like this corner cropping tool because it allows me to crop four or five pieces of paper at a time. I use glue dots to attach my photos to the cards. 

personalize holiday cards and gifts with photos | Lorrie Everitt Studio

And there you go! I personalized 80 cards in just a couple of hours!

The other project that I wanted to show you are my holiday photo gift tags ...

personalize holiday cards and gifts with photos | Lorrie Everitt Studio

I've created these for my family gift for many years. I like to number the backs of my daughters' photo gift cards so they have to open their gifts in the order of the tags. It makes Christmas morning a little more fun as we watch them hunt for which present to open next. 

For this project I sized and cropped my photos in Photoshop to fit my tag shaped paper punch. I printed them on my PIXMA Pro-100 photo printer at home so I would have better control of my picture size for this project. I was able to print eight tags at once using 8.5"x11" sheets of photo paper. I like to add baker's twine to my gift tags so I added a hole to each tag using this single hole punch

personalize holiday cards and gifts with photos | Lorrie Everitt Studio

Here's a close up of one of my gift tags on a small kraft gift box that I embellished with lace and gold glitter tape, a deer figurine and a mini bottle brush tree. 

Stay tuned ... I have a few other projects that I'm working on for the holidays! 


Backyard entertaining inspiration using my free printables

Monday, May 26, 2014

free printables for paper bows and chalkboard inspired gift tags from Lorrie Everitt

Summer is fast approaching and my family has been spending a lot of time over the past few weeks getting the backyard ready for summer entertaining. The weather was so beautiful this past weekend and I was able to take advantage of the patio space to shot a few pictures of the {free} printables that I recently created for Creative Bag. I can totally see using these printable for an outdoor gathering this summer. I designed a printable for the paper bows in yellow a little while ago for Weddingbells magazine. You can find the paper bow bunting project online and in the Spring/Summer 2014 Weddingbells magazine which is still on news stands. At the end of this post I will give you the purple paper bow printable. 

free printables for paper bows and chalkboard inspired gift tags from Lorrie Everitt

I made lemon-lime water and served it in mason jars for a casual afternoon gathering in the backyard. I love these light purple paper straws and they match the purple baker's twine that I used to tie the chalkboard circles to the glasses. The chalkboard circles are sold in kits to make bunting but I think that they work great as drink labels.

Plain white paper bags were filled with kettle chips. I thought that this would look nicer than setting out a bowl of chips. Everyone would get a bag of their own and the clothespins at the top
would keep them fresher. My printable tag could be personalized with each guest's name on the flip side. 

free printables for paper bows and chalkboard inspired gift tags from Lorrie Everitt


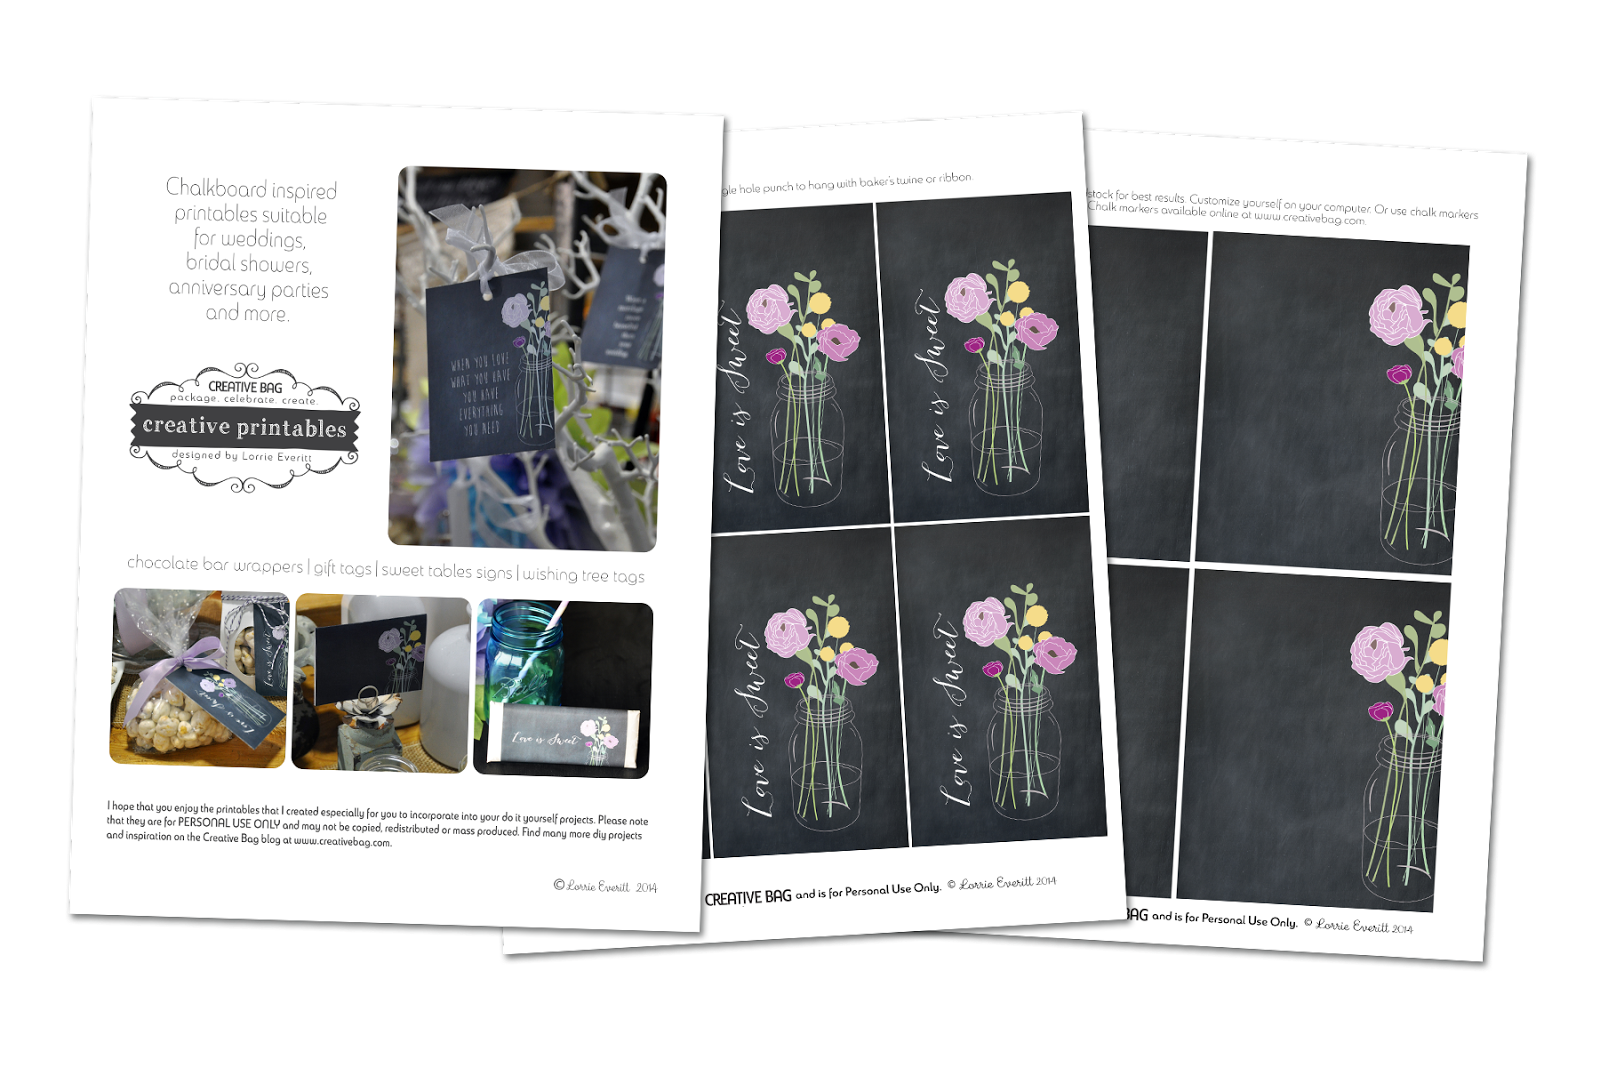
You can find the download for my chalkboard mason jar flowers on the Creative Bag blog post here.


ranunculus photos by Lorrie Everitt

I fell in love with ranunculus after seeing them in so many wedding photos on Pinterest and had to plant some in containers in our backyard. Here's a few of the pictures that I shot of my planters this weekend.

ranunculus photos by Lorrie Everitt

These flowers come in so many beautiful colours ... it was difficult to pick just one or two so I bought them all!

ranunculus photos by Lorrie Everitt


Gerber daisy have been a favourite of mine since I was a young girl. My bridesmaids carried long stemmed peach coloured gerber daisies as their bouquets almost 30 years ago. I filled two large containers with gerber daisies in our backyard this summer ...  

gerber daisy photos by Lorrie Everitt

Okay summer ... I'm ready! Bring it on. 

free printables for paper bows and chalkboard inspired gift tags from Lorrie Everitt


And now here is the download for the pretty paper bows!