Showing posts with label diy wedding. Show all posts

Let's get creative! Dress up gift bags with DIY watercolour ribbon.

Monday, September 23, 2019

Let's get creative! Dress up gift bags with DIY watercolour ribbon.

Let's get creative! Here's a sweet idea for making plain white gift bags a little more colourful by just changing out the ribbon handles. 

Let's get creative! Dress up gift bags with DIY watercolour ribbon.

I recently had the pleasure of working with Gloria Vazquez-Abrams from Historia Wedding and Event Planning and the amazing team that she brought together for a styled shoot wedding. Gloria's pastel coloured theme was filled with so many whimsical details and as soon as I saw her mood boards I knew that I needed to find a way to work my DIY watercolour ribbons to the set up.

Let's get creative! Dress up gift bags with DIY watercolour ribbon.

I removed the white ribbon handles on these white and gold foil edged gift bags and replaced them with the rainbow coloured ribbon.

Let's get creative! Dress up gift bags with DIY watercolour ribbon.

Gloria filled the gift bags on this glorious sweet table with cotton candy. The colours in the cotton candy and gourmet chocolates are so much fun and I love the way that the ribbon handles on the gift bags add that little bit of extra colour pop to the overall set up.

Let's get creative! Dress up gift bags with DIY watercolour ribbon.

The rainbow ribbon handle gift bags were also used in another area of the set up. Gloria incorporated the gift bags and these gift boxes along with balloon, paper flower, drapery and vinyl floor decal installations to create a centre stage area for the Cirque Entertainment.

Let's get creative! Dress up gift bags with DIY watercolour ribbon.

Let's get creative! Dress up gift bags with DIY watercolour ribbon.

Interested in doing this for a wedding or party?

Let's get creative! Dress up gift bags with DIY watercolour ribbon.

Here's a quickie tutorial to show you what I did and how to figure out how much painted ribbon you will need.


Let's get creative! Dress up gift bags with DIY watercolour ribbon.

The ribbons that came on the gift bags can be removed by simply cutting the ribbon and pulling them through the holes from the inside of the bag. But I suggest that you remove at least one ribbon handle by untying the knots and removing the handle in one piece.

Let's get creative! Dress up gift bags with DIY watercolour ribbon.

So as you can see above, I used the original ribbon handle to work out not only how long the ribbon needed to be for the gift bag but to also calculate how much ribbon I would need to paint so that I could change the ribbon on all of the gift bags I planned to use.

To add the rainbow ribbon to the gift bag I tied a knot on one end of the ribbon, feed it through both holes of the bag and then tied a knot on the other end of the ribbon to finish. Repeat on the other side of the bag.

My tip to make wrinkled ribbon smooth: Use a straight iron on a low temperature to easily iron out wrinkles. 


Let's get creative! Dress up gift bags with DIY watercolour ribbon.


Credits for Styled Shoot:

Planning and Styling by Historia Wedding and Event Planning 
Photography by Samantha Ong Photography 
Draping and Vinyl Floor Decals by Finer Events  
Paper Flower Décor by Floral Fantasy Studio 
Tableware Rentals by Sweet Bee Tea Party  
Linens, Chargers, Napkins and Chairs by Chair Decor 
Invitations, Menu, Place Cards, 3D Animal by A Good Day Inc. 
Packaging Supplies by Creative Bag
Chocolates by Stubbe Chocolate 
Favours by Marie Genevieve 
Cotton Candy by Bucket and Whisk 
Custom Lighted Designs by Marquee Marc  
Cirque Entertainment by Articus Productions  
Dress by Papilio Boutique 
Accessories by The Loved One 
Hair and Makeup by Beyoutiful Brides  


Let's get creative! Dress up gift bags with DIY watercolour ribbon.

how to paint on leather & faux leather clothing & accessories

Wednesday, August 14, 2019


Have you ever wanted to learn how to add your own illustrations and hand lettering to leather clothing and accessories? 

I have been painting on leather and faux leather items for about a year now and I thought that today I would share some of my tips and tricks that I have picked up. It's not very difficult to do and you don't really need a lot of different supplies. You don't even need a lot of different colours of leather paint if you keep you designs as simple as mine. If you are new to painting check out your local second hand stores and on clearance racks in your favourite stores for leather and faux leather items that you can customize.


If you are new to painting on leather, you might want to try it out on something like this faux leather tote bag.

Tip: I prefer to plan and draw out my design on paper first. You can enlarge or reduce your artwork on a photocopier to test how your finished design will look.


Once you have figured out what your design will look like on paper, cut it out as I have (see above) and use a measuring tape to figure out where to place your design. I use painter's tape to keep the paper in place. Once you are happy with the placement of your design you are ready for the next step - transferring the design onto the leather.

Tip: I placed magazines and books inside the tote bag to create a firm surface to work on.


Place a sheet of white transfer paper under the paper. Make sure that the white chalky side of the transfer paper is facing the leather. Use a sharp pencil to trace your design. 

Tip: You can trace as much or as little of the original design as you like using the tracing paper. I often leave out a lot of the smaller details and then add them in later using a white Stabilo pencil.


By the way, here's my supply list for this project: Gap faux leather tote bag, white transfer paper, Angelus flat white acrylic leather paint, white Stabilo pencil, pencil, assorted paint brushes, measuring tape and painter's tape.


This is a close up of the transferred design. The chalky lines are faint and will be easy to remove once you are done.

Now you are ready to paint. If you are feeling a little nervous about making a mistake and want to practice with your paint brushes first, I suggest doing so on scraps of faux leather or a worn out leather item from the second hand store.


I am right handed, so I always start painting on the top left hand side and work my way over to the top right side. I try to make sure that my hand doesn't accidentally rub up against any of the wet paint as I go so I work from the top to the bottom. 


Don't overload your paint brush. Allow your paint strokes to flow naturally and be prepared to go over some areas more than once to achieve a solid white line. 

Tip: Leather paint is permanent which means that there are no "do overs". Take your time and think about each brush stroke.


Larger areas will require a few coats of paint to become completely solid.
I used four light coats of paint on the LOVE letters and waited for the paint to dry completely between each layer.


Once the paint is completely dry, use a soft clean cloth to wipe away all of the white transfer  and Stabilo pencil lines. 


This technique is a great way to personalize clothing, accessories and home decor items.


I hand painted this jacket for a styled shoot I participated in earlier this year. It was used as a photo prop for a wedding set up. The jacket was stored in a garment bag that I embellished with floral illustrations to co-ordinate with the jacket design using a Sharpie paint pen. 


My custom jacket and matching garment bag are currently included in a Giveaway on InstagramThe #loveisintheair contest closes on August 18, 2019 and you can find all of the details about the giveaway on a post my Instagram account.


You can do-it-yourself: confetti poppers

Monday, October 16, 2017


DIY paper and flower confetti poppers | Lorrie Everitt Studio
Confetti poppers are very easy to make and can be used at weddings, birthday parties and showers. The wonderful thing about making confetti poppers yourself is that you can fill them with whatever kind and colour of confetti that you wish.

DIY confetti poppers | Lorrie Everitt Studio


I created the labels for my confetti poppers and I've included it as a download in this post. 

If you want to make your own confetti using scraps of tissue paper, wrapping paper and mylar, like I did for my poppers, you can find my DIY confetti tutorial here. It's simple to make your own confetti and if you are planning on making a large number of confetti poppers it is a fairly cost effective option.

DIY confetti poppers | Lorrie Everitt Studio

Gather Your Supplies: push pop containers, white paper, confetti, scissors, two-sided tape.

Step 1.  Download the labels and print out on white text paper. Using the crop marks as a guide, cut out the labels.

Step 2.  Assemble the push pop container and position the labels to the containers as shown above. Keep labels in place using two-sided tape.

Step 3.  Remove the lids. Fill the containers with either paper or flower confetti. 

Step 4.  Add lids to seal. Give the container a shake and the confetti will expand into the open space under the lid.


DIY confetti poppers | Lorrie Everitt Studio

Dried flower petals can be used as confetti if you are looking for something a little more natural and fragrant. If you are getting married just ask your florist if this is something that they can help you with. My flowers were from Petal to the Metal.

DIY confetti poppers | Lorrie Everitt Studio

To use poppers: Remove the lids before use. Push the stick with one quick movement to release the confetti from the push pop container. The poppers can be refilled and used over and over.

You can see my Facebook live tutorial with Weddingbells to make these here:


DIY confetti poppers | Lorrie Everitt Studio


Here's one more idea for creating these confetti poppers using stickers instead of my labels.

DIY confetti poppers | Lorrie Everitt Studio

I added custom stickers that were designed by Alicia's Infinity. The art on these flower confetti poppers matched Alicia's wedding stationery.

DIY confetti poppers | Lorrie Everitt Studio

Sources: photo by Sara Wilde Photography, flowers by Petal to the Metal, hand lettering by Prose and Fawns Paperie, custom stationery by Alicia's Infinity, push pops/ribbon from Creative Bag, chalkboard/glass rose gold box from Weddingstar, shoot on location at the Fox and Fawn Antique Shop.


Let's celebrate! If you make your own confetti poppers I'd love to see them. Share your pictures on Instagram using #lorrieeverittsstudio. 


Create. Celebrate. Inspire.


DIY confetti poppers | Lorrie Everitt Studio


You can do it - DIY chocolate rings

Friday, September 22, 2017

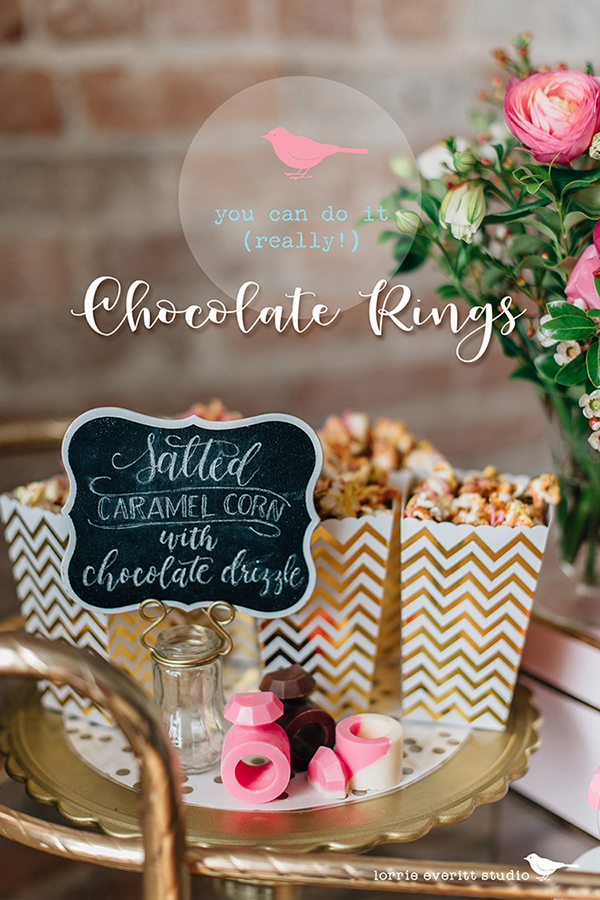
DIY chocolate rings using a ring shaped ice cube tray and melted chocolate in the colours and flavours of your choice. | Lorrie Everitt Studio

I created these sweet chocolate candy rings for a DIY bridal party styled shoot earlier this year. I can't share a lot of the details about the shoot just yet but my DIY tutorial for making these chocolate rings is up on the Weddingstar blog now. They were made using ring shaped ice cube trays and melted chocolate wafers. 

I originally found a recipe to make these as sugar rings with flecks of edible gold but after three tries I gave up and started experimenting with chocolate. I think that my chocolate rings are much easier to make if you are not a professional candy maker. And honestly, who doesn't love chocolate?!

DIY chocolate rings using a ring shaped ice cube tray and melted chocolate in the colours and flavours of your choice. | Lorrie Everitt Studio

DIY chocolate rings using a ring shaped ice cube tray and melted chocolate in the colours and flavours of your choice. | Lorrie Everitt Studio

Photo credit: Sara Wilde Photography (for the first three photos)
Sources: hand lettering on chalkboard by Prose & Fawns Paperie, sweets by Savoury & Cakeflowers by Petal to the Metalpackaging and party supplies from Creative Bag, ring ice cube tray from Weddingstar. Styled shoot photographed at Fox and Fawn Antique Shoppe. 

DIY chocolate rings using a ring shaped ice cube tray and melted chocolate in the colours and flavours of your choice. | Lorrie Everitt Studio

These chocolate rings look great on cupcakes. 
I hope that you'll pop over to see the full tutorial here.


DIY Wedding Proposal Boxes

Thursday, April 6, 2017

diy wedding proposal boxes | Lorrie Everitt Studio

I wanted to share a little DIY project that I did recently using products from Weddingstar and Creative Bag. I created a series of proposal gift box ideas for the bridal party - Maid of Honour, Bridesmaid and Flower Girl. You can find all of the DIY details, tutorials, my free downloads and links to all of the products on both the Weddingstar and Creative Bag blogs.

You can find the Weddingstar blog posts here:


The Creative Bag blog posts with packaging supplies links are here:


Note: Creative Bag sells select Weddingstar products in all of their stores and online at creativebagwedding.com.


I loved seeing all 3 of my projects featured at the bottom of the Weddingstar website this morning!