Showing posts with label jewellery making. Show all posts

do it yourself wrap bead bracelets

Sunday, October 18, 2015


diy wrap bracelet | Lorrie Everitt Studio

Don't you just love wrap bead bracelets?! I purchased one while I was in Barcelona last fall and I wear it all of the time. I can wear it alone and I layer it with other bracelets. 

After purchasing some small turquoise beads on sale at Michaels the other week, I decided to try my hand at making my own wrap bracelets. Here's how I made mine:

diy wrap bracelet | Lorrie Everitt Studio

My supplies: small beads (keep in mine the smaller the bead the more beads you will need), two sizes of beading thread (I purchased the cording shown at Michaels and used the two threads at the top), 2 collapsible eye beading needles, bead stringing glue, small buttons (mine were antique), scissors, two clips and a board to work on

diy wrap bracelet | Lorrie Everitt Studio

You will need two different thickness of beading thread. The thicker thread will be used as the base of the bracelet and the thinner thread will be used to add the beads to the base. 

Note: You are going to pass the thinner thread through each bead twice so it needs to be very thin but strong.

I used my original wrap bracelet as a guide for how long to cut the threads. 
My original bracelet wraps around my wrist twice and is 15" long. 
So I cut my thicker thread to 50" long and the thinner thread to 92". 

diy wrap bracelet | Lorrie Everitt Studio

First step is to add a button to the thicker (base) thread. Fold the thread in half, add the button and add a knot as shown. Note: the button should be able to lay flat - knot the thread so the button can move a little.

diy wrap bracelet | Lorrie Everitt Studio 

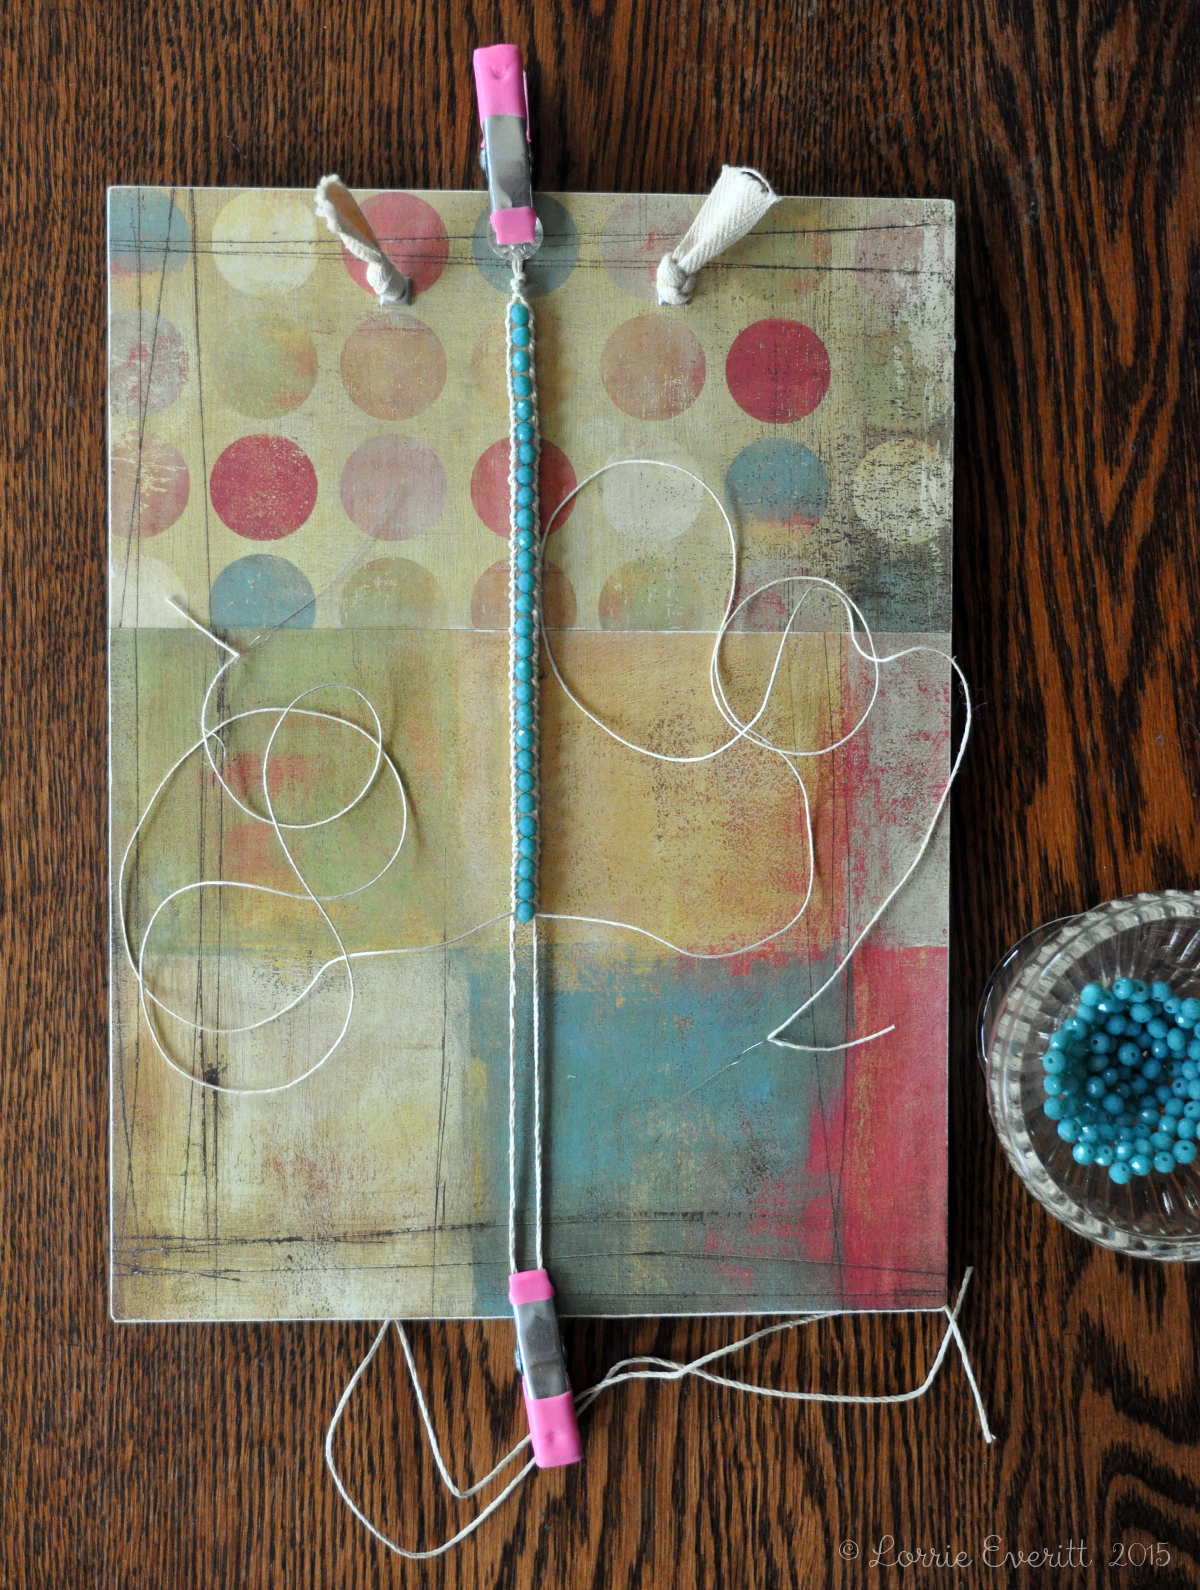
I created this crafting board so it could hang up for easy storage in my studio. It's basically a 9"x12" masonite board covered in scrapbooking paper. I punched two holes using the crop a dile tool and added a cotton ribbon for hanging. Use two clips to attach the thread base to the board as shown. You need to create a space between the two base threads so you can easily add the beads.

Once the thread base is secure on the board, fold the thinner beading thread in half and add it to the thread base just below the knot. Add a collapsible beading needle to both ends of the beading thread.

Tip: If you don't have a board like mine use a clipboard and one clip.

diy wrap bracelet | Lorrie Everitt Studio

And now the fun begins ... adding the beads!

top left: Tie a knot with the beading thread to keep it in place on the base threads.
top right: Wrap the ends of the beading threads around each base thread twice.
middle left: Add a bead to the bead thread on the left as shown.
middle right: Take the bead thread on the right and insert it into the same bead as shown.
bottom left: Wrap the two bead threads around both base threads again - twice.
bottom right: Add another bead using same guidelines as before.

diy wrap bracelet | Lorrie Everitt Studio

You will continue to add beads (remember to wrap bead threads twice before adding next bead) until you are close to the bottom of the board. 

diy wrap bracelet | Lorrie Everitt Studio

Here's a close up for reference.

diy wrap bracelet | Lorrie Everitt Studio

My finished bracelet will be longer than the length of my board so I had to re position the base threads. I wanted my beaded area to be 12.5" long. Keep checking the length of your bracelet so that you will know when to stop.

FYI: I used 55 beads on my bracelet. The bracelet that I purchased had 80 smaller beads. 

diy wrap bracelet | Lorrie Everitt Studio

Once you are satisfied with the bead length, you are ready to finish the bracelet.
top left: After the last bead is in place, wrap the bead threads around the base threads two last times.
top right: Knot the beading threads around the base threads as shown. Cut the beading threads and add bead string glue to the ends to prevent fraying.
middle left: Tie a knot with the based threads directly over the beading thread knot.
middle right: Knot the base threads once more to create a "button hole". Make sure that the button hole is large enough for your button to go through.
bottom left: Create one additional knot to finish the bracelet as shown. Cut the threads close to the knot and add a little bead string glue to prevent fraying.
bottom right: Your bracelet is ready to wear!

diy wrap bracelet | Lorrie Everitt Studio

Here's another look at my finished bracelets.

I'm also so excited to be on Instagram now! You can find me here! I'm really new to Instagram and still looking for other creative people to follow for inspiration. Leave me a comment if you have any suggestions.

diy wrap bracelet | Lorrie Everitt Studio


Resin Flower Love {at an incredible price}

Friday, March 8, 2013

Resin flowers are one of my favourite elements to add to jewellery, handmade cards, gift wrapping and home decor projects. I just made 8 large rose resin flower rings for some of my girlfriends. We are going to be together this weekend with our families and I thought that it would be a nice surprise for everyone to have matching rings. 

Creative Bag has all of their resin flowers on clearance for 10 cents a package. Depending on the size of flower they are packaged in four or six ... what a deal! You can see them online here but they will not last for long. If you live in Toronto, Mississauga or Pickering it's best to go to the store to see what is available. 

I bought a bunch of the pink resin flowers to put aside for a large party. I can use them on invitations, favors and other elements. I don't have a party planned right now but with two teenage girls I know that they will come into use at some point. 

Oh yeah, and this is how I packaged the resin flower rings. I used small canvas bags and stamped a design on each one. Baker's twine and cotton ribbon were used to attach the handmade gift tags to the canvas bags. All of these items are available at my new website  just pretty parties and of course at Creative Bag.

resin flower jewellery

Friday, May 18, 2012

I have been so inspired over the past two weeks by two things ... 1. we just recently received our Creative Bag Wedding resin flowers at Creative Bag and 2. Anthropologie just opened their new store in Oakville (which is about 7 minutes away from the house I will be moving into with my family this summer!!)

As soon as I saw the way Anthropologie was packaging their earrings and necklaces with old photos, I knew exactly how I was going to package the jewellery that I was planning to make with the new resin flowers.

Above you can see two styles of rings and a matching pair of earrings that I created with the resin flowers. The design for the earring card holder was created using old family photos and a page from an old dictionary that I scanned and played with in Photoshop. I printed the art on photo paper and mounted it onto chipboard.
Here's another pair of earrings and a matching necklace that I created using the resin flowers. The woman on these jewellery card holders is my Grandmother when she was younger. Not sure, but I think that these were taken when she was on her honeymoon. My Grandmother would have loved these!!!
The pictures on these jewellery cards are of my father and I. The picture was taken in 1962 and it is one of my favourite pictures of the two of us together when I was small. I punched two holes in the card for the necklace so that I could add the ribbon and attach the necklace.

I didn't make jewellery cards for the rings ... I've always liked seeing rings displayed in shallow containers filled with rice. So that is what I did with mine.
I just love resin flower cabochons right now. I've been using them on stationery and favor boxes for weddings and parties. You can see more of my ideas using these on Creative Bag's blog. I will be posting a tutorial for making some of these jewellery pieces on the Creative Bag blog next week if you are interested.
I will also be doing a demo with the resin flowers as well as a few other projects at Creative Bag's Toronto store on May 24, 2012 at 6pm if you are interested in attending. There is no cost to register but space is limited. Everyone will be making a resin flower ring and tissue paper flower pom-pom (yes, for free!) and you can find out more about the event and how to register here. 

To all of my Canadian friends and family, have a great holiday weekend!

pendant trays with glass inserts - tutorial

Friday, October 14, 2011

I'm totally in love with pendant trays and glass inserts right now. There are so many different pendant tray shapes for necklaces, earrings and rings and don't even get me started on all of the different colours of metal. The vintage copper is my favourite at the moment.

Here's a little tutorial on how to use the pendant trays and glass inserts to make your own jewellery!
It is almost the same as my glass tile tutorial here but we do a couple of different things at the end.

Let's gather our supplies first! You will need a pendant tray and glass insert, something to use as art (I create my own digitally and print the jpeg file at Costco), glossy accents (or your favourite brand of diamond glaze), E-6000 glue, an xacto knife and small emery board. I work on a self healing matt and I use wax paper to protect the matt when I am using the diamond glaze or glue.
The first step is to add a small amount of diamond glaze to the back of your glass insert. The back of the glass is the flat side if you have a puffy glass insert. You want to cover the entire back of the glass insert but do not add too much diamond glaze to cause it to drip down the sides.

NOTE: You do not want any air bubbles in the diamond glaze so DO NOT shake the bottle (ever). I also suggest that you turn the bottle upside down before you start so that any air bubbles move to the top. If your diamond glaze does not flow easily, use a pin to clear the tip.

Next you are going to flip your glass insert over and place it on top of your art. Do not press down on the glass. You can gently slide the glass over the art to position it. It is important that you watch the positioning of your glass for the next 10 to 15 minutes to make sure that it does not slide while it is drying. The diamond glaze will take many hours to dry ... I usually start these at night and let them sit overnight before I start the next step.
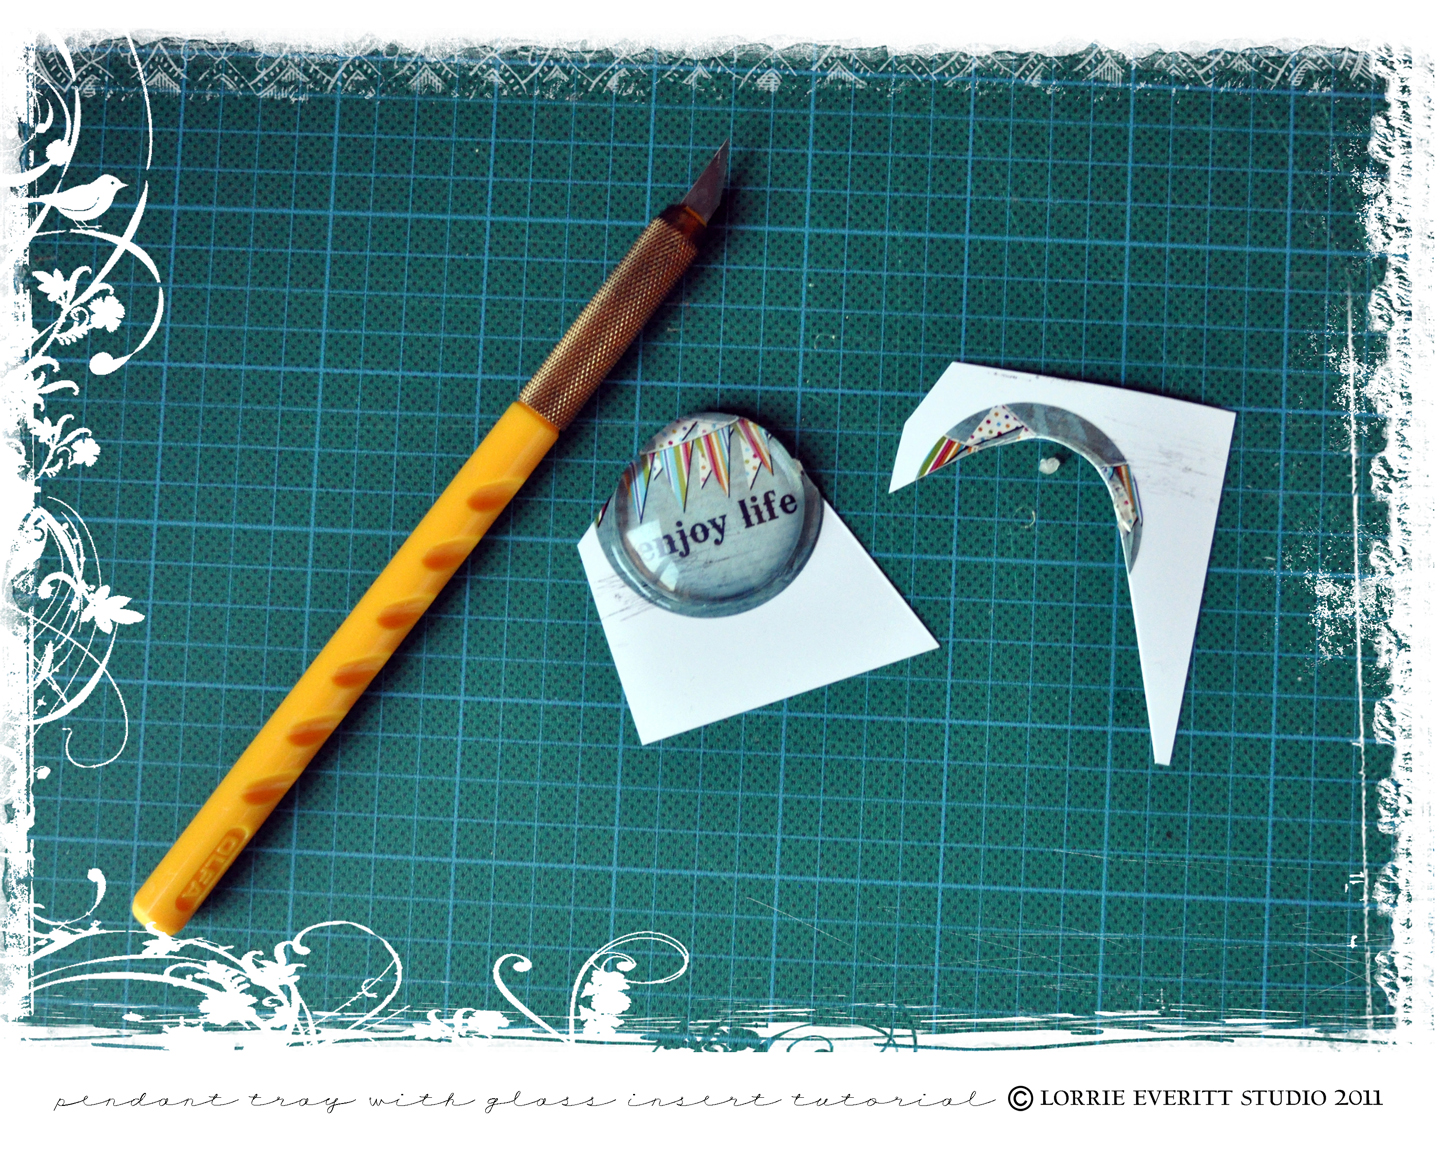
Once your piece is completely dry you are ready to cut the excess paper from the glass. Use an x-acto knife to cut around the shape of your glass insert. If you have any excess diamond glaze on the sides of the glass you can use the x-acto knife to scrap it off at this point. Then use your small emery board to sand any extra paper from the glass ... you can see more details on how to do that here in my glass charm tutorial.
I like to add a thin coating of diamond glaze to the back of my glass tile at this point. No one will see it but I think that it protects the art. It doesn't need to be thick and don't worry if you have any air bubbles. Once this is dry (in a few hours) you are ready to add the glass insert to the pendant tray.
Apply a small dab of E-6000 glue to the centre of the pendant tray. Place your completed glass insert into the tray. Take some time to position your glass insert so that it is the way you want it to look and then press down on the glass insert. Leave your piece to dry for an hour or so. 
Once the E-6000 is dry you are ready to add a chain and wear your new necklace. This same technique for the pendant trays works for earrings and rings as well. Again, this is another "additive" project ... once you make one everyone will want you to make one for them too ... which is fine because you will love making these and they make great gifts!

I have a bunch of these blank pendant tray kits for sale at Scrapbook Queens.
They are also sold in the jewellery section of better craft stores and of course at bead stores! 

Have a great weekend.

map art to wear

Friday, July 22, 2011

I {heart} maps ... always have and always will. I collect them when we travel. Maps make great keepsakes to scrapbook, journal or smash!

And lately I've been using them in my jewellery! They make great keepsakes ... like one I made above with a New York City subway map and a heart glass tile.

I made a few of these heart shaped charms with different subway stops from my trip there last year. I kept the one with Grand Central Station for myself. I was inspired by merchandise crafted with old New York City subway maps at a store located in Grand Central Station. After visiting that store, my friend Karen and I collected every subway map we could find to bring home with us.

I also tend to rip out the maps from my daytimers after the year is over. They are too cute to throw out and I'm a pack rat! I'm so glad that I have been able to use some of these smaller maps to create these tiny charms for earrings. The ones pictured with London and Paris were created for my oldest daughter as a reminder of her school trip to Paris when she was in grade 8. We were grounded at the London airport due to poor weather conditions and didn't make it to Paris until the second day of our trip. She will always remember that part of the story from our trip with these little keepsakes.
One more pair of earrings ... I think that these would be good for a Beatles fan ... they feature London and Liverpool!

So if you are off travelling somewhere this summer ... save a couple of maps from your destination ... you just may want to make a keepsake that you can wear!
If you live in the Mississauga (Ontario, Canada) area, I just added the heart shaped glass tiles and small earring sized glass tiles to my product line at Scrapbook Queens ! I am going to add them to my etsy shop for everyone else in August when I get back from the cottage ... if I have any stock left!
One last piece to share before I head off to the cottage ...
I just made these Betty & Veronica earrings ... they match my Archie scrabble tile bracelet that you can see here.  I made some of these Betty & Veronica earrings and necklaces with my girls - we can't wait to sit out on the beach with these!

guest hosting at Craftaholics Anonymous today

Wednesday, June 8, 2011

Hello everyone ... I'm so excited to be guest hosting at Craftaholics Anonymous today! Linda has an amazing site that is full of amazing tutorials and crafting ideas. I hope that you will pop over to visit and say hello!!


I also wanted to share with you my scrabble tile Archie bracelet ... I just finished it this morning ...
 

... isn't it cute!

My scrabble tile charm tutorial can be found here.

Here's the "gang" ... Mr. Lodge, Mr. Weatherbee, Ms. Grundy, Dilton, Jughead, Betty, Archie, Veronica, Reggie, Moose and Pop. I also cut a small "Archie and the gang" comic book from an advertisement for the books as a 12th charm.

Have a great day!

scrabble tile charm tutorial

Wednesday, May 11, 2011

I have been playing with my scrabble tiles and came up with a new way to make my scrabble tile charms that I thought that I'd share with you. I've been making these for a while using premade "glaze drops" but I have figured out a way to make them without the glaze drops and I'm equally as happy with the final results.

Here's what you will need to make these scrabble charms ... scrabble tiles, bails, diamond glaze (i.e. Inkssentials glossy accents), a strong adhesive (i.e. E-6000), small xacto knife, self healing cutting board, small emery board, pencil, clear piece of acetate and a picture. I decided to use some of  my old Archie comic books for this tutorial. You can use small photographs or anything paper/art that is small enough to fit on the scrabble tile.
Step 1. Trace around a scrabble tile on a piece of acetate. Cut the acetate with your xacto knife so that you have the exact template of the scrabble tile. I used a permanent black marker to go around the edges of the acetate template ... it is small and easy to "lose" when you are working.
Step 2. Next you will use the acetate template to figure out where you want to crop your picture. Once you are happy with the image, trace around the template with a pencil and cut out with an xacto knife on your self healing mat.
Step 3. Apply a small amount of diamond glaze to the back of the scrabble tile ... I put the picture on the back of the tile because I want to be able to see the letter on the other side when I'm finished ...
... spread the diamond glaze around on the back of the tile so that it covers that back entirely but does not go over the sides. You don't need a lot of diamond glaze for this part ... just a thin layer. Then place your picture on top of the glaze, press down and wipe off any diamond glaze off the edges (if any comes out). Allow this to dry for about a half an hour.
Step 4. If your picture is a little larger than your scrabble tile don't worry because this step will straighten that out. Using an emery board, you will lightly sand (with small downward strokes) the four edges of the tile to remove any excess paper.
Step 5. Now you are ready to add a top coat of diamond glaze ... simply add a layer of glaze right ontop of your image. You want to cover the entire image but be careful not to put on too much glaze that it starts to run over the sides. This layer will take many hours to dry ...
... trust me ... many hours. If you touch it to see if it is dry and it isn't ... don't worry about that mark that you just made. Once the glaze is completely dry, you can apply another thin layer of glaze to the entire image and that will cover up the finger print!
Step 6. Now we just need to attach a bail to the back of the scrabble tile if you want to use this tile for a necklace, bracelet or earrings. Using a strong adhesive such as E-6000, attach the bail to the top of the scrabble tile and allow it to dry according to the directions on the package. And now you are done!
Here's a few of my charms for girls that want to be Betty or Veronica ... I always wanted to be Betty! I think that I'm going to make a charm bracelet with the whole gang.
I have made these scrabble tiles with photographs, digial art, maps and books and I'm sure that there are lots of other good ideas out there for finding images to use on these scrabble tiles.

These are great to make with the kids too ... depending on how young they are you may have to do the cutting steps with scissors instead of the xacto knife. I hope that you enjoyed this tutorial and are tempted to make one or two for yourself.