Showing posts with label mixed media. Show all posts

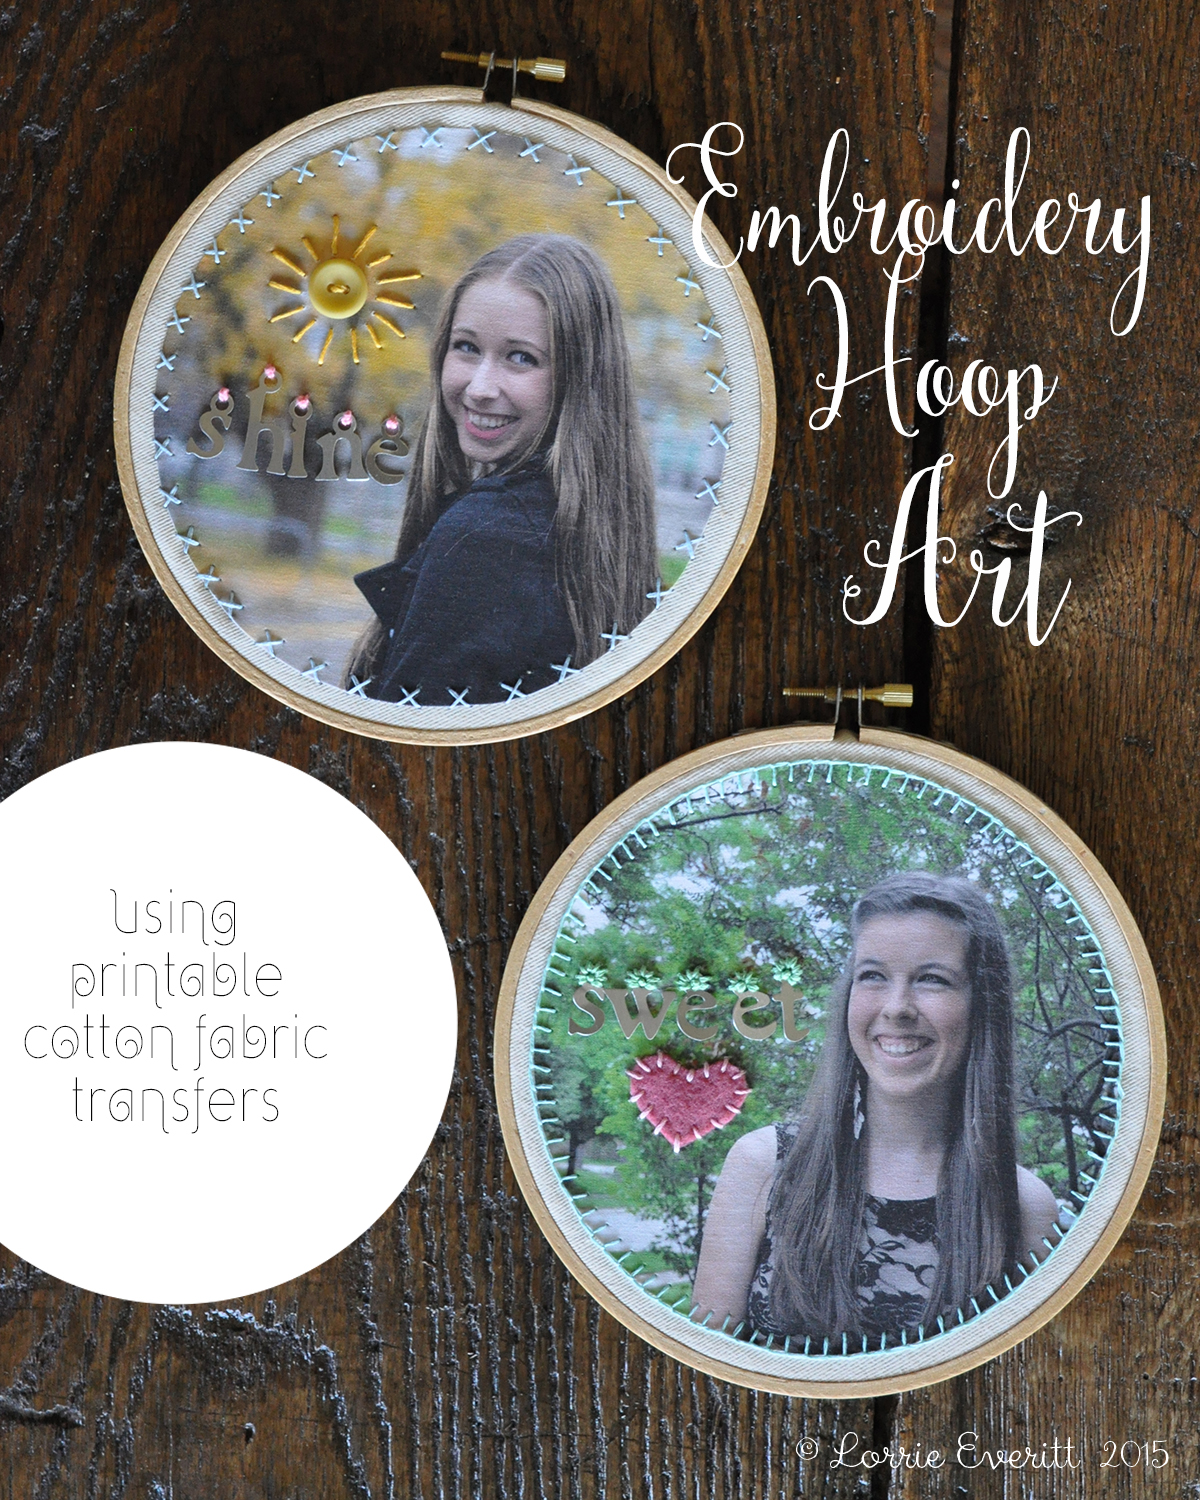
embroidery hoop art using printable cotton fabric transfers

Thursday, October 1, 2015


embroidery hoop art using printable cotton fabric transfers | Lorrie Everitt Studio

After being inspired by the endless number of projects that have been popping up on Pinterest featuring art framed in embroidery hoops, I went to work digging through my sewing supplies for my stash of embroidery hoops. I did a lot of cross stitching back in the 80's and like most of my craft addictions, I (still) have a ton of supplies to use up.

I have been playing around with these printable cotton fabric transfers and I decided to try them out for this project. Unlike most of the iron on transfers that I use, these ones are actually cotton fabric that goes through the ink jet printer - so you don't have to worry about reversing the image before printing. The adhesive is on the back so there is no fading when you iron them onto another fabric.

  embroidery hoop art using printable cotton fabric transfers | Lorrie Everitt Studio

Once you have printed out the fabric transfers you will need to cut the image out before you iron them onto the fabric of your choice. I used an inexpensive unbleached cotton for my background material.

embroidery hoop art using printable cotton fabric transfers | Lorrie Everitt Studio

Embroidery hoops are available in a number of different sizes. I sized my fabric transfer to just fit inside the embroidery hoops so that there would be room for me to stitch a decorative boarder around the image.

embroidery hoop art using printable cotton fabric transfers | Lorrie Everitt Studio

I have not been sewing for a while and forgot how relaxing it can be. It's easy to do while watching tv or sitting shotgun on a long car trip. I used a number of different colours and stitches on these pieces. The metal letters came from my scrapbooking stash and were perfect for this little project.

embroidery hoop art using printable cotton fabric transfers | Lorrie Everitt Studio

I also used a combination of felt and buttons to create little saying on each of my pieces ... like sweet "heart" and 

embroidery hoop art using printable cotton fabric transfers | Lorrie Everitt Studio

"sun" shine. If you want to re-create something similar to this and can't find the metal letters you can always add the words to your art before you print it on the fabric transfers.

embroidery hoop art using printable cotton fabric transfers | Lorrie Everitt Studio

Now I just need to find a place in my studio to hang these! 


my entry to Micheals' springtime in Paris contest

Monday, March 30, 2015


Michaels' Springtime in Paris contest | Lorrie Everitt Studio #SpringtimeInParis

I finally finished a mix media project that I created for Michaels' Springtime in Paris contest. I am uploading the entry later today but thought that I'd share my project here first.

Michaels' Springtime in Paris contest | Lorrie Everitt Studio #SpringtimeInParis

My heart skipped a beat when I read the Michaels' email newsletter announcing the contest last month. The grand prize for the contest is a trip for two to Paris! It was hard to pick just one category for the contest ... art, floral, baking, papercrafting or jewelry ... I love doing ALL of those things.

Michaels' Springtime in Paris contest | Lorrie Everitt Studio #SpringtimeInParis

My entry is a mixed media piece that is a combination of so many different things that remind me of the time I spent in Paris with my oldest daughter, Haley, as a parent chaperone for a March Break school trip in 2008. 

Michaels' Springtime in Paris contest | Lorrie Everitt Studio #SpringtimeInParis

One of the first places that we toured in Paris was the Palace of Versailles and it was the main inspiration for my project. I started with a stretched linen canvas that has lovely nail head details on the sides. I added gold stripes to the canvas using Martha Stewart’s decoupage, gold glitter and masking tape.

Michaels' Springtime in Paris contest | Lorrie Everitt Studio #SpringtimeInParis

Audrey Hepburn’s quote “Paris is always a good idea” seemed like the perfect saying to add to the framed chalkboard element I wanted to use as my focal point. I painted a piece of canvas with Martha Stewart’s black chalkboard paint and added the lettering using a chalk marker and a fine paint brush. I think that Marie Antoinette would have liked my ornate oval antique picture frame which I painted with Martha Stewart's vintage chalk paint.

Michaels' Springtime in Paris contest | Lorrie Everitt Studio #SpringtimeInParis

As a reminder of the beautiful flowers from the Palace gardens, I created paper flowers from assorted scrapbooking papers, vintage glass buttons and wire stems wrapped with fabric strips. Twisted wire jute "vines" and paper flowers grow out from behind the oval frame and allowed me to hang vintage teaspoons that I stamped with the words "LOVE", vintage chandelier crystals and tiny Eiffel Tower charms that I purchased in Paris.

Michaels' Springtime in Paris contest | Lorrie Everitt Studio #SpringtimeInParis

 I further personalized this piece by adding three photos that were taken in Paris. I am a little late entering the contest only because my youngest daughter was just in Paris this month for a March Break school trip and I wanted to make sure that her selfie by the Eiffel tower was included in my project. My oldest daughter’s photo with the Eiffel Tower in the background is one of my favourite photos of her at that age. The third photo in my project with the words “take me to Paris” will hopefully be replaced at some point with a photo of my husband and I in Paris … of course by the Eiffel Tower.

Michaels' Springtime in Paris contest | Lorrie Everitt Studio #SpringtimeInParis

I photographed my entry to the contest as a lifestyle shot to set the mood for my project. I created the mug with the heart glitter beads a while ago. I keep thinking that I really should do a tutorial on the blog to show you how I have been making these dishwasher safe mugs using different kinds of glitter and inexpense mugs from the second hand store.

Michaels' Springtime in Paris contest | Lorrie Everitt Studio #SpringtimeInParis

This is the mini sketchbook I took to Paris in 2008. I spent every night - after the kids were asleep - in my hotel room sketching things that we saw and did that day. The Michaels' Springtime in Paris contest winner will experience a sketching lesson with urban sketchers in Paris ... wouldn't that be awesome? The winner will also create a floral arrangement at the Catherine Mueller flower school and take a French cooking class at La Cuisine Paris. 

Michaels' Springtime in Paris contest | Lorrie Everitt Studio #SpringtimeInParis

I created a few different memory books to remember my time in Paris with my daughter in 2008. I am keeping my fingers (and toes) crossed that I get to make some new Paris memory books later this year. 

You can see more about the Michaels' Springtime in Paris contest here:


owl always love you

Monday, August 22, 2011

The count down to back to school is on in our house as we begin our second last week of summer holidays. Lists for school supplies and fall clothing have started to appear on the kitchen table and I know that time is starting to run out to get everything ready for the new year.  

With bts in mind, I thought that I share a sweet little project that you can make with the kids ... it's another decorative clipboard. I made some of these one afternoon with the kids on our street and they loved it. They are going to use their clipboards to keep track of school notes and memos on their desks at home.

These are simple to make using scrapbooking papers, some distressed ink, paint and old buttons for the eyes. I use Claudine Hellmuth's studio multi-medium matte as my adhesive of choice for most of my mixed media pieces. We added letter stickers and scrabble tiles to make fun sayings. And of course we had to decorate the silver clip at the top ... mine has a ribbon and bottle cap magnet but some of the girls used ribbon and large flowers.
After I finished the clipboards,  I decided to use my "Emily owl" design to create some wall art and project samples for a mixed media class that I am going to offer this fall.

I ended up making a few variations of the same design because I love to show how you can make a basic project kit your own with just a few simple changes.

This first piece would be adorable in a bedroom ... I love the quote "always kiss me goodnight".  The paper flowers were fun to make and I added some rhinestone bling just because I don't think you can ever have too much bling! (for a boy's room take out the flower details and change the paper for the owl's body to something more graphic)
This next piece was created with a bright blue background which immediately gave the design a totally different look. And instead of a quote I used a large chipboard letter covered in silver glitter to customize this for someone special.  "E" is for Emily owl!
I'm sure that you are getting the idea now. This last picture is of the three samples that I recently put on display at Scrapbook Queens for my fall classes. I have not scheduled dates for my fall classes yet but as soon as I do I will update my class website and let you know. If you are interested in being on my class email list ... send me an email and I will add your name to the list.

I hope that you enjoy the week with your kids if they have not started school yet and find a little bit of time to do something creative with them to get them excited about the new year.

fashionista clipboard

Wednesday, July 6, 2011


Here's a new project that I just completed ... it's a mixed media collage clipboard and I'm not sure where it is going to end up but I think that I will hang it up in my little display area at Scrapbook Queens for a while this summer.

I have been in a creative mood the past couple of days and really wanted to use these fabulous scrapbook papers that I bought at Scrapbook Queens about a month ago. The papers are from Basic Grey's  Sweet Threads collection ...


and I knew that I would use them in a mixed media piece at some point this summer. I was inspired to use the papers when I stumbled upon Julie Nutting's new book ...

it's called Collage Couture and it's amazing! Julie used a lot of different Basic Grey papers in her projects in the book ... including the sweet threads paper I have been hanging onto!

I've been using scrapbook papers as clothing in my mixed media collages for years but I have always painted the bodies, faces and hair and just used the papers for the clothing and accessories. What I loved about Julie's book is that she shows you how to use paper for the bodies too ... what a great idea! She still paints the hair and features of the faces so there is still some painting but not as much. It's like playing with paper dolls - remember how much fun you use to have doing that?

So here's my little project in a bit more detail ...


 I covered my clipboard in various papers, a little paint and some distressing inks to create my background. Then I added a "paper doll" that I designed using Julia's basic techniques. I love the idea of using pages from one of my old dictonaries as the body for my little fashionista.

.... here I've removed my notes so that you can see the clipboard a little better ...

The circle is actually a piece of sheet metal that I covered with more of my "sweet threads" paper. I wanted to be able to add smaller papers with a magnet to the bottom half of the clipboard and this worked perfectly.

So after adding a little bling, some vintage jewellery, a few flowers and vintage buttons and of course some lace and ribbon ... my piece was ready to be used to organize and display some of my papers and a photo ...


here it is again! I think that these would be great to make for a home office or studio. I may make these with my daughters for their bedroom study areas ... I can see a bunch of them grouped together like a fashion show! I'm also going to work on some similar projects that I can teach in the fall ... I'll keep you posted on that when I have more details worked out.

I hope that I have inspired you to check out the new Basic Grey papers at your local scrapbooking store and maybe take a look for Julie's new collage book at your local bookstore!

Happy crafting!

new classes

Friday, May 6, 2011


So happy that spring is finally here ... and summer is just around the corner. I am soooo looking forward to weekends at the cottage with family and friends. With that in mind ... I have just updated my class website with my new classes for the rest of this month and June.

I have three new classes that will be offered in June ...


"live, laugh, love" is going to be a fun and inspiring mixed media workshop that will teach you all of the techniques that I used to create the Judy lampshade that I talked about here.  The finished project would make a nice piece of wall art for a child's room.


"enjoy life ... this is not a dress rehearsal" is another mixed media project that I just loved designing. It's a mix of everything that I love ... a great quote, fashion and vintage details. In this class we will use a Tim Holtz judy and combine it with linen, ribbon, lace and vintage rhinestones to make our own "little black dress".


And this last class is a special one because I am only going to offer it one time and for five people. I've been making these funky bracelets for about a month now ... I was very inspired by Ann Tatum whom I read about in my current issue of  Somerset Studio's GreenCraft magazine. Ann has been making jewellery from vintage findings and her measuring tape bracelets inspired me to finally use the Tim Holtz measuring tape ribbons that I had been holding onto just waiting for that "perfect" project. In this class I'll share with you how I adapted Ann's original idea to create my own versions of these unique little bracelets. Because we will be using some of my vintage findings in this project, I only have enough materials to make five of this exact design.

All of my samples are on display at Scrapbook Queens now ... I just updated my little area at the front of the store!

There is still room in three of classes on Saturday May 14th ... Scrapbook Queens will be celebrating National Scrapbook Month in the store that day with a Queens Crop as well ...


I will be taking time off from teaching this summer but plan to start some new classes in the fall ... I'll keep you posted on those dates and new projects sometime in August!

If you are in Mississauga this Saturday be sure to check out Scrapbook Queens' Garage Sale ... I dropped off a couple of boxes of goodies yesterday and I noticed a lot of great stuff!

Have a wonderful Mother's Day this weekend!

Ohhh ... I almost forgot to tell you! If you like the digital scrapbooking elements that I used to show you my new June classes ... you can find them at Design House Digital! They have a free blog hop for this amazing kit ...


The Design House Digital website is down right now ... too much traffic? ... but you can get to the blog hop by visiting Robyn Meierotto's blog and "hopping" from there to the other great digital artists' blogs! This kit is great ... lots of great colours and elements ... I'm going to use it to digitally scrapbook my Mother's day pictures!

Donna Downey Class at the Art House Studio

Sunday, March 27, 2011

I had the pleasure of meeting Donna Downey this weekend and taking one of her classes at The Art House Studio in Kitchener. Donna was extremely fun and entertaining. I had a one hour drive home after class and I was feeling so inspired that when I was pulling off the highway I realized that I was in "autopilot" and had been dreaming all the way home.

 This was Donna's sample for the Friday night class ... "a life inspired". Donna's iron ons were great ... it was the first time that I had used them.  I'm made my own before but these ones were great because you could layer the iron ons ... something that you can't do with the ones you make yourself. And the "inspire" iron on has a velvet like texture that is so nice. You get two in the package so I have another one to play with on another project. 

I wish that I could have taken some of Donna's classes on Saturday because the project samples for those classes were amazing too. Many of the ladies that were in my class had signed up for all of Donna's classes this weekend ... I'm sure that they had a great weekend.

This is my finished project ... I didn't finish my project in class because I wanted to sew my photo to my canvas page so I had to complete it at home on Saturday morning.

I realized on Saturday morning that I had lost the inspiring words that Donna had supplied in the class so I had to cut out my own words from one of my books.  I felt very inspired after talking to Donna so my words say "believe in yourself always" ... and I wrote about the class on the side of the canvas so that I will always remember where I created this piece.

I took this picture before class started ... don't you just adore the groovy aprons! On the left is Karen from The Art House Studio she made her apron, of course that's Donna in the middle and on the right is Lisa from Scrapfest who is wearing a Donna Downey apron.

Donna has a great blog/website and I especially love her "inspiration wednesday" posts ... check out her last inspiration wednesday post here. I found this post very inspiring ... I love to see her in "action" ... Donna has such a great sense of humor ... she is sooo entertaining! Donna had her journal with her so I was lucky to see the original art from this post. I have to tell you  that it was just a beautiful as what you see on her post. I love all of the details and the layering.


Thanks to Karen of The Art House Studio for putting this weekend with Donna together. It was a night that I will remember for a long time. You can see our Friday night class picture here!

Valentines, butterflies and flowers ... oh my!

Monday, February 14, 2011

Happy Valentine's Day!

If you are still working on Valentine gift ideas, you can check out my earlier posts for a free download of
Valentine chocolate wrappers and gift container inspiration . The vintage postcard image above is from the Graphics Fairy - Karen has lots of royalty free images that you can use for last minute valentine cards.


I recently hung one of my new mixed media collage projects up at Scrapbook Queens to promote my newest class called "mixed media butterfly collage" ... this collage is filled with lots of 3-d butterflies and we will using the new Echo Park "Be Mine" papers on a wood canvas.

This is another one of my beginner mixed media collage classes and there are two class dates available - March 31st and April 12th. I have limited the class size to six so it should be fun for everyone. I think that this project would make a nice Mother's day gift!

I've also just added another "introduction to mixed media II" workshop ... it will take place on Friday March 4th. You can find more information about it on my class website and on the Scrapbook Queens website.
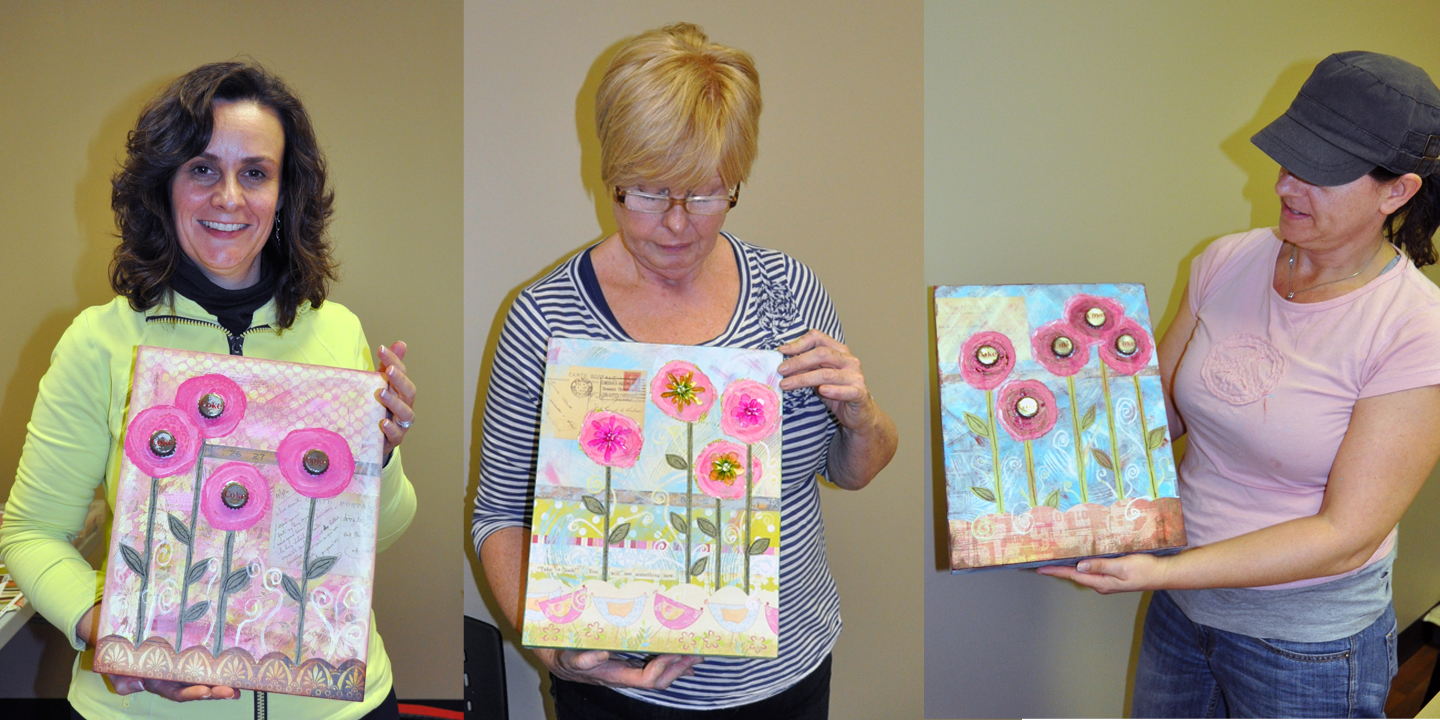
This class sold out quickly the first time that I offered it ... here's Milena, Barbara and Debbie with their finished projects! 

Have a LOVE-ly day everyone!

mixed media sculpture

Sunday, February 13, 2011

I've been wanting to make a mixed media sculpture for a while and I finally completed my first one. I'm really happy with the way that it turned out ... so many of "my favourite things" all combined into one little 3-D piece of art! The sparrow on top looks like the bird in my logo and was my inspiration for this piece.

Most of it just came together over the past 3 weeks as I cleaned up my supplies and sorting through my boxes of scraps and antique findings. The tin container at the bottom is an antique film container that I've had for about 15 years -I have one more of them and will use it when I create another one of these for Robyn ... she has already requested one of these with lots of pink for her bedroom at the cottage.

Here's a couple of views of the different sides ... there is lots of layering and every element has a special meaning to me. Again, antique pieces that I've collected and have been sitting in boxes .... hidden away for no one to see ... are now out and on view. I guess that I was just waiting for a project special enough to use them in! I'm sure that you have scrapbooking supplies or vintage pieces of jewellery that are that are doing the same thing in your home!!
I also broke open the seal of my German Silver Emporium Pure Glass Glitter that I purchased in New York last year at Tinsel Town Trading Company ... you can read more about my New York inspirations here . This glitter was a little more expensive than other glitters that I have purchased so it has been collecting dust in my studio just waiting to be used. It is sooo beautiful and sparkles like little diamonds! You can find this glitter online at tinseltrading.com.

The tin container created a secret hiding space in this piece ... which makes it a functional piece of art too ...
so I worked it into a little area of my kitchen ... it looks like just another piece of art!

I think that after I make Robyn's little sculpture I may work on another version of these mixed media sculptures to teach a class. I've got so many different ideas in my head - and they are so much fun to design! I'll keep you posted!