Showing posts with label with the kids. Show all posts

Use up your craft stash inspiration - part one.

Thursday, July 21, 2016


Like most craftaholics, I have boxes of crafting supplies taking up space in my home. I have hoarded so many supplies over years that I have decided it's time to start using up products in my craft stash. It's time to make some of those inspirational projects that I've pinned, ripped out of a magazine or sketched out in one of my notebooks. It's time to hold off from purchasing new crafting supplies for a while. Well, let me clarify that, I may need to purchase more glue, or a few new colours of paint, or if I win the lottery, I will have to purchase the Circut Explore machine  ... but other than that, no new crafting supplies. 


These funky clothespins are an example of one of the projects that I have done in the past to use up some of my crafting supplies. My sister-in-law, Kerry, and I spent an evening with a pile of crafting materials (and maybe a bottle of wine) and came up with these.


We used plain clothespins, scrapbooking paper (scraps) assorted resin flowers, a paper cutter, scissors and glue.


I have packed up a couple of boxes with supplies from my craft stash to take to the cottage this weekend. I am looking forward to some down time over the next few weeks to be able to craft with my family and friends. I'll be posting pictures of our projects on Instagram and when I am able, I will post more ideas on the blog to hopefully inspire you to use up your craft stash.


go old school with a diy holiday game

Tuesday, December 23, 2014

make it yourself - the jolly St. Nick game | Lorrie Everitt Studio

Here's a fun little project that I designed to keep the kids busy this holiday season. It's a game that is not played on a cell phone, tablet or tv ... it's old school and it can be played by two or more people. Put it on the kids table to keep the little ones busy for a little longer so the adults finish their meal in peace.

make it yourself - the jolly St. Nick game | Lorrie Everitt Studio

I designed the game for an issue of Creative Living Magazine and you can find the download for the printable as well as the complete instructions to make the game here.

make it yourself - the jolly St. Nick game | Lorrie Everitt Studio

A quick recap of the diy instructions: The game is contained in a soup/ice cream container. Six small wood blocks were used to create the "dice". My (free) download printable includes both the art for the top of the container lid and the game instructions that will be place on the inside of the lid.

make it yourself - the jolly St. Nick game | Lorrie Everitt Studio

I painted the wood blocks with chalkboard paint and used a white chalk marker and small letter stamps to spell out "jolly". To create the Santa face on the sixth side of each of the dice, I drew a moustache and two dots for eyes.

make it yourself - the jolly St. Nick game | Lorrie Everitt Studio

The red and white stripe washi tape is a cute finishing detail. If you can't find a striped washi tape like mine, look for a pattern and colour combination that matches the printable.

Now I'm off to finish my holiday baking. Happy Holidays!


owl always love you

Monday, August 22, 2011

The count down to back to school is on in our house as we begin our second last week of summer holidays. Lists for school supplies and fall clothing have started to appear on the kitchen table and I know that time is starting to run out to get everything ready for the new year.  

With bts in mind, I thought that I share a sweet little project that you can make with the kids ... it's another decorative clipboard. I made some of these one afternoon with the kids on our street and they loved it. They are going to use their clipboards to keep track of school notes and memos on their desks at home.

These are simple to make using scrapbooking papers, some distressed ink, paint and old buttons for the eyes. I use Claudine Hellmuth's studio multi-medium matte as my adhesive of choice for most of my mixed media pieces. We added letter stickers and scrabble tiles to make fun sayings. And of course we had to decorate the silver clip at the top ... mine has a ribbon and bottle cap magnet but some of the girls used ribbon and large flowers.
After I finished the clipboards,  I decided to use my "Emily owl" design to create some wall art and project samples for a mixed media class that I am going to offer this fall.

I ended up making a few variations of the same design because I love to show how you can make a basic project kit your own with just a few simple changes.

This first piece would be adorable in a bedroom ... I love the quote "always kiss me goodnight".  The paper flowers were fun to make and I added some rhinestone bling just because I don't think you can ever have too much bling! (for a boy's room take out the flower details and change the paper for the owl's body to something more graphic)
This next piece was created with a bright blue background which immediately gave the design a totally different look. And instead of a quote I used a large chipboard letter covered in silver glitter to customize this for someone special.  "E" is for Emily owl!
I'm sure that you are getting the idea now. This last picture is of the three samples that I recently put on display at Scrapbook Queens for my fall classes. I have not scheduled dates for my fall classes yet but as soon as I do I will update my class website and let you know. If you are interested in being on my class email list ... send me an email and I will add your name to the list.

I hope that you enjoy the week with your kids if they have not started school yet and find a little bit of time to do something creative with them to get them excited about the new year.

feel the (chocolate) love with a free download for Valentine's day

Thursday, January 13, 2011

 
All we need is LOVE is all we need ... well and maybe a little chocolate!

Valentine's day is a month away and I thought that I'd share with you a little project that I designed for my youngest daughter as a valentine handout a couple of years ago. These mini chocolate wrappers are so easy to make and the kids can make them with you.

You can download the art for this project here. Please note that this download is for Personal Use ONLY - no commercial use in any way. If you'd like to share this information with your friends please send them here to my blog so that they can download the file themselves ... thanks again for your support! 

So let's get started making these mini chocolate bar wrappers ... 
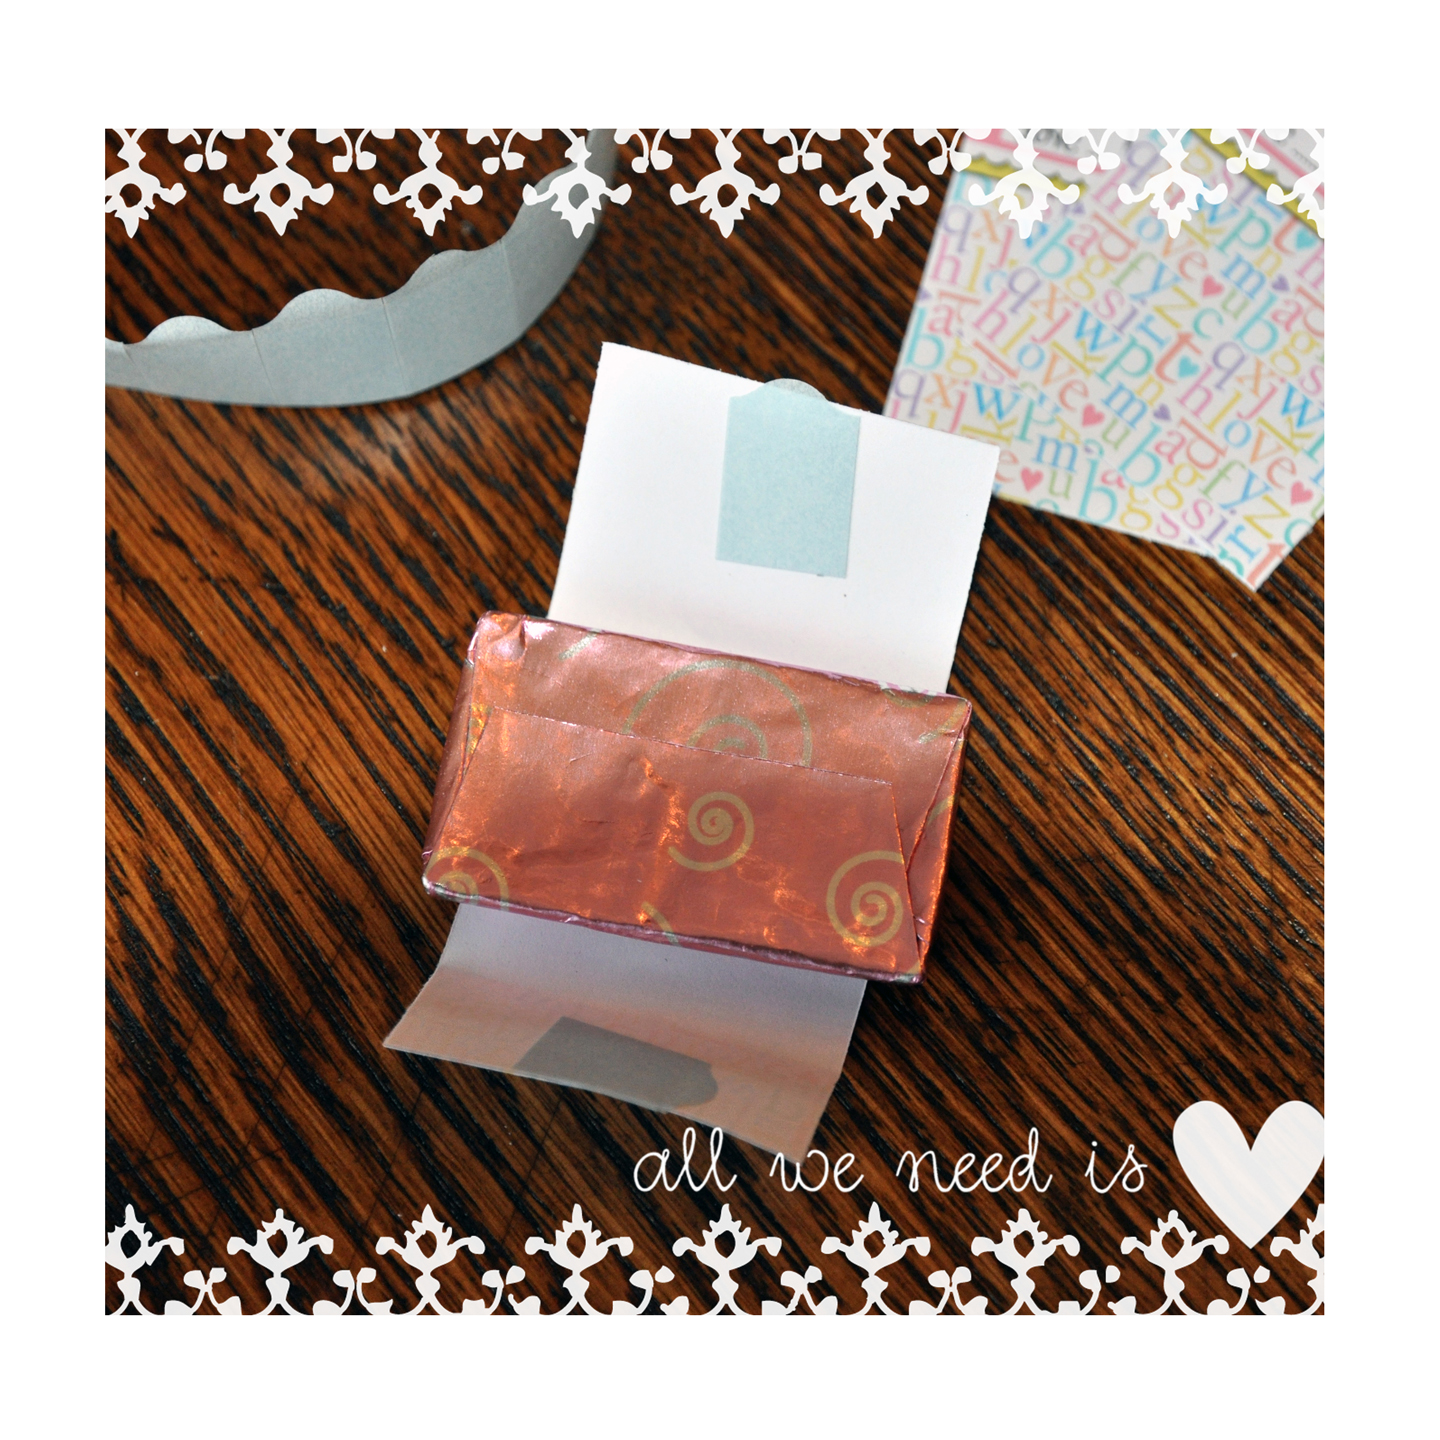
First you will need to print my pdf file that you have downloaded. Print it in colour on regular weight white paper. You will need a paper cutter (or scissors), two sided tape, a pen or marker to add a name on the wrapper and some mini chocolate bars! I am using the new Hersey's miniatures chocolate bars that have blue, pink and green wrappers (for Valentine's day and Easter?) ... the colours are perfect with my graphics on the wrappers.
Cut out the wrappers using a paper cutter ... if you are into paper crafts or scrapbooking I'm sure that you have one ... if not, use your scissors and try to cut the wrappers as straight as possible. You can have your child write their name on the dotted line at this point ... it's much easier than trying to write on the label once it is attached to the candy bar.
The next step is to add two small pieces of two sided tape to the back of the wrapper as shown. Position the wrapper so that the label is centred at the front of the candy bar and attach one of the pieces of tape to the candy bar. The fold the wrapper completely around the candy bar and using the second piece of tape secure the wrapper in place.
And you are done ... pretty easy!

Just keep in mind that the chocolate bars that I've shown are not peanut free ... so make adjustments in your candy bar selection if you have any children with nut allergies. And if you want to be able to "address" these you can easily do so by adding small blank labels to the back of the wrapper ... I've done this before with little heart shaped labels.

I hope that you are feeling the love ... just try not to eat too many of these mini chocolates while you are making these!

Pumpkinfest

Friday, October 15, 2010


yippeee ... it's "Pumpkinfest" weekend and I'm so excited that my girls are still into fall fairs and family traditions. Pumpkinfest takes places in a small town near our cottage called Waterford. We have been going to this for over 10 years and we always attend on Saturday so that we can watch the parade. I found this amazing article today on taking Halloween photos, you can find it here, and it reminded me that I should get my camera batteries charged up today so that I'm ready tomorrow!


I was looking through last year's photos and I realized that I better look for Robyn's pumpkin hat ... not just because I know she will want to wear but if I don't find it today I will forget tomorrow and we'll have to buy a new one at the fair (if they still have them!).


Do you have any Halloween or fall traditions at your house? Let me know in the comments section ... I'd love to hear how other families spend their time together!


And for my studio friends ... this has been a busy "short" week for me because of the Thanksgiving holiday. Most of my time in my studio has been spent working on a website to promote my classes and workshops at Scrapbook Queens. The site went "live" yesterday although I'm still working on it and adding dates, etc. but at least it's a start! It's a free wix website (so easy to create if you are a beginner like me!) ... please check it out at www.wix.com/lorrieeveritt/studio and let me know what you think!

pottery painting with the kids

Wednesday, September 1, 2010

I just got back from a two day "girls' getaway". I spent some time with my girlfriend Sue, her youngest daughter, Taylor and my youngest daughter, Robyn. The girls go back to school next Tuesday so this was really just an excuss to get the girls together and have some fun before we all start back into our regular routines. We stayed at our friends' vacation property in Collingwood (about 2 hours north of Toronto) and we did lots of activities around Collingwood and Blue Mountain.

The girls had a great time painting pottery at Crock a Doodle ... a cute ceramic studio at the Blue Mountain resort. The staff at the studio were amazing and the selection of ceramics was awesome! There was lots of inspiration all around the studio and they had some idea books to look through. Sue and I sat and relaxed with our Starbuck's and just let the girls create. Both of the girls have painted pottery (many times) before and were happy to work  on their own. To be honest, it was difficult for me to resist making something too but I really just wanted to sit back, take photos and watch the girls have fun ...
Taylor wanted to paint a garden marker for the new garden at their house and Robyn decided to paint a travel mug that she is going to give to her Dad ...
here is Taylor putting the finishing touches on her piece and
Robyn signs and dates the bottom of her travel mug.

If you have never done pottery painting with your child, I highly recommend trying it. It's so much fun ... the kids love to do it and you will have a unique pottery piece in the end that you will cherish forever. Robyn's sixth birthday party was at a local pottery studio and she still remembers and talks about that day everytime she uses her dog shaped earring holder!
Here's one more shot of the girls at the Blue Mountain resort ... hanging out with the "wildlife"!


more "green" crafting at the cottage

Friday, August 13, 2010

Last week we did some crafting at the cottage while we were on holidays. It was fun to just pull out my scrapbooking supplies and let the girls do what they want. Robyn and her cousin Amanda were keen to try out some collages after I showed them some amazing collage ideas in the current issue of  Somerset Studio The Art of Paper and Mixed-Media magazine.  

I let the girls go through my stash of papers, old books and scrapbooking supplies on their own and only offered helped if they asked me. I really wanted them to come up with their own ideas and not to worry about what was right or wrong or what anyone else thought looked "good".  I think that they had a good time and they worked on their projects on and off for two days. 

On the second day, Robyn was happy that I pulled out some of my special scrapbooking supplies for them to use if they wanted. I keep a bunch of my favourite scrapbooking supplies in a spice rack that I upcycled a couple of years ago ... and I don't share these supplies with the kids very often. 
  
I bought this spice rack at Costco at least 10 years ago. It wasn't your ordinary spice rack - it came with 16  spice jars, can and bottle openers, measuring spoons and a bunch of other kitchen tools ... and the rack spins! Once the spices were gone and I grew tired of seeing the rack on the overcrowded kitchen counter I knew that I needed to find a new use for the spice rack and give it a "makeover" ... so I turned it into a "scrapbooking supply organizer".

I used bright coloured scrapbooking papers to decorate most of the wood on the rack. The hooks that originally held kitchen tools were perfect for hanging paper scissors and packages of two-sided tape.

I cleaned out the spice jars and decorated the tops with scrap pieces of cork and flowers that I made out of vintage silk flower petals and buttons. I was originally going to make up labels to decorate the tops but I knew that I would be constantly re-labelling the containers over the years and it was easy to see what was in each jar from the side. The jars are filled with rhinestones, buttons, brads and miscellanous scrapbooking elements that I like to use for cardmaking, scrapbooking, collages, etc. 

The top of the spice rack had a hole in the middle to hold wooden spoons ... I used a small clay pot to fill the hole and store a few spools of my favourite ribbons.

 Haley was inspired by the girls as they were collaging and decided to do a little "upcycling" of her own. She had a white chair in her bedroom that I picked up at a garage sale a few years ago ... she didn't like the shiny white paint on it and thought that it would look better painted in a flat sky blue. After painting the chair, she cut words and phrases out of a couple of the books that I use for collages and covered the seat in random pieces of paper ...
it turned out pretty cool and Haley is so proud that she came up with the idea all by herself!

photography through the eyes of a child

Friday, July 16, 2010


This morning I was putting together a cd of photos to take to Costco for developing this afternoon ... a task that usually takes me a l-o-n-g time because I am known for always having a camera in hand and taking lots and LOTS of photos.

But this summer, I have noticed that I really have not taken many photos of our family and things that we are doing together. 

I'm not really sure why ... maybe because I haven't been scrapbooking as much as I use to ... maybe because I haven't felt like we were doing anything new or different. 

My daughter Robyn has been at a photography camp this week ... it's just a day camp ... nothing professional ... but she has been having a great time and everyday she has been coming home and showing me what she shot on her digital camera ... she is so excited about photography right now. 

This weekend we are going to the cottage. Both of the girls will have friends with them ...  including a couple of friends that have never been to the cottage. I'm going to take up some extra digital cameras and let the kids have fun shooting whatever they want ... I think that it will be entertaining and I'm looking forward to seeing what the kids photograph.

Robyn is going to a scrapbooking camp for a week in August ... who knows, maybe she will want to use the photos we take this weekend to camp to scrapbook about! 


By the way, the two photos are of a picture that is displayed in Robyn's cottage bedroom. I made it for her five years ago. The picture is of Robyn when she was 5 years old sitting on a wire swing wearing her favourite "tutu" tee shirt ... she was twirling in the swing unaware that I was taking her photo. She always tell me how much she loves that photo of her (and I am still not allowed to give away the tutu tee shirt) ...  I will never forget that day we spent together.


welcome to the cottage

Monday, April 5, 2010


Our family spent the Easter long weekend at the cottage. The weather was beautiful and there was lots to do outside as well as inside. We remembered that we had not been to the cottage since the end of December when we walked in the front door and saw all of the Christmas decorations and tree were still up!

There was lots of craft time worked in between cleaning, cooking and entertaining. Robyn enjoyed making "rock people" on afternoon.
 
Robyn loves to go through my containers filled with large smooth beach rocks that I collect every summer on the beach at the end of Long Point. She colours them with my coloured sharpie markers and adds googlie eyes ... and of course they all get a name!

I like to use the beach rocks a different way. I have family and friends sign the rocks and leave them in a large glass jar in our front entrance ... kind of like a guest book but better because I encourage everyone to not only write their name but to decorate the rocks as much or as little as they want.

I set everything out on a table so that it is one of the first things that you see when you walk into the cottage ...


I refill the bowl of rocks all of the time to make sure that there are lots to select from ...
we have lots of coloured sharpie markers to choose from ...
and the large glass cookie jar from Ikea is perfect for holding lots of rocks.

It always makes me smile to watch the kids go through the jar to find the rocks they decorated in previous years ... and then ask me if it's okay for them to decorate another rock this year. And I always say "yes" and remind them to write the year so that we will remember when they made it!


We still have some chocolate cupcakes to eat up from the holidays ... but with all of the chocolates and candies from "the bunny" ... I think that they may be around for a few days!

camera fun with the kids - part 2

Thursday, March 25, 2010

I just created the "letters" alphabet that my daughters and their friends helped me photograph when we were on vacation last week. I wrote earlier about Shona Coles' idea http://shonastudio.blogspot.com/2010/02/fun-photo-exercise-to-do-with-kids.html and here is my take on the activity ...


I pulled the letters together in a stamp format. The stamps were modified from a digital kit that I purchased on line at http://www.twopeasinabucket.com/ so that it would fit 28 images.

I'm now working creating 8x10 pictures for each of the 13 children that were with us on vacation and using the letters we photographed to spell out each of their names. Here's the first 3 that I have completed ...


I had to take a few extra pictures of different letters so that I'd have some options when putting the kid's names together and I am happy with the way that they have turned out so far. Three done ... ten more to go!!!