Showing posts with label wedding inspiration. Show all posts

Let's get creative! Dress up gift bags with DIY watercolour ribbon.

Monday, September 23, 2019

Let's get creative! Dress up gift bags with DIY watercolour ribbon.

Let's get creative! Here's a sweet idea for making plain white gift bags a little more colourful by just changing out the ribbon handles. 

Let's get creative! Dress up gift bags with DIY watercolour ribbon.

I recently had the pleasure of working with Gloria Vazquez-Abrams from Historia Wedding and Event Planning and the amazing team that she brought together for a styled shoot wedding. Gloria's pastel coloured theme was filled with so many whimsical details and as soon as I saw her mood boards I knew that I needed to find a way to work my DIY watercolour ribbons to the set up.

Let's get creative! Dress up gift bags with DIY watercolour ribbon.

I removed the white ribbon handles on these white and gold foil edged gift bags and replaced them with the rainbow coloured ribbon.

Let's get creative! Dress up gift bags with DIY watercolour ribbon.

Gloria filled the gift bags on this glorious sweet table with cotton candy. The colours in the cotton candy and gourmet chocolates are so much fun and I love the way that the ribbon handles on the gift bags add that little bit of extra colour pop to the overall set up.

Let's get creative! Dress up gift bags with DIY watercolour ribbon.

The rainbow ribbon handle gift bags were also used in another area of the set up. Gloria incorporated the gift bags and these gift boxes along with balloon, paper flower, drapery and vinyl floor decal installations to create a centre stage area for the Cirque Entertainment.

Let's get creative! Dress up gift bags with DIY watercolour ribbon.

Let's get creative! Dress up gift bags with DIY watercolour ribbon.

Interested in doing this for a wedding or party?

Let's get creative! Dress up gift bags with DIY watercolour ribbon.

Here's a quickie tutorial to show you what I did and how to figure out how much painted ribbon you will need.


Let's get creative! Dress up gift bags with DIY watercolour ribbon.

The ribbons that came on the gift bags can be removed by simply cutting the ribbon and pulling them through the holes from the inside of the bag. But I suggest that you remove at least one ribbon handle by untying the knots and removing the handle in one piece.

Let's get creative! Dress up gift bags with DIY watercolour ribbon.

So as you can see above, I used the original ribbon handle to work out not only how long the ribbon needed to be for the gift bag but to also calculate how much ribbon I would need to paint so that I could change the ribbon on all of the gift bags I planned to use.

To add the rainbow ribbon to the gift bag I tied a knot on one end of the ribbon, feed it through both holes of the bag and then tied a knot on the other end of the ribbon to finish. Repeat on the other side of the bag.

My tip to make wrinkled ribbon smooth: Use a straight iron on a low temperature to easily iron out wrinkles. 


Let's get creative! Dress up gift bags with DIY watercolour ribbon.


Credits for Styled Shoot:

Planning and Styling by Historia Wedding and Event Planning 
Photography by Samantha Ong Photography 
Draping and Vinyl Floor Decals by Finer Events  
Paper Flower Décor by Floral Fantasy Studio 
Tableware Rentals by Sweet Bee Tea Party  
Linens, Chargers, Napkins and Chairs by Chair Decor 
Invitations, Menu, Place Cards, 3D Animal by A Good Day Inc. 
Packaging Supplies by Creative Bag
Chocolates by Stubbe Chocolate 
Favours by Marie Genevieve 
Cotton Candy by Bucket and Whisk 
Custom Lighted Designs by Marquee Marc  
Cirque Entertainment by Articus Productions  
Dress by Papilio Boutique 
Accessories by The Loved One 
Hair and Makeup by Beyoutiful Brides  


Let's get creative! Dress up gift bags with DIY watercolour ribbon.

DIY Wedding Proposal Boxes

Thursday, April 6, 2017

diy wedding proposal boxes | Lorrie Everitt Studio

I wanted to share a little DIY project that I did recently using products from Weddingstar and Creative Bag. I created a series of proposal gift box ideas for the bridal party - Maid of Honour, Bridesmaid and Flower Girl. You can find all of the DIY details, tutorials, my free downloads and links to all of the products on both the Weddingstar and Creative Bag blogs.

You can find the Weddingstar blog posts here:


The Creative Bag blog posts with packaging supplies links are here:


Note: Creative Bag sells select Weddingstar products in all of their stores and online at creativebagwedding.com.


I loved seeing all 3 of my projects featured at the bottom of the Weddingstar website this morning!


Mingle Magazine feature - Boho styled wedding

Wednesday, November 2, 2016

autumn Mingle magazine - entertaining inspiration

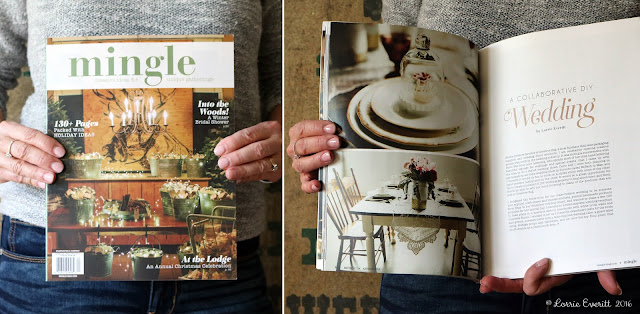
I am so happy to finally post about a styled boho wedding shoot I did earlier this year with a talented team of local wedding vendors. The styled shoot is currently featured in the autumn 2016 Mingle Magazine.

Mingle is full of creative ideas for unique gatherings. I'm all over the fall and holiday party ideas - there's a ladies wrap night and flower arranging lunch, cookie swap party, holiday prep party, santa's workshop party and hot chocolate and ice skating party. Oh my, I wish I was at all of these gatherings! 

autumn Mingle magazine - entertaining inspiration for creative get togethers

Our Boho wedding was featured on 7 pages (yeah!) but there are so many more photos and details that were not shown in the magazine that I'd like to share. So here you go ...

boho wedding inspiration | Lorrie Everitt Studio

Our photographer, Kat Williams from Attakat did such an amazing job. We were at The Warehouse Event Venue in Downsview Park. The white walls and polished concrete floor at the venue were like a blank canvas just waiting for us to make it our own. Toni from Confetti and Bows rents her huge 8' by 8' wall of handmade paper flowers and we used it to create the most amazing photo booth area.

boho wedding inspiration | Lorrie Everitt Studio

Doris from Love Lettering created the mirror/sign for the photo booth. Doris found the mirror in the trash and rescued it from a landfill. Doris is also the creative genius and maker behind PosecardsTM  - our awesome photo props.

boho wedding inspiration | Lorrie Everitt Studio

All of the wedding cakes and sweets were created by Caitlin from Cakelaine. Doris did the custom hand lettering on the chalkboard And if you are looking for guidance on how to easily add hand lettering onto chalkboards you can find my DIY tutorial here

boho wedding inspiration | Lorrie Everitt Studio

The paper lanterns, balloons, chalkboards, cake stands and cake topper were all from Creative Bag. I added the gold details to the "best day ever" cake topper and you can find my DIY tutorial here.

boho wedding inspiration | Lorrie Everitt Studio

These adorable Sugargirlee latex balloons from Creative Bag and are not only cute they are made in Canada and earth-friendly. The balloons will decompose as fast as an oak leaf in your backyard. I added white and gold tassels to one of the large hellium filled balloons.

boho wedding inspiration | Lorrie Everitt Studio

The paper goods were all created by Alicia from Alicia's Infinity. Alicia's beautiful watercolour illustrations were the inspiration behind all of the wedding details.

boho wedding inspiration | Lorrie Everitt Studio

The Perfect Table supplied all of our vintage and specialty tabletop and accent pieces. You can find the lace table runners here.

boho wedding inspiration | Lorrie Everitt Studio

Alicia also designs and creates custom wedding jewellery. I love this necklace that she created featuring one of her watercolour illustrations that match the wedding stationery. The necklace was packaged in a kraft jewellery box that was hand lettered by Doris for a Bridesmaid proposal gift.

boho wedding inspiration | Lorrie Everitt Studio

Our gift table set up featured a clear wishing well that Doris embellished with her beautiful hand lettering and illustrations.

boho wedding inspiration | Lorrie Everitt Studio

I created this vignette beside the wishing well with a something old, something new, something borrowed and something blue theme. A vintage bride and groom where placed inside a new glass apothecary container. And a borrowed family wedding photo were embellished with a blue ribbon and displayed in this new vintage inspired card holder.

boho wedding inspiration | Lorrie Everitt Studio

All of our beautiful floral arrangements were created by Jessica from Periwinkle Flowers. I added gold paint to white hobnail milk glass vases from Creative Bag

succulent favour in love mason jar | Lorrie Everitt Studio

I also have to thank my daughter Haley for being our "hand model" for the shoot and agreeing to wear whatever I put on her for the photo styling. This is the only picture that you can see more than her hands. 

I keep seeing the Autumn Mingle magazine in Michael's, Indigo and Whole Foods and I have to admit it makes me smile every time I see it!


watercolour pencil experiment on fabric bags

Friday, January 15, 2016


If you have been following me on Instagram you might have seen the watercolour drawings that I created during our family vacation in St. Thomas last month. Next to my camera, I almost always pack a small pad of watercolour paper, some watercolour pencils and a few paint brushes when I travel. 

This week I though that it would be fun to experiment with my watercolour pencils to see if they would work on these fabric favour bags


I knew that if I was planning to make dozens of favour bags that I would have to come up with some simple graphics that would be easy to recreate on each bag. I would have to come up with something quite different from these watercolour paintings that I created on my holidays.


And this is what I came up with!


 Of course, I had to add some text to one of my designs. I think these bags would be adorable for a Valentine's day gift, a wedding favour, a baby shower or a crafting party. 

What do you think? Want to try to make these yourself? Here's what I did to create my abstract watercolour "blob" ...


Gather your supplies: Derwent watercolour pencils, cotton fabric drawstring bags, assorted watercolour paint brushes, paint palette, two containers to hold water, a pencil sharpener and some paper towels.


Top left  I inserted a small board into my bag so that the watercolour paint didn't soak through to the back of the bag. Mix up your watercolours in your mixing tray using the pencil crayon colours of your choice. I used (39) turquoise blue, (40) turquoise green, (44) water green and (48) may green.

Top middle and right  Starting on the left side of the bag, I painted a single stripe of turquoise blue using a wide flat paint brush. While the first stripe was still wet I painted a second stripe using turquoise green that overlapped the first stripe slightly ... 

Bottom left and middle then I continued to add two more stripes using water green and may green, again overlapped each one so that the colours blended together. 

Bottom right  Once the paint dried I was able to add extra depth to each colour by drawing directly onto the stripes using wet pencils. I blended the pencil strokes using additional watercolour paint and my paint brush until I achieve the look I wanted.


Tip: If you want to add a word over your watercolour "blob" like I did with the pink love bag, it is best to wait until the background is completely dry before adding more paint for the lettering. 


I hope that I've inspired you to make something this weekend!


Set up a photo backdrop to take pictures of family and friends

Sunday, December 20, 2015


set up a photo backdrop to take photos of family and friends | Lorrie Everitt Studio

Last year my husband's Grandmother asked me to take some photos of her with all of her grand and great grand children when we were together for the holidays. She knows that I always have my camera on hand and love to take photos.

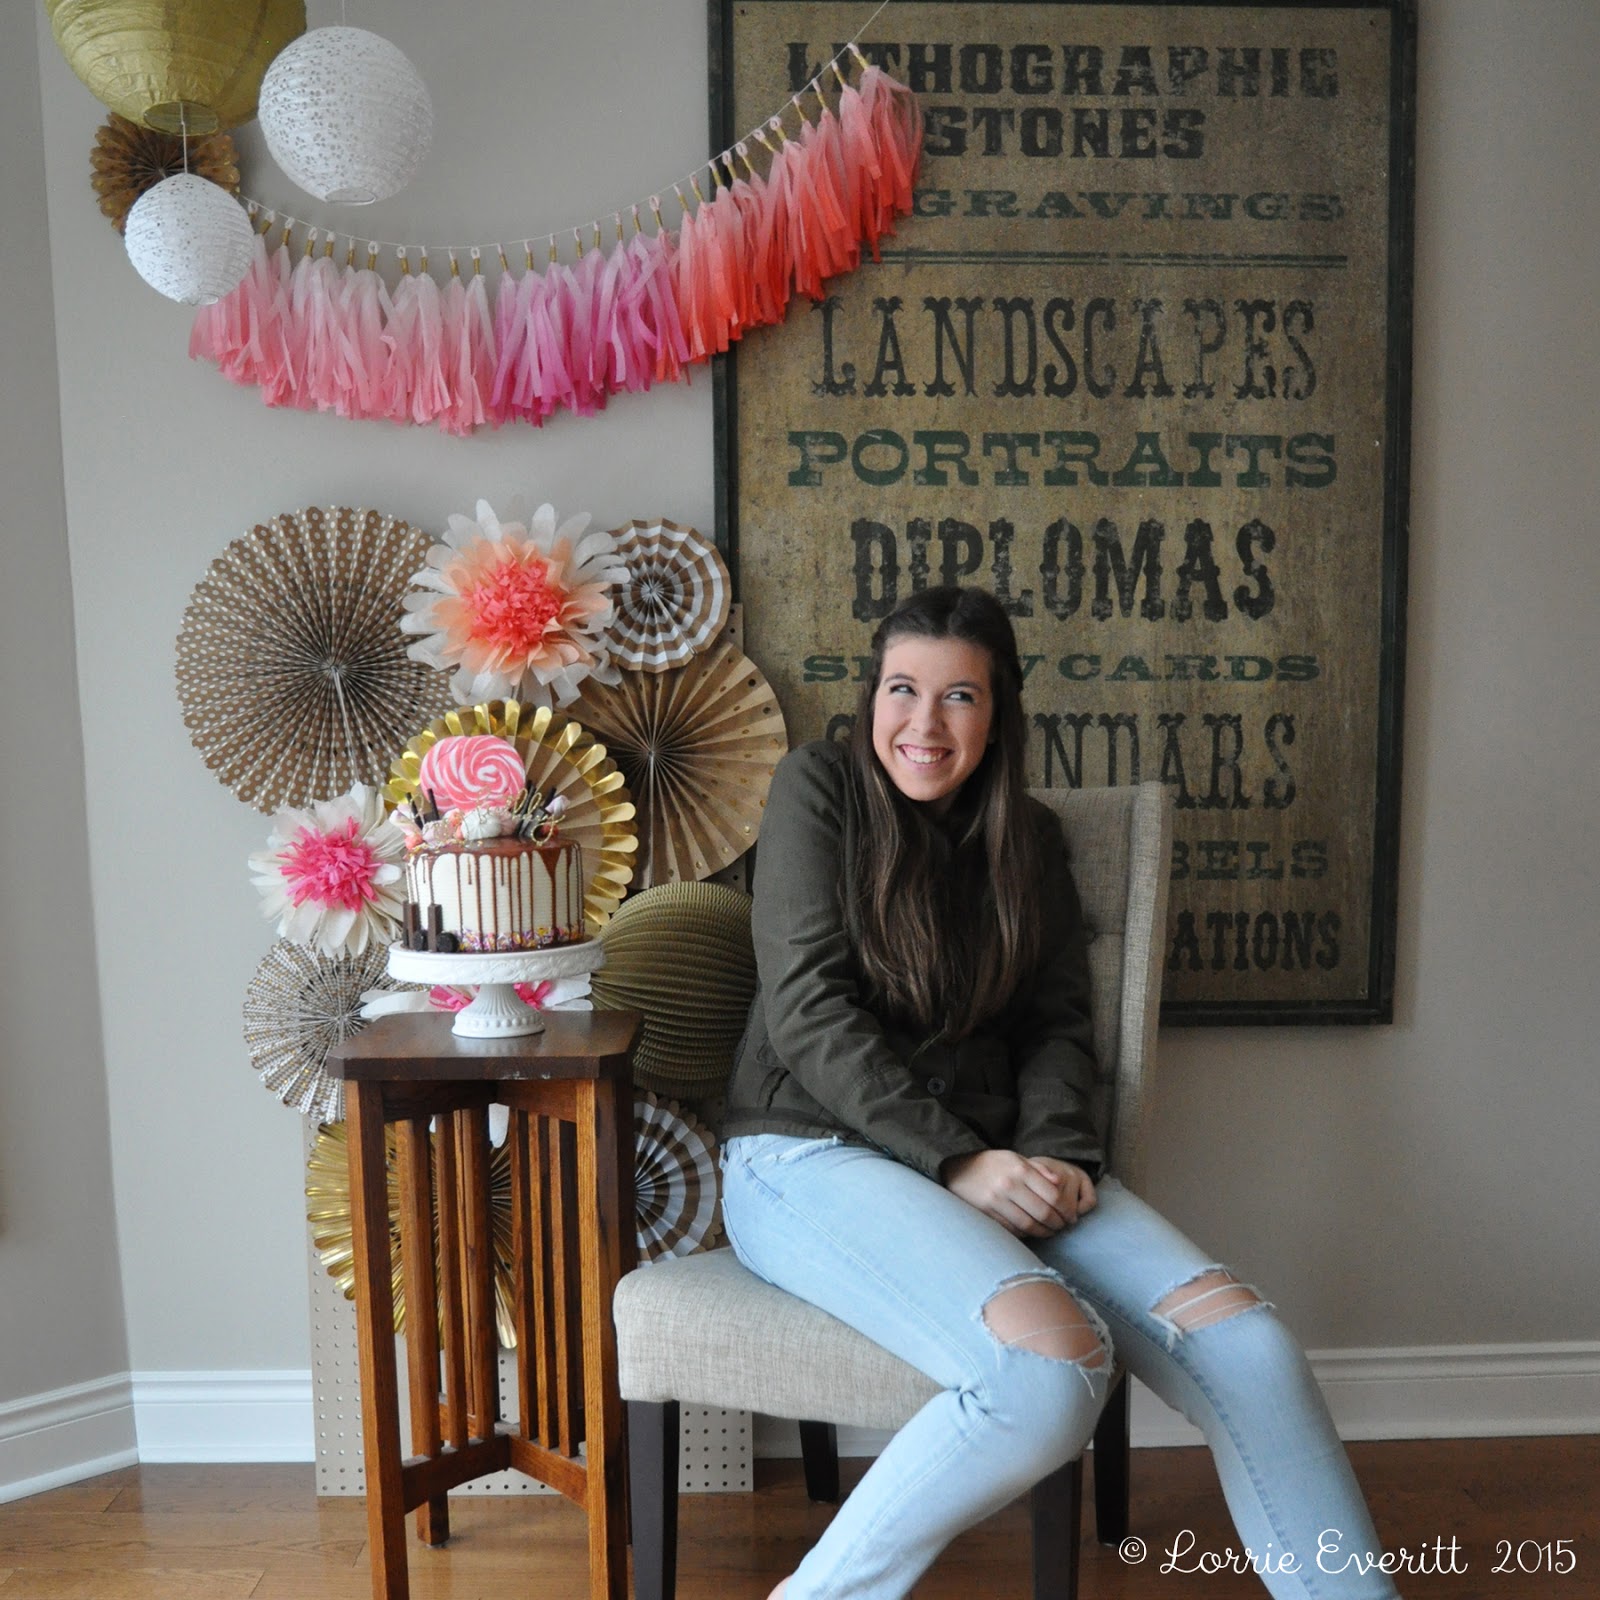
We celebrated Grandma's 99th birthday this weekend and I decided to surprise her by setting up a photo backdrop in my kitchen so I could photograph her with everyone at the party.

set up a photo backdrop to take photos of family and friends | Lorrie Everitt Studio

I knew that the natural light in the kitchen would be the best spot to photograph at the time of day that I would be shooting. I made an assortment of paper and tissue paper elements to hang as a backdrop and hung some paper lanterns. I was going to cover up my vintage sign with a canvas drop sheet but I liked the look of it with the paper decorations and it became part of the set up. 

set up a photo backdrop to take photos of family and friends | Lorrie Everitt Studio


I used a chair and a small table with Grandma's birthday cake as props. I tested the set up with my daughter before the birthday guests arrived to make sure that back drop was going to work for both sitting and standing.


set up a photo backdrop to take photos of family and friends | Lorrie Everitt Studio


Grandma loved the photo backdrop and was so happy to have her photo taken with everyone. We had a lot of fun taking the photos and you can tell from all of the smiles when you look at the pictures.


set up a photo backdrop to take photos of family and friends | Lorrie Everitt Studio


A little later in the day, I surprised Grandma again by presenting her with a gallery frame filled with photos that I had just shot and printed at home. She left the party with not just memories of the day but something that she could hang in her home right away. 


set up a photo backdrop to take photos of family and friends | Lorrie Everitt Studio


This diy concept is a fun idea for more than just birthday parties! I would do this for a baby or bridal shower, wedding or anniversary party and of course, during the holidays.

The best part for me was being able to print the photos right away so I could frame them and present them as our gift. I really like that my Canon Pixma Pro-100 photo printer can print photos up to 13" x 19" because I can purchase almost any frame that I want and I know that I won't have to worry about the photo size.

Here's a few more of the photos that I shot at the party ...

set up a photo backdrop to take photos of family and friends | Lorrie Everitt Studio

I posted this collage photo on Instagram after the party was over ... 

set up a photo backdrop to take photos of family and friends | Lorrie Everitt Studio

and here's a close up of the birthday cake that I decorated and used as a "prop" in some of the photos.

I hope that you have the opportunity to take lots of photos in the next few days with your family and friends.

Smile!