Showing posts with label recipes. Show all posts

diy - oreo cookie hostess gift

Thursday, December 18, 2014

diy oreo cookie hostess gift

I don't always have a lot of time to do holiday baking and over the years I have come up with a few creative ways to make store bought items look like they are homemade. Dipping oreo cookies in melted chocolate is one of my favourites right now and if you add holiday sprinkles they are sure to delight both young and old. Package a bunch of these cookies up in a gift box and you've got a great gift for a teacher or your next door neighbours. 

Here's how I make these ... 

diy oreo cookie hostess gift

Step One. Gather your ingredients. Oreo cookies, chocolate candy melts in a colour of your choice, holiday sprinkles.

diy oreo cookie hostess gift

Step Two. Melt the chocolate candy melts according to the instructions on the package. Dip cookie into melted chocolate as shown. 

Tip to keep the chocolate melted a little longer ... I place the container in a larger bowl containing boiling water.

diy oreo cookie hostess gift

Step Three. Quickly add sprinkles before the chocolate hardens.

Tip: I use a baking drying rack to keep the cookies standing upright to dry so I can keep dipping more cookies.


diy oreo cookie hostess gift

When your cookies look as good as these, you want a clear box or a box with a window like this one for your gift packaging.

These are so simple to make and the kids will love to help you out ... so go ahead and let them!

Find more of my food packaging ideas for the holidays here.


Yummy candy kabobs you can create yourself for party treats or favors

Friday, October 25, 2013

create candy kabobs with or for the kids | Lorrie Everitt Studio

Looking for a fun little treat to make with or for your kids? How about some candy kabobs? 

I created these using striped paper straws, bamboo skewers and candies that I picked up at the Dollar Store and The Bulk Barn. They are super easy to make so little (and big) helpers will want to get in on the action. Of course your helpers will want to eat up any left over candies so clean up will be a breeze!

Here's how I made mine:
tutorial: create easy candy kabobs with or for the kids | Lorrie Everitt Studio
Gather your supplies: bamboo skewers with ball end, paper straws, assorted soft candies.

Step one -  Cut the paper straws to the length you want to cover the bamboo skewer keeping in mine that you can only add candy to the exposed bamboo skewer. If you don't want to add a lot of candies like mine ... cut your straws into 3" pieces.

Step two - I folded two pieces of ribbon candy as shown above. I added them one piece at a time by inserting the skewer into the middle of the folded candy.

Step three - I finished by adding two candies at the top to completely cover the bamboo skewer.

Make as many of these as you please and present them in a glass container so that everyone can see the striped straws. 

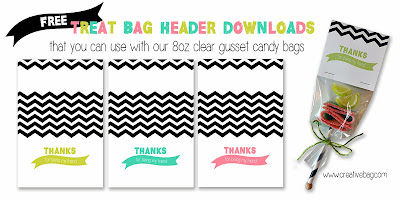
If you are thinking about using these as party favors for guests to take home ... you can find some packaging ideas and my free download for candy bag headers on the Creative Bag Blog in this post and this post.

free download and packaging ideas for candy kabobs | Lorrie Everitt Studio


Do you love Pinterest as much as I do? Interested in winning a prize package of diy products to create a bunch of canvas gift bags for Christmas that I have personally put together? 
Then check out this post for all of the details! I'm hosting a "Pin It To Win" contest over at Creative Bag this week.
Pin it to Win contest at Creative Bag

You have until end of the day on October 27th, 2013 to enter.

Good luck and I hope that you have a creative weekend!

My last minute Christmas projects

Saturday, December 22, 2012

I hope that you are ready for Christmas at your home. I'm happy to say that my last gift has been wrapped and is under the tree, the turkey is in the fridge and I just have a few last minute things on my grocery list that I will pick up a little closer to the 25th. I am looking forward to spending time with my daughters baking in the kitchen over the next few days. 

I wanted to share with you a couple of my last minute projects. The first one is a little treat bag that you can make up and hand out to friends that stop by over the holidays. I called it a Reindeer Treat bag!  I created the bag header and I you can use it too if you want. Just  download my art, print it on white cardstock and cut it out. To attach the bag header to the top of a glassine bag  or a clear bag you will need to fold the bag header in half and use staples to close. Fill the bags with candies or use my recipe below.

Reindeer Treats Recipe: mix together  equal amounts of pretzels, Shreddies cereal, M&M's candies and chocolate chips.


Download Reindeer Treats bag header here.

You will notice on the download that there are two extra square tags on the side of the download. I hate to leave blank space when I am printing something out so I added the tags!


I love to send and receive Christmas cards. It's a Christmas tradition that I personally look forward to every year. This year I made a ribbon garland using scraps of ribbon to display the cards with pictures on them. My photo above shows my  2012, 2011 and 2010 Christmas cards to demonstrate what the Christmas card garland will look like. 
Here's a quick overview of how to make one of these ribbon garlands. It doesn't  take long to make. It's such a simple project that you could make it with the kids in under an hour ... it will keep them busy before Santa arrives! I used lots of different ribbons - assorted colours, widths and textures. I even added some tinsel ribbon for fun. I cut the ribbon into lengths of about 6" but you don't have to have them all the exact same length so don't worry too much about measuring. I used one long length of twine as the base and tied a loop for hanging on one end. Then I just started tying ribbons in a random manner along the twine. I added a large wood clothespins in between the ribbons about every 4" to hang the cards. You will want to cut the ends of the ribbons once they are tied onto the twine. Cut the ends however you want ... mix it up as you can see in my photo above. Make the garland as long as you want to fit the space you want to hang it. When you are done, tie another loop at the end of the twine for hanging and cut off any extra twine. 


I made a couple of these chalkboard signs with my daughter and her friends a few weeks ago. They were painted on wood market trays from Creative Bag. I bought some more of these wood market trays to use for Christmas day entertaining. The trays are disposable but the shapes are really nice and I clean them off and paint them with black board paint. You can see more details on how I create these here and here. I am going to save the trays from Christmas day to do something for my daughter's rooms. I know that I will be checking my Pinterest boards for quotes to use. 

I hope that your Christmas preparations are going well and that there will be time to do sit back and relax with family and friends. 

Merry Christmas Everyone!!

push pop cupcakes for a Valentine party

Wednesday, January 11, 2012

I was so excited when I saw the push pop containers arrive at Creative Bag last week. Have you seen them yet? Apparently they are the next "big" thing since cupcakes! My daughters and I had fun making mini cupcakes to fill inside them on the weekend and I created a tutorial to show you how to make them for the Creative Bag blog this week that you can see here.

Here's a close up of what the container looks like ... can't you just see these at a birthday party, wedding or any celebration involving food!!
To display my push pops I put a piece of styrofoam in a container and filled the container with sugar. I carefully punched holes in the styrofoam with a screw driver keeping in mind where I wanted to position the push pops. Then I added the push pops.


I posted earlier that I am now writing for the Creative Bag blog too. You can view the blog here. If you like my personal blog, I hope that you will follow me at the Creative Bag blog too ... I have some free downloads there (I'll get them on this blog soon too!) and I plan to do some giveaways, contests and lots more!

cake pop tutorial

Tuesday, August 9, 2011

We just got back from two weeks of holidays at the cottage. Everyone had a great time and the weather was great. We had a couple of rain days that were filled with reading books, working on craft projects and baking with the kids.

The girls and I made cake pops one afternoon .. so yummy and so much fun to make. I took photos as we worked and so I could create this mini tutorial!
Note: we found that our cake pops were a little on the big side ... I'd suggest making the balls slightly smaller than the ones in the photos!
These sweet treats are so yummy and would make a great treat for a birthday party,
shower, wedding or any excuse that you have to entertain! You could decorate these treats in colours and shapes for the holidays ... I'm already making notes for how I might decorate these for Halloween and Christmas!