Showing posts with label packaging. Show all posts

DIY Easter themed gift packaging using pom poms

Saturday, March 17, 2018


 DIY Easter themed gift packaging inspiration using handmade pom poms | Lorrie Everitt Studio

In my last post I showed you how to make your own pom poms using The Loome pom pom tools. Today I thought that I'd show you some of the Easter themed projects that I created using my pom poms.

DIY Easter themed gift packaging inspiration using handmade pom poms | Lorrie Everitt Studio

I placed pom poms on these burlap tote bags. I think that these tote bags would be so sweet for an Easter egg hunt. Finish the front and the backs of the bags or just add a pom pom to one side ... there's no right or wrong.

On the front: a small pink pom pom along with a few hand stitched whiskers. 
On the back: a larger white pom pom.

DIY Easter themed gift packaging inspiration using handmade pom poms | Lorrie Everitt Studio

Turn plain muslin drawstring bags into Easter favor bags by adding pom poms. I added a small punch of colour to the pom poms to represent a bunny nose and a chick beak. It was easy to add an embroidered word to the muslin bag for another fun detail.
Tip: I used disappearing fabric ink pens to write out what I was going to embroider.

DIY Easter themed gift packaging inspiration using handmade pom poms | Lorrie Everitt Studio

DIY Easter themed gift packaging inspiration using handmade pom poms | Lorrie Everitt Studio

DIY Easter themed gift packaging inspiration using handmade pom poms | Lorrie Everitt Studio

Tip: If you are going to use fabric bags to package edible items you should package the food in clear candy bags first. 

DIY Easter themed gift packaging inspiration using handmade pom poms | Lorrie Everitt Studio

Turn any plain wine bag into an Easter theme wine bag by adding a pom pom to the bottom of the bag. Who wouldn't love to receive this as a hostess gift on Easter weekend?
Tip: Sew the pom pom in place with a few stitches so it will not fall off. 

DIY Easter themed gift packaging inspiration using handmade pom poms | Lorrie Everitt Studio

Pom poms can be added to plain paper shopping bags using glue. I created tissue paper pom poms and tissue paper bunny "ears" to make my gift bags a little more special.


DIY Easter themed gift packaging inspiration using handmade pom poms | Lorrie Everitt Studio


pretty gift topper inspiration

Sunday, December 24, 2017

pretty gift topper inspiration from Lorrie Everitt Studio

Just in case you are still finishing up your holiday gift wrapping today here's a little last minute inspiration to make your gift wrapping a little prettier by using a variety of different gift toppers. I love to add gift toppers to my gift wrapping because it's pretty and because it's like you are giving a bonus gift. And who wouldn't like that?!

pretty gift topper inspiration from Lorrie Everitt Studio

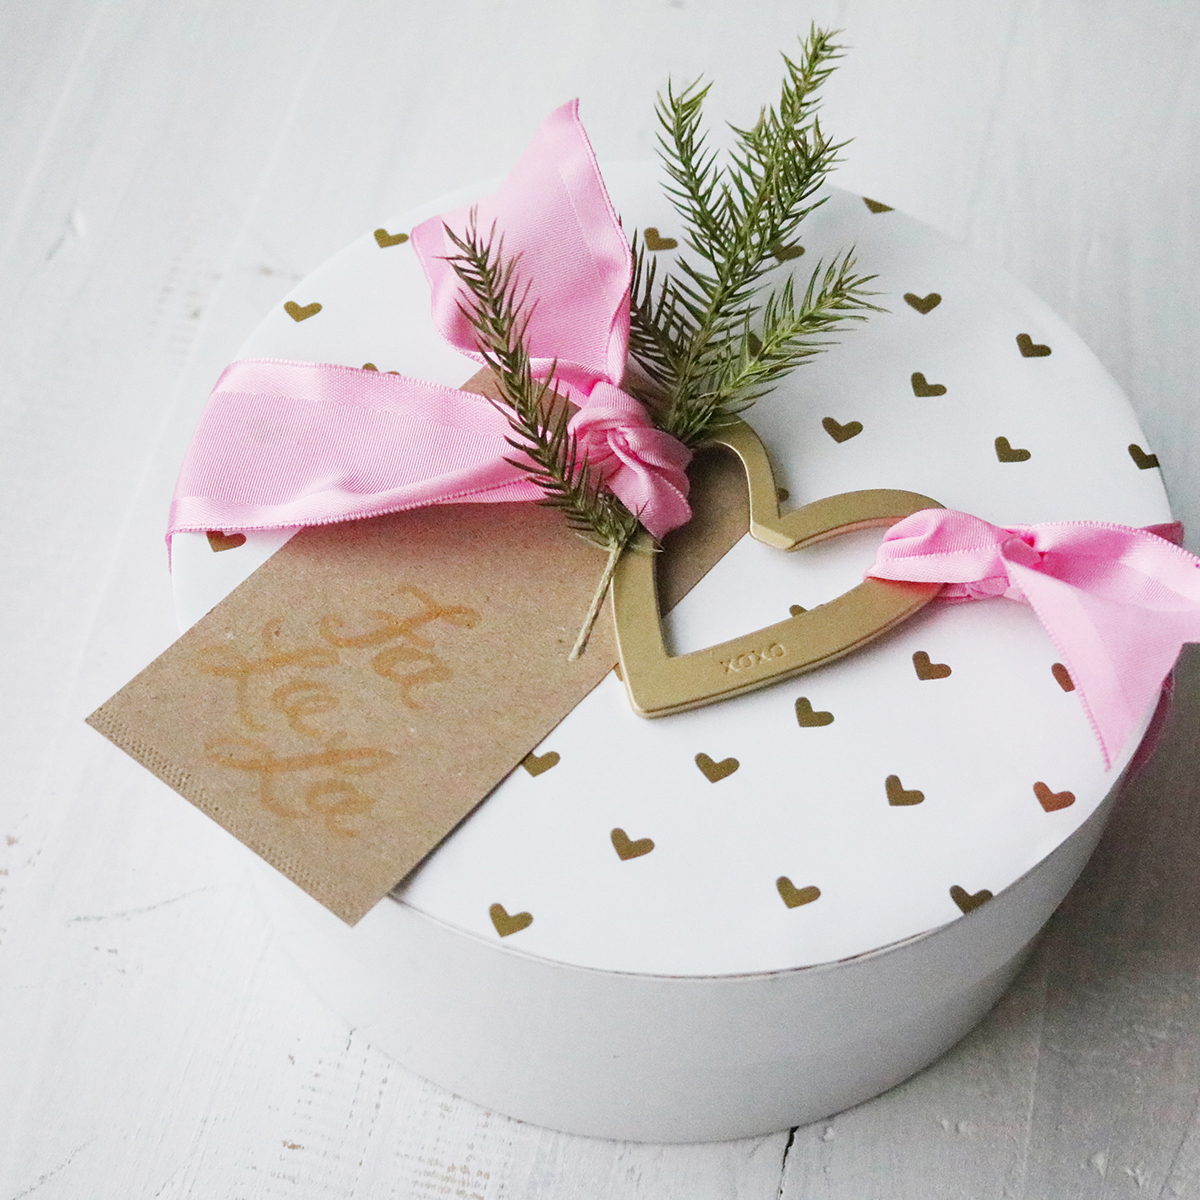
This heart shaped bottle opener is both practical and beautiful. I stock up on these to use for hostess gifts all year round.


pretty gift topper inspiration from Lorrie Everitt Studio

For the bakers and foodies on your list - add a cookie cutter or an edible cookie ornament! My custom owl cookie ornament was made for me by Mary from Emma's Sweets and you can check out her cookie decorating tutorials here.

pretty gift topper inspiration from Lorrie Everitt Studio

This fresh rosemary wreath isn't just pretty, it will make your gift smell good too! I added a round coaster with a holiday message behind the wreath as a gift tag.

pretty gift topper inspiration from Lorrie Everitt Studio

Mini wreaths all tied up with ribbon are so simple yet so elegant.

pretty gift topper inspiration from Lorrie Everitt Studio

Add a one-of-a-kind hand painted ornament for a personal touch like this one from Jennifer Fryer.

pretty gift topper inspiration from Lorrie Everitt Studio

If you shopped at any local holiday markets you might have picked up handmade ornaments like this adorable wood fox by Kiriki Press. You can make your own gift tags using photos .

pretty gift topper inspiration from Lorrie Everitt Studio

I've shown you how to make these simple paper bows before and they are a great way to use up your wrapping paper scraps.

pretty gift topper inspiration from Lorrie Everitt Studio

Can't find something to use as a gift topper? No problem. You can add a personal touch to plain gift boxes and wrapping paper using markers, stamps and paints. I used a gold metallic pen to draw a design to the top of this gold foil edged gift box.

Happy wrapping and Merry Christsmas.


Sources: All of my gift wrapping supplies were from Creative Bag
Floral elements were created by Flower Treasures
All photography is my own with the exception of the two photos that were credited to Janet Kwan Photography.


pretty gift topper inspiration from Lorrie Everitt Studio

It's wrapping season!

Monday, December 7, 2015


It's my favourite time of the year .... wrapping season! I have been asked many times if I am a "professional gift wrapper" and I always laugh and say "no". But I do like gift wrapping and designing packaging products.

So this month I am going to write a few posts about how I am wrapping my Christmas gifts. This weekend I started to wrap a few of my family's gifts. I have not finished holiday shopping yet but I always feel like I'm ahead when I get a few gifts wrapped up and under the tree. 

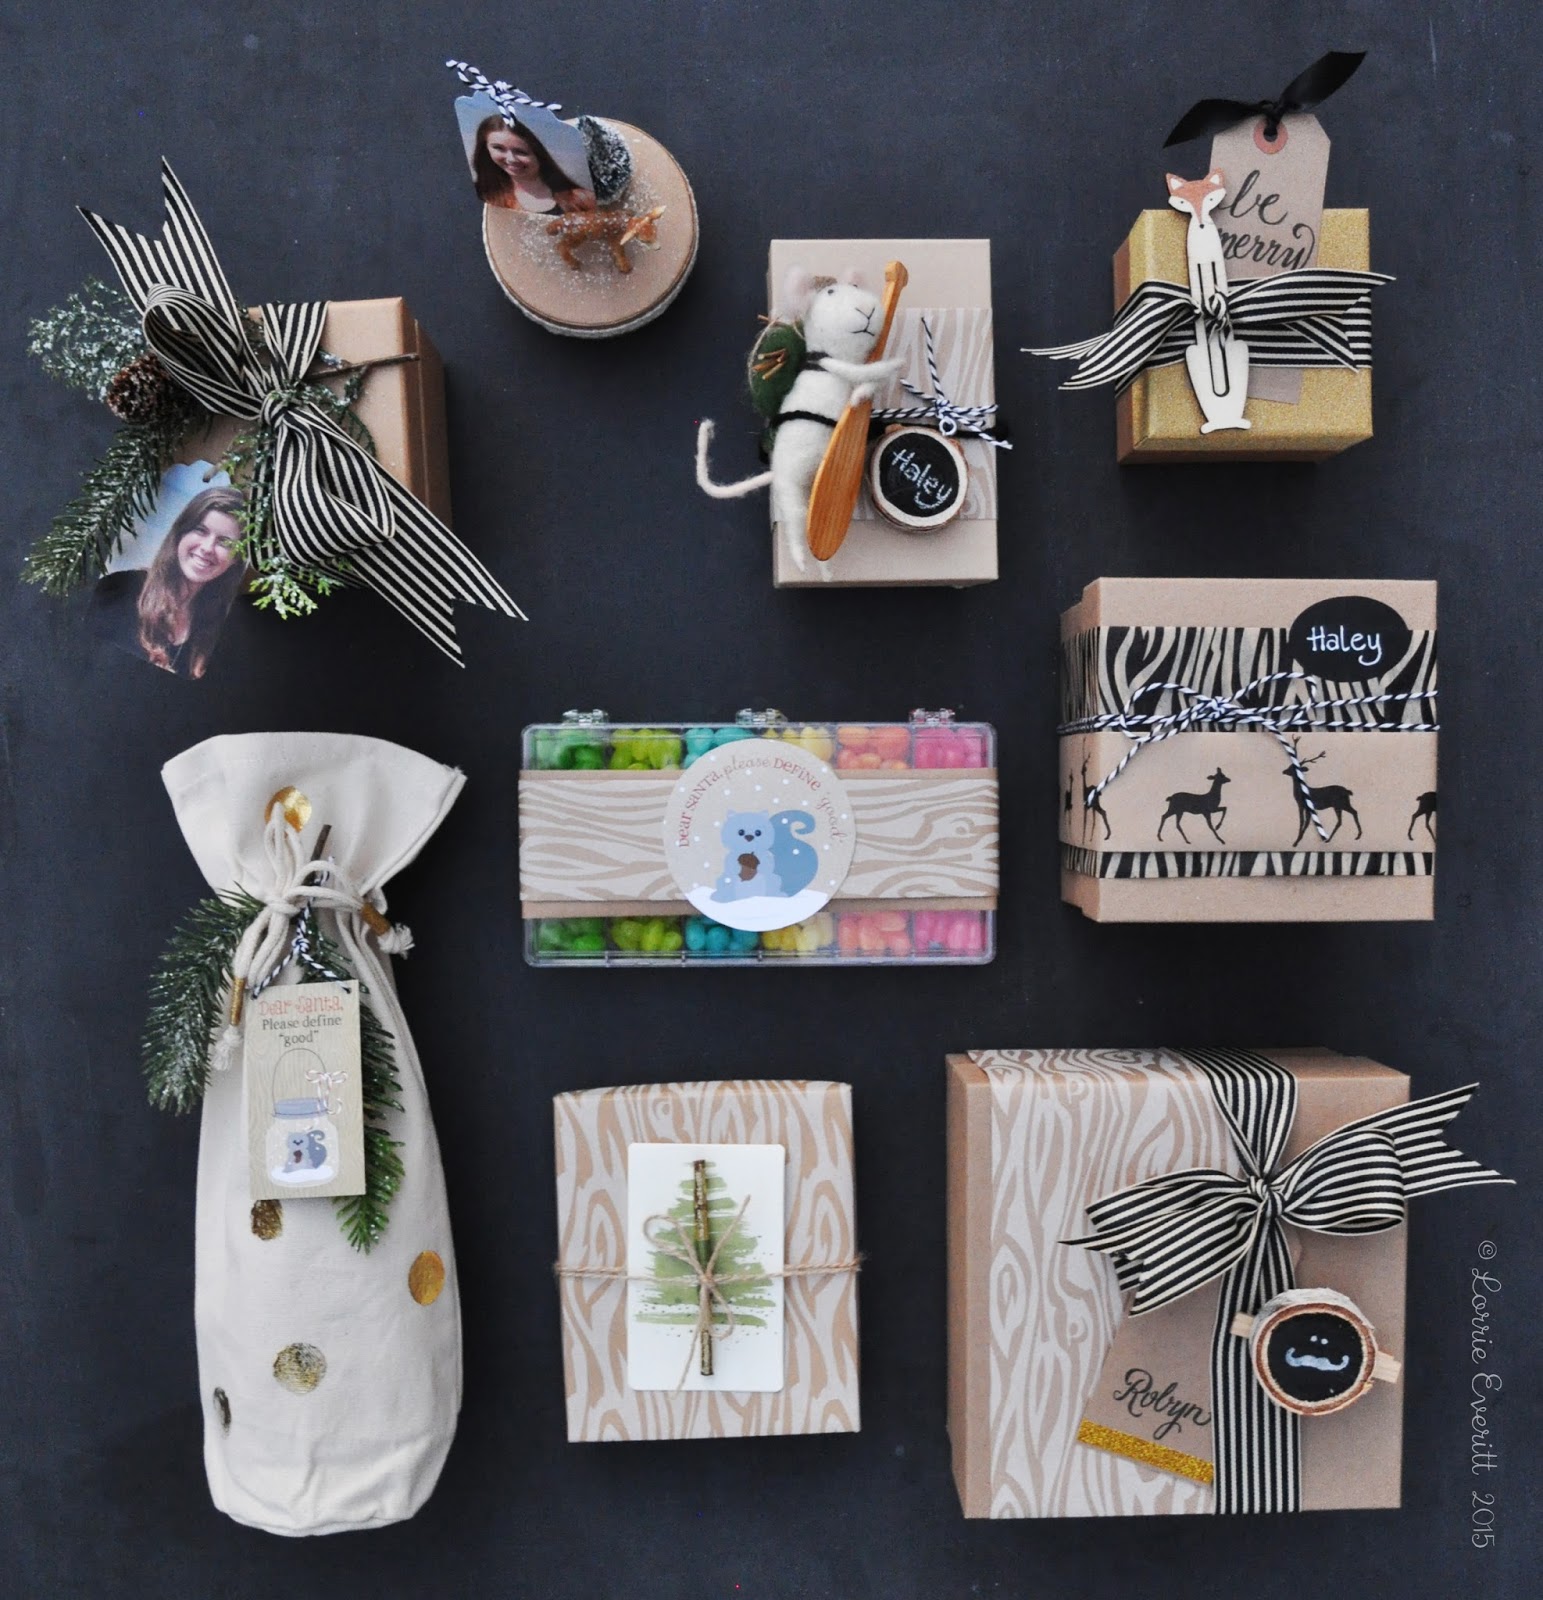
I select my holiday wrapping supplies early and try to co-ordinate everything. This year it is all about kraft, black, gold and a touch of white to match my contemporary woodland theme.


One of my favourite time savers for gift wrapping is to use plain gift boxes that are already "gift ready". All that I have to do is add some pretty ribbons and a few embellishments. 

Top left: This kraft box was decorated with ribbon. I added some artificial greenery and a gift tag that I created from a photo.

Top right: A wrapping paper band was added to this box using two sided tape. I purchased the felt mouse ornament and made the wood chalkboard gift tag.

Bottom left: Round boxes make great gift boxes and can easily be decorated using glitter, washi and lace tape. The toy deer and mini tree were glued into position on the top of the box so they could hold a photo gift tag.

Bottom right: These gold and kraft boxes are my favourite because the gold glitter does not come off ... less mess = less time cleaning up! Ribbon does double duty here - it keeps the box from opening and it holds the fox bookmark in place. Plain kraft tags are dressed up with ribbon and a hand written message.


I adore wrapping paper but I really don't like to wrap presents in the traditional way. So if I use gift wrap I usually try to do it in a way that will look "professionally" wrapped ... but it's not. 

Top left: Gold foil dots were added to plain canvas bags. I created this diy wine bag project for She Entertains' holiday 2015 online magazine.

Top right: I reuse these kraft boxes every year for my family's gifts. This year I'm adding patterned kraft wrapping paper and striped ribbons to decorate them. I glued one of my handmade wood chalkboards to a large clothespin to hold a kraft tag embellished with gold glitter tape.

Bottom right: I only wrapped the top of this kraft box with wrapping paper so it could be reused. My gift tag was something that I received from Anthropologie last year and never used - they would be easy to recreate and I'm going to do a post later on to show you how to make these yourself.

Bottom left: This is a simple idea for a hostess gift that I created for Creative Living online magazine last year . Use these clear boxes and fill them with candies from the bulk food store. I added a couple of bands of wrapping paper and a cute label to finish. You can find my free download for the label here.


Now that I'm (finally) on Instagram, I'll be sharing my gift wrapping ideas there too!


Have you started your holiday wrapping yet?


my gift wrapping inspiration for a wedding gift

Sunday, June 7, 2015

gift wrapping inspiration for a wedding gift | Lorrie Everitt Studio

My husband and I attended a wedding this weekend and I thought that I'd share with you how I gift wrapped our wedding gift. We always give cash but I really don't like to put it in an envelope because I think it's nice to see a few gift wrapped items on the gift table.

Instead of using gift wrap, I placed a gift box inside of a custom bag that I created using iron on transfers, a cotton tote bag and the graphics from a free download that I designed for Creative Bag. The graphics were easy to personalize - I just added the bride and groom's names as well as their wedding date. You can find the free downloads for five different graphics to use on cotton tote bags here.

gift wrapping inspiration for a wedding gift | Lorrie Everitt Studio

You can see the inside of the gift box above. I filled the box with sizzle before I added the card and money. I simply tied a wide white satin ribbon around the gift box to keep the lid from falling off inside of the bag. I added a little note inside the box to let the bride know that the box could be used as a keepsake box for gift cards and photos after the wedding.

wedding details that I love | Lorrie Everitt Studio

We had such a wonderful day at the wedding. The sun was shinning, the bride and groom were so happy and everything was so beautiful. I snapped a few shots at the wedding reception ... these were some of my favourite decor details.

Do you have a wedding to attend this summer? I hope that this inspires you to do something a little different with your gift wrapping - even if you are giving cash!

By the way - do you like to win free stuff? Creative Bag is celebrating the launch of their new website all next week for five days starting Monday June 8th. There will be five daily giveaways and daily specials in stores and online. I will be posting all week long on the Creative Bag blog and I hope that you will hop over to see what is happening and while you are there enter to win each of the daily draws!


Yummy candy kabobs you can create yourself for party treats or favors

Friday, October 25, 2013

create candy kabobs with or for the kids | Lorrie Everitt Studio

Looking for a fun little treat to make with or for your kids? How about some candy kabobs? 

I created these using striped paper straws, bamboo skewers and candies that I picked up at the Dollar Store and The Bulk Barn. They are super easy to make so little (and big) helpers will want to get in on the action. Of course your helpers will want to eat up any left over candies so clean up will be a breeze!

Here's how I made mine:
tutorial: create easy candy kabobs with or for the kids | Lorrie Everitt Studio
Gather your supplies: bamboo skewers with ball end, paper straws, assorted soft candies.

Step one -  Cut the paper straws to the length you want to cover the bamboo skewer keeping in mine that you can only add candy to the exposed bamboo skewer. If you don't want to add a lot of candies like mine ... cut your straws into 3" pieces.

Step two - I folded two pieces of ribbon candy as shown above. I added them one piece at a time by inserting the skewer into the middle of the folded candy.

Step three - I finished by adding two candies at the top to completely cover the bamboo skewer.

Make as many of these as you please and present them in a glass container so that everyone can see the striped straws. 

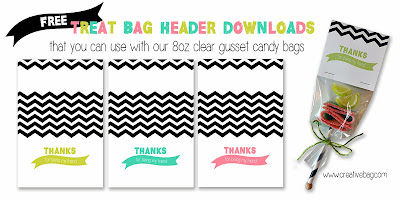
If you are thinking about using these as party favors for guests to take home ... you can find some packaging ideas and my free download for candy bag headers on the Creative Bag Blog in this post and this post.

free download and packaging ideas for candy kabobs | Lorrie Everitt Studio


Do you love Pinterest as much as I do? Interested in winning a prize package of diy products to create a bunch of canvas gift bags for Christmas that I have personally put together? 
Then check out this post for all of the details! I'm hosting a "Pin It To Win" contest over at Creative Bag this week.
Pin it to Win contest at Creative Bag

You have until end of the day on October 27th, 2013 to enter.

Good luck and I hope that you have a creative weekend!

resin flower jewellery

Friday, May 18, 2012

I have been so inspired over the past two weeks by two things ... 1. we just recently received our Creative Bag Wedding resin flowers at Creative Bag and 2. Anthropologie just opened their new store in Oakville (which is about 7 minutes away from the house I will be moving into with my family this summer!!)

As soon as I saw the way Anthropologie was packaging their earrings and necklaces with old photos, I knew exactly how I was going to package the jewellery that I was planning to make with the new resin flowers.

Above you can see two styles of rings and a matching pair of earrings that I created with the resin flowers. The design for the earring card holder was created using old family photos and a page from an old dictionary that I scanned and played with in Photoshop. I printed the art on photo paper and mounted it onto chipboard.
Here's another pair of earrings and a matching necklace that I created using the resin flowers. The woman on these jewellery card holders is my Grandmother when she was younger. Not sure, but I think that these were taken when she was on her honeymoon. My Grandmother would have loved these!!!
The pictures on these jewellery cards are of my father and I. The picture was taken in 1962 and it is one of my favourite pictures of the two of us together when I was small. I punched two holes in the card for the necklace so that I could add the ribbon and attach the necklace.

I didn't make jewellery cards for the rings ... I've always liked seeing rings displayed in shallow containers filled with rice. So that is what I did with mine.
I just love resin flower cabochons right now. I've been using them on stationery and favor boxes for weddings and parties. You can see more of my ideas using these on Creative Bag's blog. I will be posting a tutorial for making some of these jewellery pieces on the Creative Bag blog next week if you are interested.
I will also be doing a demo with the resin flowers as well as a few other projects at Creative Bag's Toronto store on May 24, 2012 at 6pm if you are interested in attending. There is no cost to register but space is limited. Everyone will be making a resin flower ring and tissue paper flower pom-pom (yes, for free!) and you can find out more about the event and how to register here. 

To all of my Canadian friends and family, have a great holiday weekend!

Hoppy Easter Monday

Monday, April 9, 2012


I hope that you had a wonderful Easter weekend. It's Easter Monday and my kids do not have school today ... which means I will be checking up on them every few hours to make sure that they are not eating candies and chocolate all day.

We spent a couple of days at the cottage this long weekend. It was the first time we've spent any time at the cottage since September and we all looked forward to getting away from the city for a couple of days.


We went for a walk on the beach Saturday afternoon ... it was a beautiful day and we can hardly wait for summer!
I hosted an Easter brunch on Sunday at the cottage and made little Easter loot bags for the kids. The bags are from Creative Bag, of course, and I did a quick post about them here.

The little chick with the letters were a last minute idea that I created using things at the cottage ... a dice, black checkers, K&Company glitter chipboard letters and some colourful Easter chicks. I used gel medium to glue them all together.

Have a wonderful day!


paper pops tutorial and my holiday wrapping is done!

Friday, December 23, 2011

My holiday packaging projects are done and I'm ready to start our holiday baking with the girls after they come home from school this afternoon. Yum!

I have one last tutorial to share with you - paper pops! I made a few of these to attach to larger gifts that I was wrapping. I also added paper pops to some tin wine containers that I purchased from Creative Bag.

1. gather your supplies: (scrapbook) paper cut into long strips and circles, bone folder, scoring board (optional but handy if you are going to make lots of these), circle paper punch (again optional - you can cut out paper circles), and glue (gel medium my adhesive of choice - hot glue or white glue will work too)
2. you will need two strips of paper for each paper pop {mine were 2" x 12" each but you can cut yours wider or thinner depending on the final size of paper pop you want to make} and you will need to score each strip of paper with your bone folder every 1/2" {or 1/4" for smaller pleats}
3. after scoring, fold each strip like an accordian
4. glue the two folded strips of paper together as shown and
5. glue again to form a circle
6. once the glue is completely dry, you will push down on the paper so that it flattens and creates the paper pop ... it's a little tricky at first and will not stay that way until you glue a circle to the front and back to keep the paper pop in place.
7. apply a generous amount of adhesive to the backs of your circles and position onto the paper pop
8. you can decorate the centre of the paper pop however you want!

Here you can see the difference between scoring your paper every 1/4" {on left} and 1/2" {on right} ... you will get less pleats with the 1/2" fold but it will be thicker. Either look is fine - it's really up to you.

Here's another picture of the tin wine container with a paper pop ... because the container is metal you can add a magnet to the paper pop it you want!

Here's a paper pop on a present ... this paper pop has a bottle cap embellishment from an earlier post/tutorial in the middle. I used pop dots to adhere the paper pop to the kraft paper.

I used natural kraft paper as the base for all of my larger wrapping projects and then added divine twine and handmade tags to dress them up!

I attached fake polariod pictures of who the gift is for to some of the pictures and attached them to the divine twine using small wood clothespins that I decorated with glitter tape. It's a simple look but it goes with the rest of my holiday packaging!

I hope that you are done your holiday shopping and ready to complete your holiday wrapping!

I hope that you have a wonderful Christmas with your family and friends. Cheers!