Showing posts with label book crafts. Show all posts

Vintage book projects no.1 - fall pumpkins

Tuesday, October 23, 2012


I have had a love affair with old books for quite a long time. And I am always looking for unique ways to re purpose them. I was inspired by a picture of a "carved" book earlier this year and knew that I had to try to make a pumpkin book for fall decorating in our new home.
If you'd like to try to make one of these yourself, this is what I did ...


1. You will need an old book and an exacto knife. I used a dictionary for this project because I liked the yellowed pages.
2. Cut the book pages from the cover being careful to leave the pages glued together.
3. Draw out the shape the you want your final pumpkin to look like. You have to think about how your pumpkin will sit so you will want to leave a small area at the bottom of the pumpkin flat.
4. Using the shape that you drew as a template, start cutting the pages with the exacto knife. You will want to cut in sections. Take your time. When you get to the end of the book and have cut all of the pages, you may find that some of the pages were not all cut to the same size. That's okay, don't panic ... you can always go back and trim some of the pages.
But just like when you were 5 and tried to cut your own bangs ... try not to be a perfectionist and over cut!
5. To make the pumpkin into a 3D shape, I glued the first and last pages together using gel medium and 6. used paper clips to hold the book pages together until the gel medium was dry.

You can decorate the top of your pumpkin with a branch. I also added leaf shapes that I cut out of green felt and some pieces of twine.

These pumpkins are great for fall decorating and can easily be added into your Halloween decorating as well.

If you are looking for more Halloween projects pop over to Creative Bag's blog. I have been posting Halloween packaging, food decorating and party ideas over there all month. There are some free downloads for Halloween packaging here and here

I know that a number of people have been inquiring about my workshops. I don't have any mixed media or art classes planned at this point. The only workshops that I have planned for the rest of this year are free holiday packaging and party workshops at Creative Bag. The workshops are usually on Thursday nights in Toronto (close to Yorkdale Shopping Centre). If you are interested in attending just send me an email and I will add you to my email list and notify you when dates are available.

fashionista clipboard

Wednesday, July 6, 2011


Here's a new project that I just completed ... it's a mixed media collage clipboard and I'm not sure where it is going to end up but I think that I will hang it up in my little display area at Scrapbook Queens for a while this summer.

I have been in a creative mood the past couple of days and really wanted to use these fabulous scrapbook papers that I bought at Scrapbook Queens about a month ago. The papers are from Basic Grey's  Sweet Threads collection ...


and I knew that I would use them in a mixed media piece at some point this summer. I was inspired to use the papers when I stumbled upon Julie Nutting's new book ...

it's called Collage Couture and it's amazing! Julie used a lot of different Basic Grey papers in her projects in the book ... including the sweet threads paper I have been hanging onto!

I've been using scrapbook papers as clothing in my mixed media collages for years but I have always painted the bodies, faces and hair and just used the papers for the clothing and accessories. What I loved about Julie's book is that she shows you how to use paper for the bodies too ... what a great idea! She still paints the hair and features of the faces so there is still some painting but not as much. It's like playing with paper dolls - remember how much fun you use to have doing that?

So here's my little project in a bit more detail ...


 I covered my clipboard in various papers, a little paint and some distressing inks to create my background. Then I added a "paper doll" that I designed using Julia's basic techniques. I love the idea of using pages from one of my old dictonaries as the body for my little fashionista.

.... here I've removed my notes so that you can see the clipboard a little better ...

The circle is actually a piece of sheet metal that I covered with more of my "sweet threads" paper. I wanted to be able to add smaller papers with a magnet to the bottom half of the clipboard and this worked perfectly.

So after adding a little bling, some vintage jewellery, a few flowers and vintage buttons and of course some lace and ribbon ... my piece was ready to be used to organize and display some of my papers and a photo ...


here it is again! I think that these would be great to make for a home office or studio. I may make these with my daughters for their bedroom study areas ... I can see a bunch of them grouped together like a fashion show! I'm also going to work on some similar projects that I can teach in the fall ... I'll keep you posted on that when I have more details worked out.

I hope that I have inspired you to check out the new Basic Grey papers at your local scrapbooking store and maybe take a look for Julie's new collage book at your local bookstore!

Happy crafting!

dream journals and flying lessons

Monday, May 31, 2010

I love to make dream journals. They are a wonderful way to recycle old books into journals that can be reused in a new way and may be cherished for many more years to come. I call these "dream journals" because I personally use them to keep my creative ideas and quick sketches in them.

 Kelly Rae Roberts' ecourse started yesterday and one of Kelly's first suggestions was that we have a journal or something similar to write down notes, ideas, dreams and goals ... I was so happy that I already had a dream journal ready for this course! I used a book that my youngest daughter and I used to read called  "I Love My Little Storybook" ... it is beautifully illustrated and written by Anita Jeram. I didn't use my daughter's book as she still has it on her book shelf but I did find a copy of it at the second hand store and knew that I would use it one day for a dream journal for myself.

I have one dream journal listed in my etsy shop right now and a few dozen just about ready to add ... maybe by the end of this week ... if this ecourse doesn't take up too much of my creative time! They are really easy to make yourself if you have the right supplies.

Here's how I make my dream journals ...


1. gather your supplies: a hard cover book, blank paper (I use a heavier weight card stock), hole punch for book binding (mine is by CarlaCraft), single hole punch tool and hammer, spiral binding (also by CarlaCraft), self healing mat, wire cutters and pliers, paper cutter

2. Cut the spine off the book with the paper cutter so that you are left with the two covers and loose book pages. Trim the book pages with the paper cutter so that they are all the same size.

3. Measure the size of your book pages and cut the blank paper to the same size.


4. Hole punch all of the book pages and the blank pages with the hole punch on the left side.


5. Using an extra paper with holes as a template, mark where you need to hand punch the front and back book covers. Punch holes in the covers with the hand punch and small craft hammer on a self healing mat.


6. Put the book together by alternating a few book pages with a few blank papers. If you want to leave all of the book pages in the journal ... so that you can still "read" the story ... you may have to limit how many blank pages you can add. You will be somewhat limited by the binding as to how many pages you have in the final book ... play around with it a bit until you get the balance that you want. Sandwich all of the papers inside the covers and add the spiral binding by starting at the top and twisting the binding through the holes.
Once the spiral binding is in place cut the extra binding with the wire cutters and fold both ends over with a pair of pliers so that the binding stays in place.


Now I'm ready to start my "flying lessons" ... time to go and do some dreaming ...


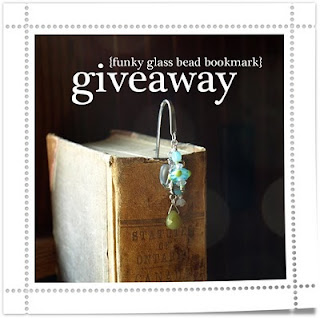
funky glass bead bookmark giveaway

Monday, April 12, 2010


I thought that I'd do a little "giveaway" this week ... I'm so happy to be going to New York in a couple of days with my friend, Karen, to see a taping of the Martha Stewart Show and I thought that this would give me something to look forward to when I get back. I'm going to giveaway the "funky glass bead bookmark" featured above. I know that a lot of my family and friends are new to this "blogging thing" so I'll give you a couple of options to get into the draw ... 1. leave me a comment after this post or 2. join my group "followers" (see the right hand side of the blog). If you are already a follower - you are already in the draw!!!  I'll draw the winner on Saturday morning and post the winner's name on my blog.

Here's a little story about my funky glass bead bookmarks ... I've made these for years ... they are so cute and a great way to show off so many of the beautiful glass beads that I have collected. I made few hundred of these little bookmarks last year as a part of my therapy after my brain surgery. Making these bookmarks helped me physically and mentally ... and it was something that I wanted to do so it was fun. I worked on them for months and when I was done, I gave away all of the bookmarks to the hospital staff to thank the many doctors, nurses, therapists and volunteers who took such good care of me.


Just in case you would like to make one of these funky glass bead bookmarks for yourself ... here's how ...


you will need a variety of different sizes of beads, a couple of links of chain, head pins, jump rings, book hooks and a few jewellery making tools like pliers and wire cutters. I buy all of my supplies at Michael's and my local bead stores and I have been known to re purpose beads from necklaces and earrings on these bookmarks too. 

 
The first thing that I do is to create a few bead grouping on the head pins. There is no right or wrong way to do it so just have fun arranging a few small beads with a medium sized bead until you like what you see ... then twist the end of the head pin to form a circle (see picture above). Larger beads can just be added to the head pins by them self and then twist the end of the head pin to form a circle ...


once you have a bunch of beads on the head pins, you will need to attach a small length of chain to the book hook with a jump ring. Use your pliers to close the jump ring and then cut the chain with wire cutters so that the chain is about 1/2" long ...


I usually add about 3 or 4 bead groupings to each bookmark ... lay the beads out on either side of the chain to see how you want to position them. Attach each bead grouping to different links on the chain using jump rings and your pliers to connect them ... and that's it!

Warning!!! ... these are really fun to make and you will soon be finding yourself making these as gifts for everyone - family, friends, teachers, etc and you will be adapting the designs for different holidays.  I gave these out (with candy) to the children on our street for Halloween last year ... the bookmarks had pumpkin and ghost charms mixed in with orange and black beads ... everyone thought that they were really boo-tiful!