Showing posts with label scrapbooking. Show all posts

scrapbooking with my vintage buttons

Thursday, June 23, 2011


I love to collect vintage buttons ... and I'm always looking for ways to get them out of the vintage canning jars I store them in and onto my art.

I was inspired by some posts that I've been reading this week at Scrapbook & Cards Today blog. Summer Fullerton has been using buttons in her projects and I thought that I'd share with you some of the pages from my scrapbook(s) that include my vintage buttons.

The first picture is one of my daughters, Robyn, when she was little and still liked to pose for Mommy!


This layout was done a few years ago but the picture was taken about 17 years ago. It was one of my favourite pictures of my younger brother with my daughter, Haley, when she was a few months old.


... as you can see I like to hand and machine sew on my pages - I love to make the stitching part of the design.


I can never pass up a container of pearl buttons at the second hand store or antique store ... I used a few of them here on this layout featuring my daughter Robyn playing with a friend's son one rainy afternoon at the cottage.


This layout features a large vintage button at the top and three smaller buttons at the bottom. I used a series of summer pictures from the cottage to work with the words that I added to each photo.
I love this saying ...
"Dance as though no one is watching.
Love as though you have never been hurt before.
Sing as though no one can hear you.
Live as though heaven is on earth."


here's another shot of this layout at an angle so you can see the button details.


One last page ... I love this layout ... the colours were inspired by a project that I was working on at the time for April Cornell. I did a number of marketing, visual merchandising and licencing projects for April a few years ago and this was one of the pictures from a photo shoot that we did in Canada. We used one of my friend's baby as a model in the clothing and on the linens. Although I used vintage buttons on my page, they reminded me of buttons that April would use in her products ...


... they also served another purpose ... to hold the ribbons that I wrapped around a painted chipboard letter in place!

I hope that I have inspired you to do some scrapbooking, take some photos of your kids or do something with the buttons you have been saving for a special project.


before I go ... I wanted to share this photo that I tore out of a wedding magazine last year for inspiration ... another great idea for using buttons in a creative way. Wouldn't this be cute on a summer hat! I bought a bunch of coloured buttons at Scrapfest in the spring and I'm saving this project for a rainy day at the cottage this summer with the girls. I'll let you know how it goes!

Busy as a bee ...

Thursday, June 2, 2011

It's been a busy week around our house ... lots going on with everyone and I'm trying to get ready for the Bread and Honey Festival in Streetsville this weekend. I'll be there with Scrapbook Queens!

I was at the store today pulling together my product to take to the festival ... we are setting up tomorrow night! I will be taking most of my display pieces from the store so if you are at Scrapbook Queens on the weekend - my product and class project samples will be in Streetsville so you will have to "buzz" over to visit us!!!

I was watching the SQ team pack up product this afternoon and it looks like there will be lots of show specials and demos. I'm planning on taking some things to work on ... so if you live in the area and have a chance to come see us ... we'll be at the Arena!

Have a great weekend!!!

Scrapfest in Kitchener ... oh what fun!

Monday, April 11, 2011

I have not been blogging much for the past two weeks ... I was so busy getting ready for Scrapfest in Kitchener last weekend that there was barely time to do anything else. Scrapfest is over now but I am still charged up after meeting so many wonderful people at the show. It was the first time for Scrapbook Queens to have a booth at a show so it was very exciting ... and a little overwhelming for all of us but we had a great time! I could not get over how many nice people there were to talk to ... both attending the show and exhibiting at the show ... it really was a lot of fun.

Here's a picture of our Booth on Friday night just before we started packing up for the evening ... thanks to Sue Sykes for taking the photo of our booth and this next one of us ...
This was our Scrapbook Queens "set up crew" ... from right to left ... {princess}Gabriella, {queen}Irena, {king} Joe, Deneen and myself. Thanks again Sue for taking these pictures ... we love your articles in Canadian Scrapbooker magazine!

Here's a shot that I took of my product display ... my glass charm necklace kits were a big hit as was my judy floor lamp with the floral shade. And as promised, I will include some additional pictures of the lamp in this post for everyone that was interested in taking pictures of it.

My digital "eat cake" kit on cd that I launched at Scrapfest along with my glass charm necklace kits are now for sale at Scrapbook Queens. I'll do another post later in the week about the digital kit! For anyone looking for my glass charm necklace tutorial you can find it here.
Here's a picture of my lamp showing the apron and some of the shade. I hung 24 different charms from the bottom of the shade to show some of my art.

We did a draw for one of my glass charm necklace classes at the show ... if you did not win the class you will have another chance to win one of my necklace kits if you follow Scrapbook & Cards Today magazine. I meet the magazine's publisher, Catherine Tachdjian at the show (she bought two of my charm necklace kits!) and I donated one for a giveaway on the Scrapbook & Cards Today blog. Good luck!!
Here is another shot of the lampshade and charms ... 
and another close up of the paper flowers and butterfly. So many people asked if I would do a workshop to make one of these shades ... it took me three nights to complete the shade and I really don't want to work out what it would cost me to reproduce it. But I am going to try to work on a project that will use the elements I created to decorate the shade on a smaller scale that can be made into a workshop. I have a few ideas that I think will work so once I have created a final piece I'll let you know more!
... one more pic ... this one is of the "brooch" that I added to the apron ... I created it with a couple of my vintage rhinestone pieces, some scraps of ribbon and a Tim Holtz crown. I just adore the Maya Road black organza and satin ribbons that I added to the apron ... they are two of my favourite ribbons right now and I have a feeling that they will be finding their way into a lot of my projects in the near future! 

That's all for now ... if you didn't visit us at Scrapfest on the weekend ... I think that Scrapbook Queens and I are going to be at another event in June and I will let you know more about that as the details unfold!
Have a great week!


reminder to self

Monday, September 20, 2010

I've been working on a bunch of scrapbooking projects the past few days ... collecting materials, looking through pictures and coming with with new ideas. I'm  mainly trying to work out classes to offer at Scrapbook Queens this fall but I also want to use this opportunity to create some new pieces to document my what my family has been doing for the past year and I want to create some funky things to use for holiday decorating and gift giving in the next few months.

 
I created this scrapbook page a few years ago ... I wrote a "memo to myself" at the bottom saying "don't forget it's the little details that really matter.  Don't let them pass you by.". I had no idea at the time that in 2 years I would be waiting to have brain surgery and wondering if I was going to have be around to see my children grow up.

I am so glad that my girls know that I love them. We have such a wonderful life and I'm so happy that I have found so many creative ways to document the little things that make us smile. I'm looking forward to spending a couple of days just creating!

dance as though no one is watching you
love as though you have never been hurt before
sing as though no on can hear you
live as though heaven is on earth

scrapbooking fever

Thursday, September 16, 2010

oh dear ... i think that i have "scrapbooking fever" right now ... can't stop thinking about scrapbooking and anything that will has to do with my scrapbooking supplies and tools ... i've got lots of doodles in my notebook for projects that I want to get to work on.

it all started last friday when one of the moms on my street came to our house and started talking about a new scrapbooking store that just opened ... and it is only 10 kms from us ... she also told me that they were just starting to look for instructors to run classes. so after thinking about it all weekend ... i spent most of the day monday going through my scrapbooking things putting together a little package of my work ... 
 
this is what it looks like ... i think that it's really cute ... and it co-ordinates with my "brand". I dropped the package off at the store on Tuesday ... and now ...  

well, i'm now an instructor at Scrapbook Queens!

i'm so excited ... i didn't sleep last night because my head is just spinning with ideas and i can't wait to get started planning projects and classes.  

i'll keep you posted on what i'm doing ... if you have ever taught or taken a creative course and have any suggestions to pass onto me about what you {liked} i'd love to hear your comments ... i want to make these classes fun and creative for everyone!

i also wanted to tell you about another thing that has been adding to my scrapbooking fever this week ... if you love digital scrapbooking you have to pop over to Designhouse Digital today for the most amazing "blog hop" ... 
they have a very large, very cool kit that can be downloaded for FREE ... all of the individual parts of the kit are downloaded on each of the 10 digital scrapbooking artists' blogs. you'll find tons of inspiration and lots of great designers to get you going ... but just let me warn you ... you may end up getting "the fever" too!

photography through the eyes of a child

Friday, July 16, 2010


This morning I was putting together a cd of photos to take to Costco for developing this afternoon ... a task that usually takes me a l-o-n-g time because I am known for always having a camera in hand and taking lots and LOTS of photos.

But this summer, I have noticed that I really have not taken many photos of our family and things that we are doing together. 

I'm not really sure why ... maybe because I haven't been scrapbooking as much as I use to ... maybe because I haven't felt like we were doing anything new or different. 

My daughter Robyn has been at a photography camp this week ... it's just a day camp ... nothing professional ... but she has been having a great time and everyday she has been coming home and showing me what she shot on her digital camera ... she is so excited about photography right now. 

This weekend we are going to the cottage. Both of the girls will have friends with them ...  including a couple of friends that have never been to the cottage. I'm going to take up some extra digital cameras and let the kids have fun shooting whatever they want ... I think that it will be entertaining and I'm looking forward to seeing what the kids photograph.

Robyn is going to a scrapbooking camp for a week in August ... who knows, maybe she will want to use the photos we take this weekend to camp to scrapbook about! 


By the way, the two photos are of a picture that is displayed in Robyn's cottage bedroom. I made it for her five years ago. The picture is of Robyn when she was 5 years old sitting on a wire swing wearing her favourite "tutu" tee shirt ... she was twirling in the swing unaware that I was taking her photo. She always tell me how much she loves that photo of her (and I am still not allowed to give away the tutu tee shirt) ...  I will never forget that day we spent together.


digital scrapbooking with Jan Hosford

Thursday, June 3, 2010


I've been on my computer this morning playing with a couple of new digital scrapbooking kits that I just received yesterday from Jan Hosford. Jan is a very talented artist that I have had the pleasure of connecting with online this week during my "flying lessons" ecourse with Kelly Rae Roberts. As soon as I saw the kits I knew what I wanted to do with them and here's a little story about my completed page ...

Our first cottage had a playhouse that my husband built when our first daughter was 2 years old (she is 16 now). He wired it for lights and a couple of electrical outlets so that we could be in there on raining days during the summer. I decorated the playhouse by painting flowers on the walls and floor. I sewed curtains and cushions for the child size wicker furniture from of old quilts. I still remember the weekend that I spent outdoors painting the wooden table and chairs with a plaid design and flowers. We spent a lot of time in that playhouse ... drawing and making crafts, reading story books and having lemonade tea parties with stuffed teddy bears and rabbits. Both of my daughters loved that playhouse for so many years. I was so happy when we sold the cottage to very close friends of ours a few years ago because they had small children and I knew that they would enjoy the playhouse too. Our friends have now outgrown the cottage and are getting ready to move out. I'm not sure why but it suddenly hit me this week that we are not going to be able to visit the playhouse anymore. The new owner of the cottage is a single guy so I'm thinking that he really isn't going to want a girl's playhouse in the backyard! Oh well ... we will always have our memories!

Here's the two kits from Jan Hosford at The Digichick shop that I used to create this page ....


... I think that I will send this off to Costco for printing! Have a great day!

nyc memory book ... thanks to Michaels Stores

Tuesday, June 1, 2010


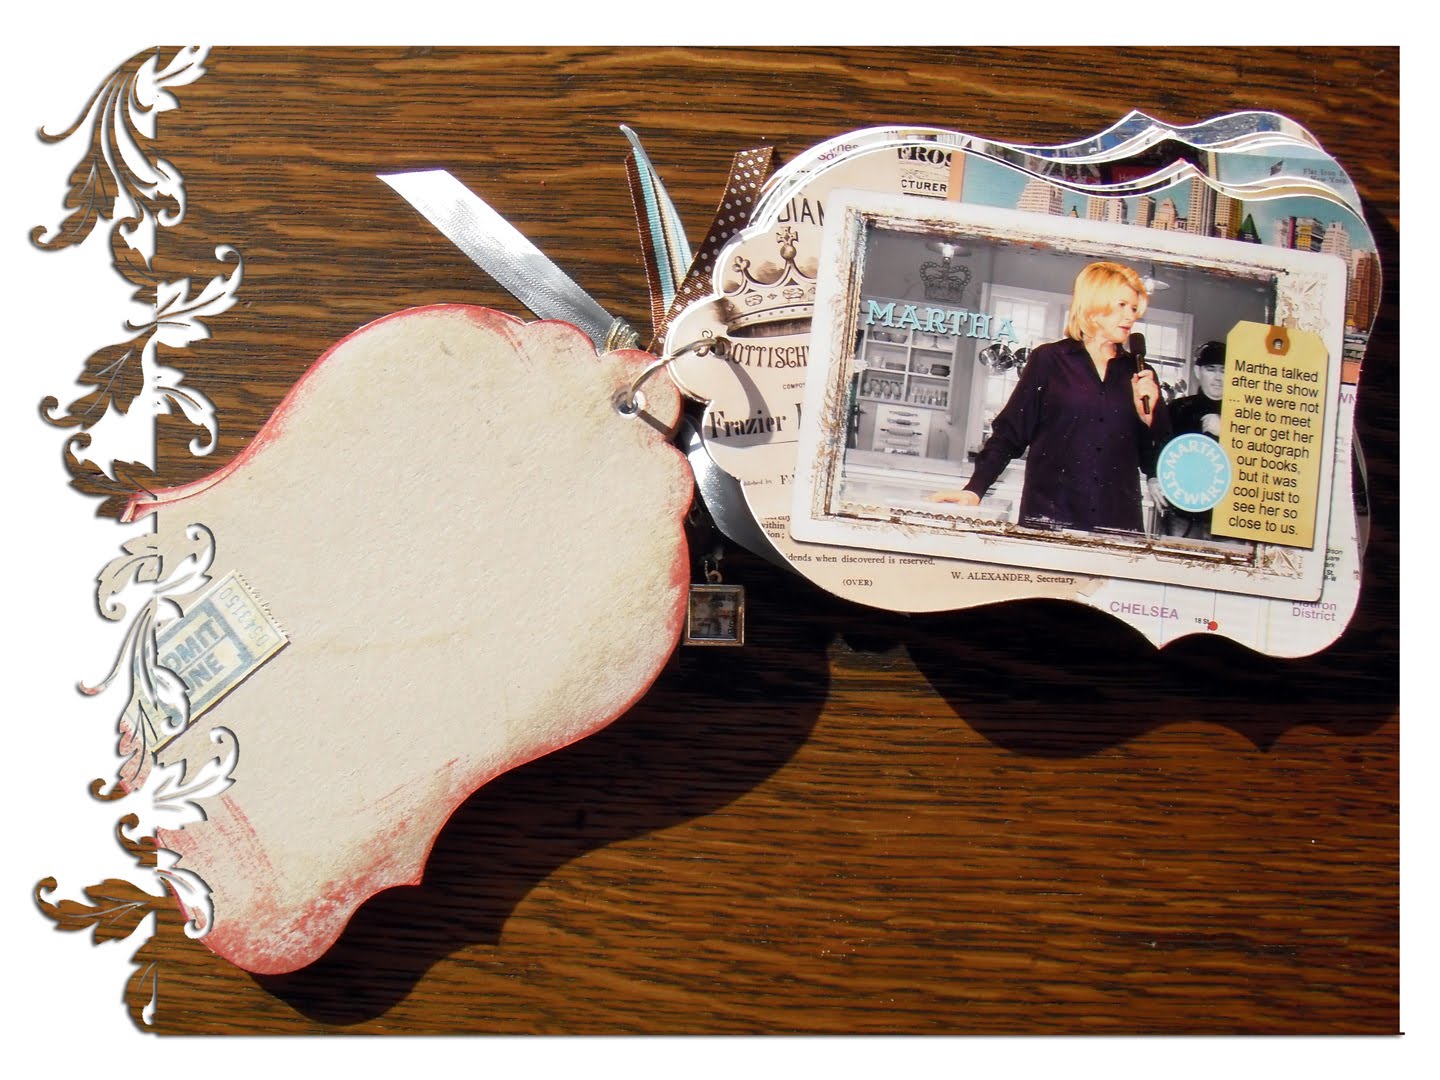
I have finally finished my three nyc memory books ... I made three copies - one for my dear friend Karen, who received hers the other weekend, one for me and one to send to Michaels  head office to thank them for sending me to New York to see the Martha Stewart Show.


I created all of the pages digitally with a combination of my pictures, nyc maps, vintage papers & postcards, and other digital elements that I created or bought on line ...

 
I left space on the back of each page so that Karen and I could each write our own handwritten notes about the trip ... I used BasicGrey chipboard books as the base ...


I tied a bunch of ribbons to the binder ring and added a little jewellery chain that I made ... I added a piece of the nyc subway map to one piece ...


I'm ready to send this off in the mail tomorrow. Thanks again Michaels ... we had a wonderful time!!!

memories in a bottle

Thursday, May 20, 2010


I've been a scrapbooker for years ... even before the scrapbooking "craze" started well over 10 years ago ... but I'm not what you would call a traditional scrapbooker. Oh yes, I have tons of {unfinished} albums, boxes of patterned and plain 12x12 papers, scrapbooking tools and supplies ... but I only scrapbook when I feel like it and I tend to think outside of the "page" a lot.

My "memory bottles" are one of my favourite ways to keep track of  our family holidays on the beach. They are super easy to make and I can incorporate some of our beach treasures into the jar so I reduce the amount of beach glass, shells and rocks that collect in drawers and closets around the house and the cottage.

The first picture is an example of the memory bottle that I made after our trip to St. Lucia this winter. This is a closer look at the bottle ...


Here's what you need to make these yourself:

1. a bottle. I use new or old bottles ... just keep in mind that you will want to see through one side of the glass and the mouth at the top has to be big enough to fit a small photo.
2. sand. In this example, I used beach sand from our cottage as the base ... you don't have to use sand but I do find that sand or something similar (small beads, glitter, etc) help to keep the picture in place before you start adding your other elements to the bottle.
3. picture. Before you start cutting out pictures, cut a piece of blank paper to figure out what will size photo will fit inside the bottle and that you can get it through the mouth of the bottle. If the picture you want to use isn't the right size and you have photo editing software on your computer, resize the photo to fit before printing and cutting.
4. tag and ribbon. I use tags to decorate the outside of the bottle and to write something about what is inside. I also like to add charms, beads and stamps to the tags if they have some connection to the memory. Assorted ribbons tied around the top of the bottle top add colour and tie into my decor for display.
5. stuff. This is the fun stuff inside the bottle. Use anything that you want to go with the memory ... shells, beach glass, ticket stubs, beer bottle caps, whatever! You may need to use chopsticks or something similar to move items around in the bottle once your photo is in position.


This is a back view of my memory bottle from St. Lucia ... you can see that I added text to the back of the tag (the front features a stamp from St. Lucia). I've positioned shells and pebbles in behind the photo to keep the photo upright. You could add a second photo to the back ... I don't because I place these bottles on a shelf and you can't see the back.

There is no right or wrong way to put these together ... they don't have to be beach or holiday themed ... just have fun with them and get creative. Make one or make a bunch of memories.

 
You could make these memory bottles with the kids too ... they'd make great gifts for father's day or for a favourite teacher at the end of the school year!