DIY cork coasters for the holidays

Thursday, November 10, 2016

diy cork coasters | Lorrie Everitt Studio

Looking for a simple holiday gift project? How about these custom holiday coasters.

diy cork coasters | Lorrie Everitt Studio

I created these four coasters in less than an hour using digital graphics and a font that I purchased from Creative Market. I put one initial on each coaster design so everyone in my family would have their own coaster.

diy cork coasters | Lorrie Everitt Studio

Here's what you will need to create these yourself: cork coasters, laminating sheets, scissors, pencil, glue and a glass (a little smaller than your coasters).

diy cork coasters | Lorrie Everitt Studio

After designing each coaster, I printed them out on card stock. Before laminating the paper, you need to cut out the designs into circles that are slightly smaller than your cork coaster. I used a drinking glass as a template to draw circles with a pencil around my art.

diy cork coasters | Lorrie Everitt Studio

Follow the instruction on your self laminating sheets to laminate the paper circles. The next step is to cut out the laminated coaster designs. Keep in mind as you are cutting that you need to leave a clear border around each circle so that the paper remains laminated.

diy cork coasters | Lorrie Everitt Studio

The last step is to glue your laminated art on to the cork coasters.

I created these holiday coasters as part of a #makefulchallenge. I received the cork coasters in the mail from Makeful and was instructed to embellish them any way I wanted. You can see my entry into the contest here.

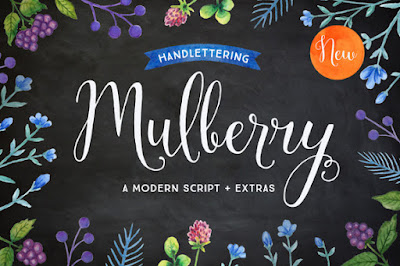
The holiday graphics bundle from Creative Market is called Holiday Happiness by Lisa Glanz and the font is called Mulberry .
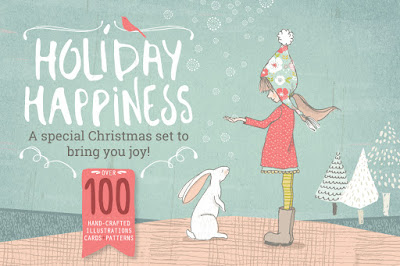
Holiday Happiness digital graphics bundle by Lisa Glanz on Creative Market

Mulberry font from Creative Market

You could also create these coasters using photographs, wrapping paper or decorative scrapbooking papers. Stay tuned for more holiday gift giving and decorating projects.


diy cork coasters | Lorrie Everitt Studio

Mingle Magazine feature - Boho styled wedding

Wednesday, November 2, 2016

autumn Mingle magazine - entertaining inspiration

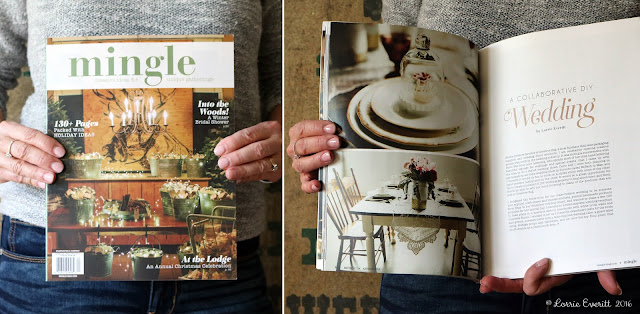
I am so happy to finally post about a styled boho wedding shoot I did earlier this year with a talented team of local wedding vendors. The styled shoot is currently featured in the autumn 2016 Mingle Magazine.

Mingle is full of creative ideas for unique gatherings. I'm all over the fall and holiday party ideas - there's a ladies wrap night and flower arranging lunch, cookie swap party, holiday prep party, santa's workshop party and hot chocolate and ice skating party. Oh my, I wish I was at all of these gatherings! 

autumn Mingle magazine - entertaining inspiration for creative get togethers

Our Boho wedding was featured on 7 pages (yeah!) but there are so many more photos and details that were not shown in the magazine that I'd like to share. So here you go ...

boho wedding inspiration | Lorrie Everitt Studio

Our photographer, Kat Williams from Attakat did such an amazing job. We were at The Warehouse Event Venue in Downsview Park. The white walls and polished concrete floor at the venue were like a blank canvas just waiting for us to make it our own. Toni from Confetti and Bows rents her huge 8' by 8' wall of handmade paper flowers and we used it to create the most amazing photo booth area.

boho wedding inspiration | Lorrie Everitt Studio

Doris from Love Lettering created the mirror/sign for the photo booth. Doris found the mirror in the trash and rescued it from a landfill. Doris is also the creative genius and maker behind PosecardsTM  - our awesome photo props.

boho wedding inspiration | Lorrie Everitt Studio

All of the wedding cakes and sweets were created by Caitlin from Cakelaine. Doris did the custom hand lettering on the chalkboard And if you are looking for guidance on how to easily add hand lettering onto chalkboards you can find my DIY tutorial here

boho wedding inspiration | Lorrie Everitt Studio

The paper lanterns, balloons, chalkboards, cake stands and cake topper were all from Creative Bag. I added the gold details to the "best day ever" cake topper and you can find my DIY tutorial here.

boho wedding inspiration | Lorrie Everitt Studio

These adorable Sugargirlee latex balloons from Creative Bag and are not only cute they are made in Canada and earth-friendly. The balloons will decompose as fast as an oak leaf in your backyard. I added white and gold tassels to one of the large hellium filled balloons.

boho wedding inspiration | Lorrie Everitt Studio

The paper goods were all created by Alicia from Alicia's Infinity. Alicia's beautiful watercolour illustrations were the inspiration behind all of the wedding details.

boho wedding inspiration | Lorrie Everitt Studio

The Perfect Table supplied all of our vintage and specialty tabletop and accent pieces. You can find the lace table runners here.

boho wedding inspiration | Lorrie Everitt Studio

Alicia also designs and creates custom wedding jewellery. I love this necklace that she created featuring one of her watercolour illustrations that match the wedding stationery. The necklace was packaged in a kraft jewellery box that was hand lettered by Doris for a Bridesmaid proposal gift.

boho wedding inspiration | Lorrie Everitt Studio

Our gift table set up featured a clear wishing well that Doris embellished with her beautiful hand lettering and illustrations.

boho wedding inspiration | Lorrie Everitt Studio

I created this vignette beside the wishing well with a something old, something new, something borrowed and something blue theme. A vintage bride and groom where placed inside a new glass apothecary container. And a borrowed family wedding photo were embellished with a blue ribbon and displayed in this new vintage inspired card holder.

boho wedding inspiration | Lorrie Everitt Studio

All of our beautiful floral arrangements were created by Jessica from Periwinkle Flowers. I added gold paint to white hobnail milk glass vases from Creative Bag

succulent favour in love mason jar | Lorrie Everitt Studio

I also have to thank my daughter Haley for being our "hand model" for the shoot and agreeing to wear whatever I put on her for the photo styling. This is the only picture that you can see more than her hands. 

I keep seeing the Autumn Mingle magazine in Michael's, Indigo and Whole Foods and I have to admit it makes me smile every time I see it!


DIY holiday apron

Sunday, September 25, 2016

diy holiday apron - Lorrie Everitt Studio

I am taking part in the latest Makeful Challenge using a white apron that I received in the mail. Call me old fashion but I still love receiving notes and packages in the mail. When I received my apron a couple of weeks ago I knew that I would need to keep my project simple so I could fit it into my busy work schedule. 

Here's how I created my apron. The apron challenge was inspired by Jacob's Creek Wines. I decided to add a cute holiday saying and some simple illustrations using a paint pen.

diy holiday apron - Lorrie Everitt Studio

My first step was to draw out my lettering and cooking utensil illustrations to scale on plain paper. And yes, I do consider a cork screw to be a cooking utensil, although the wine I open does not always get added to the food. 

Then I cut out the words and illustrations so I could move them around and figure out where I wanted everything to be on the apron. I liked the idea of the utensils popping out of the pockets and I was able to arrange them so they didn't get too close to the saying at the top.

diy holiday apron - Lorrie Everitt Studio

I traced my design onto the apron using a black Sharpie paint pen. As you can see above, it was easy to see through the apron material and trace the  design. I taped the papers and apron to my working surface so they wouldn't move as I worked.

diy holiday apron - Lorrie Everitt Studio

Here's a close up of the finished design. 

Tip: If you don't feel that your hand lettering is good enough, you can type your words out on your computer using whatever fonts you would like. Just remember to size your lettering so it  will fit the space on your apron. 

diy holiday apron - Lorrie Everitt Studio

You can find my apron project on my Makeful profile page. All of the apron challenge projects will be up and live tomorrow. 


Use up your craft stash inspiration - part two.

Sunday, August 21, 2016


I can't believe how long I have hung onto some of my crafting supplies. Take for example a jar full of colourful clamp file paper clips and an old potato masher. They have been in my cottage crafting stash for over ten years. 


I know that I have had these items for at least ten years because it was in 2006 that I created the potato masher photo holder (above). I purchase two potato mashers at a garage sale near our cottage and I always intended to make the second potato masher into a recipe card holder. 


So this weekend, I finally got around to making my recipe card holder. It took me about ten minutes to make and I'm going to show you how I did it. 

Here's what you will need: an old potato masher with a wood handle, a metal clamp file paper clip, a 1/4" screw, a screw driver and a pair of pliers.


Step One. Pre-drill a small hole in the handle of the potato masher so it will be easier to add the screw. I made a quick hole using a nail and hammer.


Step Two. Using a pair of pliers, bend open one side of the metal clamp file paper clip as shown above. Bend it just enough so you can add the screw into one of the holes.


Step Three. Screw the metal clamp file paper clip in place on the wood handle. Bend the clamp file paper clip back into shape using the pliers and that's it ... you're done! 


Now I am thinking that it would be fun to make a few more of these to use for entertaining. They would make interesting sign holders for a food bar.


Here's one more photo so you can see what they look like from the side. By the way, I glued my photos and recipe cards to drink coasters so they will not bend easily. 


Use up your craft stash inspiration - part one.

Thursday, July 21, 2016


Like most craftaholics, I have boxes of crafting supplies taking up space in my home. I have hoarded so many supplies over years that I have decided it's time to start using up products in my craft stash. It's time to make some of those inspirational projects that I've pinned, ripped out of a magazine or sketched out in one of my notebooks. It's time to hold off from purchasing new crafting supplies for a while. Well, let me clarify that, I may need to purchase more glue, or a few new colours of paint, or if I win the lottery, I will have to purchase the Circut Explore machine  ... but other than that, no new crafting supplies. 


These funky clothespins are an example of one of the projects that I have done in the past to use up some of my crafting supplies. My sister-in-law, Kerry, and I spent an evening with a pile of crafting materials (and maybe a bottle of wine) and came up with these.


We used plain clothespins, scrapbooking paper (scraps) assorted resin flowers, a paper cutter, scissors and glue.


I have packed up a couple of boxes with supplies from my craft stash to take to the cottage this weekend. I am looking forward to some down time over the next few weeks to be able to craft with my family and friends. I'll be posting pictures of our projects on Instagram and when I am able, I will post more ideas on the blog to hopefully inspire you to use up your craft stash.


A little bit about me and my Facebook Live video with Makeful

Thursday, June 30, 2016


Hello there! Today I thought that I'd do a different post and introduce myself since I have not really done this before. 

If you have not met me in before you most likely don't know that I  love to craft, make things and take photos (lots of photos). I love to be creative, it's the first word that I have used to describe myself in any job interview I have ever been in. 

I'm also from a generation that did not grow up with computers, cell phones and social media. Yes, if you start to do the math, you will realize that I was born sometime in the sixties. The earliest memory that I have about learning anything about computers was in high school, maybe grade 12, and we punched holes into a series of long cards and then feed them into a machine to solve math equations (at least that is what I think we were doing!) In my last year at Queen's University (1983),I signed up for a brand new course that was offered called "Computers in Society". In that course I heard theories about how computers were eventually going to change the world and how we do things. All I got out of that class was a husband. No, really, for real - that is where my husband and I first met. He followed me home from class one day and asked to borrow my class notes as an excuse to talk to me. After university I studied Graphic Design at George Brown College and again, we did have computers. We learned how to hand letter use Letraset (which was basically sheets of rub on letters). I had been working as a Creative Director for more than 15 years when I decided to take six months off so I could go back to school and learn how to use Illustrator, Photoshop and Indesign. I still remember when cell phones cell phones were the new "big thing" although if my memory is correct then they were about the same size as a Grande cup from Starbucks.

I'm trying to be social. Yes, I do have Facebook, Twitter, Pinterest and Instagram accounts but I'm not on them 24/7. Other than maybe Pinterest, I don't consider my self an "expert" in the area of social media. I started my Pinterest account when Pinterest was pretty much unknown - you had to get an invitation to have an account! I still remember getting personal emails in the first few months from Pinteret asking me questions like what could they do to improve the site and how could they make it more user friendly. I just signed up for an Instagram account last fall. Everyone kept telling me I should be on it Instagram because it's so visual and "me" but I resisted for so long because I thought that it was going to take away from what little me time I have already.  My teenage daughter gave me her old ipad and helped me to get set up on Instagram, and to be honest, I'm a little obsessed with it right now. I'm sure the novelty will wear off in a year or two (maybe). I am on Facebook but mostly just to see what family and  friends are doing. I don't post on Facebook very often and most likely should but then that would take away from my time to craft and make things. And I'd really much rather be making things.

When some of the ladies at Makeful asked me if I was interested in doing a Facebook Live video with them as part of the new Maker's Challenge using a cell phone case I said sure! I had NO IDEA what Facebook Live was. And even after looking at some videos of past Facebook Live videos, I still honestly thought we'd be shooting the video they would edit it and then we'd play it on Facebook later in the day. Nope. I was wrong. Live is Live. No do overs. Just relax and do it.

We shot the Makeful Challenge Facebook Live video yesterday morning. You can see it here. I have to be honest, I had so much fun doing it. I really did not know if people would tune in to watch it and connect with me as I was on camera working. But we did have an audience turn us on and the questions were awesome. I felt like we were all in the same room working on a project together - like a girls' night craft party (but without the wine!). 

If you love to craft as much as I do and you like to connect with other like minded creative people then you should join the Makeful community. I have met so many inspiring and talented people in the past year. People that I follow on social media (and they follow me), people that I feel that I can contact to ask questions or to work together on a project and people that I get together with for tea and now call my friends. And it's all because I've taken part in Makeful challenges, events and special projects like the Facebook Live video.

Have a great long weekend! Happy Canada Day here at home and Happy July 4th to my friends from the US. 

By the way, the photo above is the project that I created on the Facebook Live video.


Simple Daily DIY - twine challenge project

Wednesday, June 8, 2016


I'm taking part in the Simple Daily DIY challenge during the month of June. Have you heard about it? The first challenge was all about twine/jute. I created this unique photo display box using supplies I already had on hand.


My supplies - a wood shadow box (mine was purchased at Ikea a number of years ago), a birch branch wood slice (my Dad cut a bunch of these for me but they are easy to find), a screw eyelet, twine/jute, a photo and scrapbook paper. 


I measured the top of my shadow box to find the centre and drilled a hole in that spot. The hole was just large enough so I could feed the two ends of the twine through it. 

I left my shadow box with the natural unfinished wood but you could easily paint it at this point if you wanted to. 


I used a round paper punch to crop an old family photo so it would fit on my birch branch slice. I added the screw eyelet to the top of the birch slice and then glued the photo onto the birch slice so it would hang straight.


To suspend the branch slice in the box: 
1. centre a long piece of twine through the screw eyelet and tie a quick knot close to the screw eyelet, 2. feed both ends of the twine through the hole of the shadow box, 3. figure out where you want the branch slice to hang inside the box and tie a knot at the top of the box to keep it in place. I tied a bow at the top of the box and trimmed the twine to finish.

Note: As you are working with the placement of the branch slice inside the box, you may need to adjust the angle of the screw eyelet so that the branch faces forward. Just give it a little twist until you are happy with the placement.


I cut a  piece of scrapbook paper to fit the back of the shadow box to complete.

 I used a kraft and gold foil dot pattern to match my home decor. Instead of using a pattern paper background I could have added another photo as a background. For example, a scenic water/sky photo would have added to the boating theme and complimented the colours in my family photo. Another idea is to add sand or beach glass inside the bottom of the shadow box.

If you try this project I'd love to see what you made! Add your own spin to make it your own. I'm on Instragram and you can tag me at @lorrieeveritt or #lorrieeverittstudio. 

 You can view Sustain My Craft Habit's YouTube video here to find out more about the Simple Daily DIY Challenge.