Saturday, December 14, 2013


chalkboard bunting - {free} twenty thirteen and fourteen download | Lorrie Everitt

In my last blog post I showed you how to create your own chalkboard bunting using canvas banners, chalkboard paint and chalk markers. Today I'm going to give you the {free} download for the "twenty thirteen" graphics I used on my holiday bunting. 

I added my twenty thirteen chalkboard bunting to one of my fireplace mantle displays by tying it onto an antique frame. I used lots of white satin ribbon and wrapped it around the frame for a very casual look. 

chalkboard bunting - {free} twenty thirteen and fourteen download | Lorrie Everitt

I really dislike the fireplace mantle in our living room. It's on my list to change ... someday. I painted three antique frames in decorator's white to match our fireplace and leaned them against the wall for my display. I think that the style of the frames compliment the (ugly little) wood molding on the fireplace.

chalkboard bunting - {free} twenty thirteen and fourteen download | Lorrie Everitt

My mantle was pretty simple to pull together ... three white vintage frames (only one was decorated with bunting and a special ornament), pre-lit garland, burlap ribbon and a large letter "E".

As I was creating the download for the "twenty thirteen" graphics I was thinking that this bunting would be great for a New Years Eve party ... so I add "fourteen"! You can see my tutorial for making the chalkboard bunting on this post.


If you make a "twenty fourteen" bunting to use for a New Year Eve's party please let me know! I'd love to see pictures!


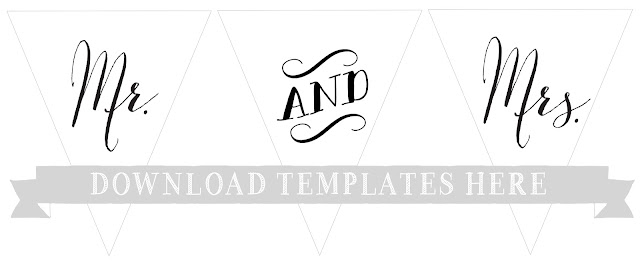
chalkboard bunting tutorial and free "Mr. & Mrs." download

Friday, November 22, 2013

chalkboard bunting tutorial by Lorrie Everitt | lorrieeverittstudio.blogspot.ca

Chalkboard + Love = Wedding {bunting}

Planning a wedding and looking for some diy ideas to personalize your special day? Here's a fun little project that you can make in an afternoon. Turn plain canvas bunting into a chalkboard bunting using Martha Stewart's chalkboard paint. Here's how I created mine ... 
chalkboard bunting tutorial by Lorrie Everitt | lorrieeverittstudio.blogspot.ca

Gather your supplies: 3 canvas or linen banners, Martha Stewart’sblack multi-surface chalkboard acrylic craft paint, foam brush, chalk, chalkboard marker, white tracing paper, ribbon or twine, paint brush optional.

Note: my template download was created to fit a large triangle canvas bunting shape - you may need to adjust the size of the template to fit your canvas bunting.

Step 1. Paint both sides of each canvas banner with two or three coats of black chalkboard paint. Allow to dry completely at least 1 hour between coats.

Step 2. Allow paint to cure completely at least 24 hours. Condition chalkboard canvas by lightly rubbing chalk over the surface and wipe with a soft, dry cloth to remove chalk.

Step 3. Download file for type and print out on regular paper. Cut out triangular shapes and place the type templates over each banner. Place tracing paper between the template and canvas banner. Trace the lettering with a pencil.

Step 4. Use a chalk marker to retrace the lettering on each banner. Chalk markers are available in a variety of different sizes. I wanted my chalk lettering to look like calligraphy so I used used a paint brush to apply the liquid chalk. Simply create a “puddle” of chalk liquid by pressing down on the chalkmarker on a smooth surface. You can see my tutorial to do this here.

Step 5. Tie ribbon or twine of your choice to each triangle to create the bunting.

The reason that I like to use chalk markers is that it can be removed with water if you make a mistake while you are working. Once the ink is dry it will not rub off when you touch it.  

https://sites.google.com/site/creativbagblog/holiday-2013/chalkbunting_mr%26mrs.pdf?attredirects=0&d=1

Download the template here.

Looking for more diy bunting ideas for your wedding? Check out this post from Weddingbells! It features four more of my diy bunting projects. 

http://www.weddingbells.ca/diy-wedding-ideas/6-easy-diy-wedding-bunting-projects-free-templates/?utm_medium=email&utm_campaign=Weddingbells+Newsletter+November+22+2013&utm_content=Weddingbells+Newsletter+November+22+2013+CID_80ae3ac2be11fb56b9b135042910639a&utm_source=Newsletters&utm_term=6%20Easy%20DIY%20Wedding%20Bunting%20Projects%20%20Free%20Templates


Maybe you are not planning a wedding  but love the idea of chalkboard bunting? Here's another idea for the chalkboard bunting!
chalkboard bunting tutorial by Lorrie Everitt | lorrieeverittstudio.blogspot.ca
I designed this bunting to use in a photograph with my daughters for our holiday cards. It is going to be hanging on the fireplace mantle in our family room very soon! 
I will share the template for the words "twenty thirteen" in my next post if you are interested. 


Yummy candy kabobs you can create yourself for party treats or favors

Friday, October 25, 2013

create candy kabobs with or for the kids | Lorrie Everitt Studio

Looking for a fun little treat to make with or for your kids? How about some candy kabobs? 

I created these using striped paper straws, bamboo skewers and candies that I picked up at the Dollar Store and The Bulk Barn. They are super easy to make so little (and big) helpers will want to get in on the action. Of course your helpers will want to eat up any left over candies so clean up will be a breeze!

Here's how I made mine:
tutorial: create easy candy kabobs with or for the kids | Lorrie Everitt Studio
Gather your supplies: bamboo skewers with ball end, paper straws, assorted soft candies.

Step one -  Cut the paper straws to the length you want to cover the bamboo skewer keeping in mine that you can only add candy to the exposed bamboo skewer. If you don't want to add a lot of candies like mine ... cut your straws into 3" pieces.

Step two - I folded two pieces of ribbon candy as shown above. I added them one piece at a time by inserting the skewer into the middle of the folded candy.

Step three - I finished by adding two candies at the top to completely cover the bamboo skewer.

Make as many of these as you please and present them in a glass container so that everyone can see the striped straws. 

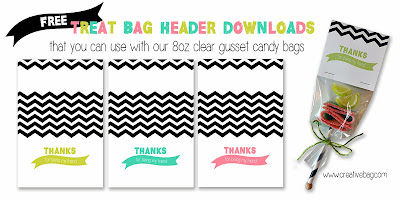
If you are thinking about using these as party favors for guests to take home ... you can find some packaging ideas and my free download for candy bag headers on the Creative Bag Blog in this post and this post.

free download and packaging ideas for candy kabobs | Lorrie Everitt Studio


Do you love Pinterest as much as I do? Interested in winning a prize package of diy products to create a bunch of canvas gift bags for Christmas that I have personally put together? 
Then check out this post for all of the details! I'm hosting a "Pin It To Win" contest over at Creative Bag this week.
Pin it to Win contest at Creative Bag

You have until end of the day on October 27th, 2013 to enter.

Good luck and I hope that you have a creative weekend!

Chalkboard love ... get organized using chalkboard signs and labels!

Wednesday, September 4, 2013

Do you have a passion for all things chalkboard right now? I do! I have made a number of projects for Creative Bag over the past few months with all of their amazing new chalkboard products. During our last few days at the cottage this summer we were blessed with a few rain days (yeah rain days ... an excuse to stay inside and spend time crafting) and I ended up reorganizing my cottage craft supplies using a bunch of my recent chalkboard purchases.
chalkboard inspiration from Lorrie Everitt Studio | lorrieeverittstudio.blogspot.ca
I picked up the metal buckets in my craft cabinets a number of years ago from the dollar store. I was using tags with strings on the bucket handles to organize the items stored in the buckets but the tags would flip around every time I opened the cabinet doors and I was just tired of dealing with them any more. These mini chalkboard signs with clip backs from Creative Bag are perfect for helping me to organize my supplies. I used a fine chalk marker to write on each sign. I like chalk markers for projects like this because the words will not rub off easily every time I touch the sign. You can use water to wipe the marker and re write so it is possible to change your mind ... for a while. Once the marker has dried and set it does not wipe clean with water ... but you can always add a fresh coat of chalkboard paint yourself and start again!
chalkboard inspiration from Lorrie Everitt Studio | lorrieeverittstudio.blogspot.ca

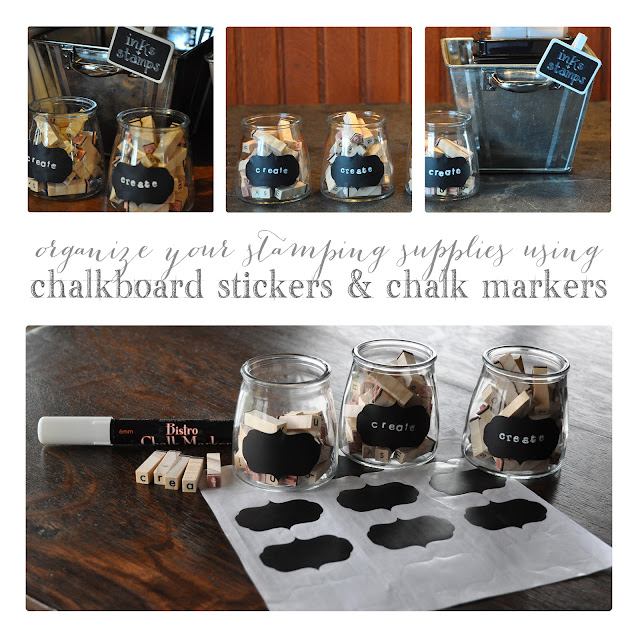
I also used these adorable chalkboard labels from Creative Bag to organize some of my other supplies in vintage glass bottles. I love how my mini letter stamps are now organized and ready to be used. I picked up a bunch of these mini stamps in different fonts a long time ago and was struggling to find a way to store them. The stamps were packaged in individual boxes by font and I knew that they would always be out of sight, out of mind and never used unless I could find a way to store them so that it would be easy to see at a glance. I used the stamps and a chalk marker to "stamp" directly onto the chalk labels. I can tell what font is in each container by simply looking at the label. 

If you would like to see how I used the chalk markers with my stamps you can see my full tutorial here on the Creative Bag blog.

Looking for some awesome chalk fonts to use for digital scrapbooking or crafting projects? Here's ten of my favorites and all are free to download!

10 chalkboard fonts from Lorrie Everitt Studio | lorrieeverittstudio.blogspot.ca

 sign handwriting 

follow Lorrie Everitt on Pinterest at pinterest.com/lorrieeveritt/
Looking for more blackboard inspiration? Follow me on Pinterest!

The kids are back to school. I hope that you can find some time this week to have a little "me time" and get creative with your own chalkboard projects!

diy crochet lace denim shorts

Tuesday, June 4, 2013

Are you ready for summer? I'm not. But after seeing all of the new crochet lace ribbons at Creative Bag this week I'm actually looking forward to wearing shorts again ... shorts with lace details that is.

We added lace to a number of my daughter's shorts last year. It was super easy to do and  a great way to spend a few raining days at the cottage. We added lace in different widths to different areas of the shorts - pockets, hem, waist band. You can see in the photos above that we added a small band of lace to the front pockets and a larger band of lace to the hem. There is no right or wrong way to do this and if you need inspiration for where to place the lace just check out your favourite denim retailers for ideas.

I just bought some of the ivory crochet lace this week at Creative Bag. After I finish updating a pair of my denim shorts I am going to figure out how to make a clip using the lace for my youngest daughter's hair. She bought a beautiful lace dress from Anthropologie to wear to her grade 8 grad and I have noticed that she has been pinning hair styles with lace bow hair clips. If I come up with something worth sharing I'll show you what we end up doing at the end of the month. 

It's a banner day - my submission!

Friday, May 17, 2013

"Start everyday like it's your birthday" banner by Lorrie Everitt
I read about an exhibition on Oh My! Handmade Goodness this week that inspired me.

The exhibition is called "It's a Banner Day" and it is hosted by Hygienic resident artist, Patti Murphy and local artist Kat Murphy. Patti and Kat have invited artists - designers, photographers and artists from all over the world - to participate in this exhibit. Everyone is asked to create a banner that represents an artful message of hope, good news, happiness and/or success. The banners will all be strung together to decorate the gallery. 

This is my submission!

My banner started out as a graphic design that I created on my computer using a mix of fonts, one of my favourite bird illustrations and photo that I took of my chalkboard to use as the background. I printed the completed graphics onto professional photo paper and was prepared to stop there because I have so much on the go with work, family and volunteer projects right now. But after cutting out my printed banner and looking at the simple one dimensional banner, my "mixed media" side took over and I lost all control. The next thing I knew, I was pulling mixed media supplies out of the cabinets in my studio. Glue, brushes, boxes of paper, scraps of vintage and new ribbons, jars of coloured buttons, and spools of sewing threads were littered all over my table in a matter of minutes. 

Everything just seemed to fall into place and an few hours later as I was packaging up my completed submission. I realized when I was driving to the post office that the extra time I spent on this project made me feel happy. It was as if I had spent an afternoon at the spa getting pampered. I felt wonderful, relaxed and ready to dive into my "to do list".  

If you are interested in finding out more about this exhibition you can find it here on the "It's a Banner Day" website.


If you are thinking about submitting a banner yourself ... there's still time! You can get all of the details regarding submissions and to download the templates here

It's a Banner Day Exhibition with artists Patti Murphy and Kat Murphy.
If you are looking for more of my project ideas don't forget that I also blog for Creative Bag.
I just posted some free downloads there that can be used for wedding and party packaging projects. 

Resin Flower Love {at an incredible price}

Friday, March 8, 2013

Resin flowers are one of my favourite elements to add to jewellery, handmade cards, gift wrapping and home decor projects. I just made 8 large rose resin flower rings for some of my girlfriends. We are going to be together this weekend with our families and I thought that it would be a nice surprise for everyone to have matching rings. 

Creative Bag has all of their resin flowers on clearance for 10 cents a package. Depending on the size of flower they are packaged in four or six ... what a deal! You can see them online here but they will not last for long. If you live in Toronto, Mississauga or Pickering it's best to go to the store to see what is available. 

I bought a bunch of the pink resin flowers to put aside for a large party. I can use them on invitations, favors and other elements. I don't have a party planned right now but with two teenage girls I know that they will come into use at some point. 

Oh yeah, and this is how I packaged the resin flower rings. I used small canvas bags and stamped a design on each one. Baker's twine and cotton ribbon were used to attach the handmade gift tags to the canvas bags. All of these items are available at my new website  just pretty parties and of course at Creative Bag.