holiday gift giving

Monday, November 29, 2010

I can hardly believe that it is almost December ... what happened to November?
I've been so busy with so many different projects ... I really need to find some time to take pictures and start sharing. I have a bunch of freebies to add so keep posted for those soon.  Speaking of pictures ... I just bought a new camera and I seem to be going through a bit of a "learning curve" so I may not show a lot of photos to illustrate my how to's for a while. Hopefully a few good pictures will be enough. 

I just finished making my Christmas cards (70 of them) and I'm hoping to started writing inside and addressing them all by this weekend. I also designed the holiday cards for my husband's work and they are on the printing press as we speak ... can't wait to see the finished product!

I also decided to offer two more workshops in December ... I didn't think that I was going to have time but I've had a number of people ask me about projects for gift giving. So I've just added the details to my  class website . The classes are at Scrapbooking Queens and there is one this coming Sunday afternoon and another in a couple of weeks during the day while the kids are at school. We are going to make two of my charms, similar to the ones I sell on etsy and two gift containers, one is a small metal pail with a lid and the other is a metal gift card holder. Here's another picture of the projects ...

My hubby has done most of our Christmas shopping for us this year ... what a sweetie. There are a lot of gift cards so I'm going to be making a bunch of these gift containers to give as gifts myself this year.

I'll offer more classes in the new year but I haven't had time to work out all of the details yet. I really want to offer a couple of  introductory and intermediate mixed media collage workshops and I've got a great idea for a banner that I'm really excited about too. I recently designed the gift cards for Scrapbook Queens - they should be arriving in the store this week. The gift cards can be used for product in the store, crops and classes ... so they are great to ask for if you are interested in taking class and they are great to give if you want a friend or family member to take a class with you. Here's a sneak peak of my design ....
... this is the marketing piece that I made for the store to display. I can't take credit for the elements in the design ... I purchased a commercial licence for a digital kit to save time ... but the design is mine and I think that they are something that I'd like to see in my wallet!

Well that's all for now ... I'll post again this week with a holiday project that you can add to your tree.

BTW ... it's my baby brothers' (48th) birthday today ... I hope you had a great day Ted!!!


Michaels Holiday Contest

Friday, November 19, 2010

I'm so excited ... it's back again this year ... Michaels Holiday Crafting Contest! And I just entered the wall hanging (picture above) that I made as a gift for my daughter Robyn. I created a similar mixed media collage on a wooden canvas last weekend ... and it was my inspiration for making this piece. You see, as soon as I was finished making my original collage, my daughter Robyn told me that she loved it and wanted it for her room at the cottage. Making another one for the contest was easy and I now have another gift to check off my list!

 In case you didn't know about the Michaels contest - this is the second week of the contest - I think that it runs for 7 weeks. Every Monday there will be a new "challenge" and a chance to enter the contest. Michaels posts on facebook what three basic items have to be used in your project and you have until Sunday to create and upload your entry onto their facebook page.

They ask you to list your materials and how you made your project ... and I thought that I'd share with you here how I made my entry ... so here you go:


I started by glueing old book pages to the charger. Once it was dry ...
then I used acrylic paints and distressing inks to add some colour and antique the edges.
Then I used my scrapbook papers to create a design for the centre of the charger. I printed the words on my inkjet printer and left a space for the word "butterflies". The scrapbook papers were glued to the charger. I used an assortment of metal and sticker letters to spell out butterflies ... 
... I added a paper measuring tape, some lace and some Martha Stewart glitter to the inside rim of the charger. Next I used my brand new, handy dandy Martha Stewart butterfly paper punch to cut butterfly shapes from two-sided scrapbook papers ...


... I love this paper punch because you can use it anywhere on a piece of paper (not just the edges!). I scored each of the butterflies to make them a little more 3-D. Some butterflies got glitter and a few others got rhinestone bling ... little girls gotta have bling, right?!! I glued the butterflies on the charger ...

... as you can see this charger is not going to be used during Christmas dinner ... so I punched two holes at the top of the charger and added a velvet ribbon to hang.

If you click here it will take you to the Michaels facebook contest ... please click "like" if you want to vote for my project for this week's (November 15-21) challenge under the "winners and gallery" tab. There are weekly prizes for a $100 Michaels gift card (every week!) and a grand prize at the end for a crafting cruise with Jo Pearson! ... wouldn't that be cool to win?

Jo Pearson has a really cool video on how to decorate chargers that you can actually use on your table and you can see it right here!

Good luck everyone and let's get creative!

Locks of Love donation ... Luke and Kathy

Monday, November 1, 2010

Here's a little story that I wanted to share about a beautiful friend, Kathy, who was recently diagnosed with breast cancer and her very caring and loving godson, Luke who decided to cut his hair to raise money for cancer research and donate his hair to the Locks of Love.

Luke plays left wing with the University of Ontario Institute of Technology. Today I went to the university with Kathy and Luke's mom and sister to take pictures and cheer Luke on as he cut off his long blonde locks!
 ... this is Luke before the cut ...
... Kathy and Luke's Mom getting Luke's hair ready so it could be sent off to Locks of Love afterwards ...

... Kathy made the first cut ... followed by Luke's Mom, Breann (Luke's sister) and Marlin Muylaert (Luke's head coach) ...
... and here's the "after" picture!

Luke's hair was just about 12" when it was cut ... more than long enough to donate for a wig. Luke has been taking pledges for Cancer here and I believe that he has reached his goal of $3,000. Congrats Luke and Kathy!

Luke's hair cutting ceremony is on youtube ... you can see it here.

 For anyone in the area that is interested, the Super Boobie Fairy's are hosting their 5th annual  Crop for a Cure at Scrapbooking Queens this Friday. The 24 hour crop event is to support Breast Cancer research at Princess Margaret Hospital.
  

special class offer & printer display box instructions

Wednesday, October 27, 2010

Hello there and let me start off by saying thank you to everyone who stopped by for the grand opening of Scrapbook Queens on the weekend! I meet so many new people and was happy to see some familiar faces too! The store was busy all day. I received lots of feedback on my classes and future project ideas. I know that there will be a few mixed media workshops coming up after Christmas.

I had a lot of requests for my "charms" class at night so I've just added a class THIS FRIDAY NIGHT for anyone in the area that is interested in attending. There is a Friday night crop at the store from 6pm to midnight. I'm really excited because if you take my class you will be able to join the crop for no extra charge! The class will start at 6 and go for about 45 minutes. Our pieces will have to dry for almost 2 hours so you can work on your own projects at the crop. We'll get back together around 8ish and spend another hour completing our charms. These charms make cute teacher gifts and I'll have extra supplies on hand if you want to buy them from me to make additional charms in the class.

I also wanted to share with you my new jewellery holder ... I made it out of a old printer box. I originally designed it to store/display my earrings in my closet but I ended up using it to display my charms for the open house last week. Here's how I made it ...

I selected a couple of sheets of scrapbook paper .... I choose a black and white damask pattern. I carefully cut the paper to fit every opening in the printer's box. I measured every opening before cutting because I wanted the paper pattern to be repeated in the box and not every opening was the exact same size. If you use a solid paper you don't have to worry as much about reproducing the pattern but you will still have to measure the openings. Once I had all of the papers cut I used mod podge to glue the papers to the wood.

My next step was to add tiny screw eyes to each of the openings. I measured each opening and marked where I wanted the screweye to be placed ... then I used a drill to make a small hole so that the screweye would go in easily. When you add the screweyes make sure that you don't go through the back of the wood or you will mark the wall when you hang it up. You will also want to make sure that the screweyes are all set the same way.
I added small antique looking safety pins on each of the charms so I could hang them from the screweyes. If you use this to hang earrings that don't have post backs - they would just dangle from the screweyes!

Here's a couple of pictures from the opening at Scrapbook Queens last week ... you can see my printer box display on the table ...   
here's some of the croppers and another instructor, Karan talks about her classes ...
lots more cropping going on and Irena and Joe are busy behind the cash desk!
So many talented people in one space ... inspiring and fun!!!

Pumpkinfest

Friday, October 15, 2010


yippeee ... it's "Pumpkinfest" weekend and I'm so excited that my girls are still into fall fairs and family traditions. Pumpkinfest takes places in a small town near our cottage called Waterford. We have been going to this for over 10 years and we always attend on Saturday so that we can watch the parade. I found this amazing article today on taking Halloween photos, you can find it here, and it reminded me that I should get my camera batteries charged up today so that I'm ready tomorrow!


I was looking through last year's photos and I realized that I better look for Robyn's pumpkin hat ... not just because I know she will want to wear but if I don't find it today I will forget tomorrow and we'll have to buy a new one at the fair (if they still have them!).


Do you have any Halloween or fall traditions at your house? Let me know in the comments section ... I'd love to hear how other families spend their time together!


And for my studio friends ... this has been a busy "short" week for me because of the Thanksgiving holiday. Most of my time in my studio has been spent working on a website to promote my classes and workshops at Scrapbook Queens. The site went "live" yesterday although I'm still working on it and adding dates, etc. but at least it's a start! It's a free wix website (so easy to create if you are a beginner like me!) ... please check it out at www.wix.com/lorrieeveritt/studio and let me know what you think!

thankful

Friday, October 8, 2010

It's Thanksgiving weekend in Canada this weekend ... looking forward to getting away to the cottage and spending some time with my family. Lots planned but I'm hoping that we will have some down time so I've packed some of my jewellery supplies so that my daughters and I can make a couple of necklaces. I've been playing around making these glass tiles necklaces. I'm going to try to make some of them with scrabble tiles on the back too. They are really fun to make and I've just started to wear a couple of them to make sure that they don't fall apart with use (so far, so good!).
 I've used pictures of my family on a couple of them and now I'm experimenting with pictures of some of my artwork (Robyn likes the mixed media collage close up of her as an angel with a bird on her shoulder - I gave it to her for her birthday!) ...
... I'm also experimenting with some of my photos ... I really like this one that I took in Paris a few years ago. I think that I will give it to my friend Sue later today so that she can tell me how it wears too. 

After I have finished "wear testing" these necklaces, I think that I might make some of these to put in my esty shop ... they would make great teacher gifts for the holidays.

I hope that you have a wonderful Thanksgiving weekend!

 Before I go, I also wanted to share with you a picture of a beautiful necklace that was made for me a few months ago. My friend Karen wore a similar necklace when we went to New York in the spring. Karen's mother made it for her and when we got back from New York she created one for me too. I love it and it is very special to me ... especially right now ... Karen's mother, Gee, lost her battle with cancer earlier this week. She will be dearly missed.

fun and games

Monday, October 4, 2010


Hello there! Sorry I have not been posting as often as normal ... I've been "playing" for the past few weeks and I honestly have not had a lot of time to be on my computer ... but I'm back now and I thought that I'd share with you one of the projects that I created on the weekend. We are going to a Euchre/Halloween party at the end of the month and I've been wanting to make these cute little "what's trump" cubes for a while. I got the original idea from my friend Mary ... I'm not sure where she got the idea from but she had someone paint the cubes for her ... I'm reusing an old deck of cards that was missing some cards and sitting in my "junk" box.

So here's what you will need - playing cards (6 cards for each cube), wooden cube (I used 1 3/4" cubes but you can adjust the size as long as it isn't bigger than the cards), mod podge, a sponge brush, sandpaper or nail file, paper cutter or scissors, and a piece of acetate.

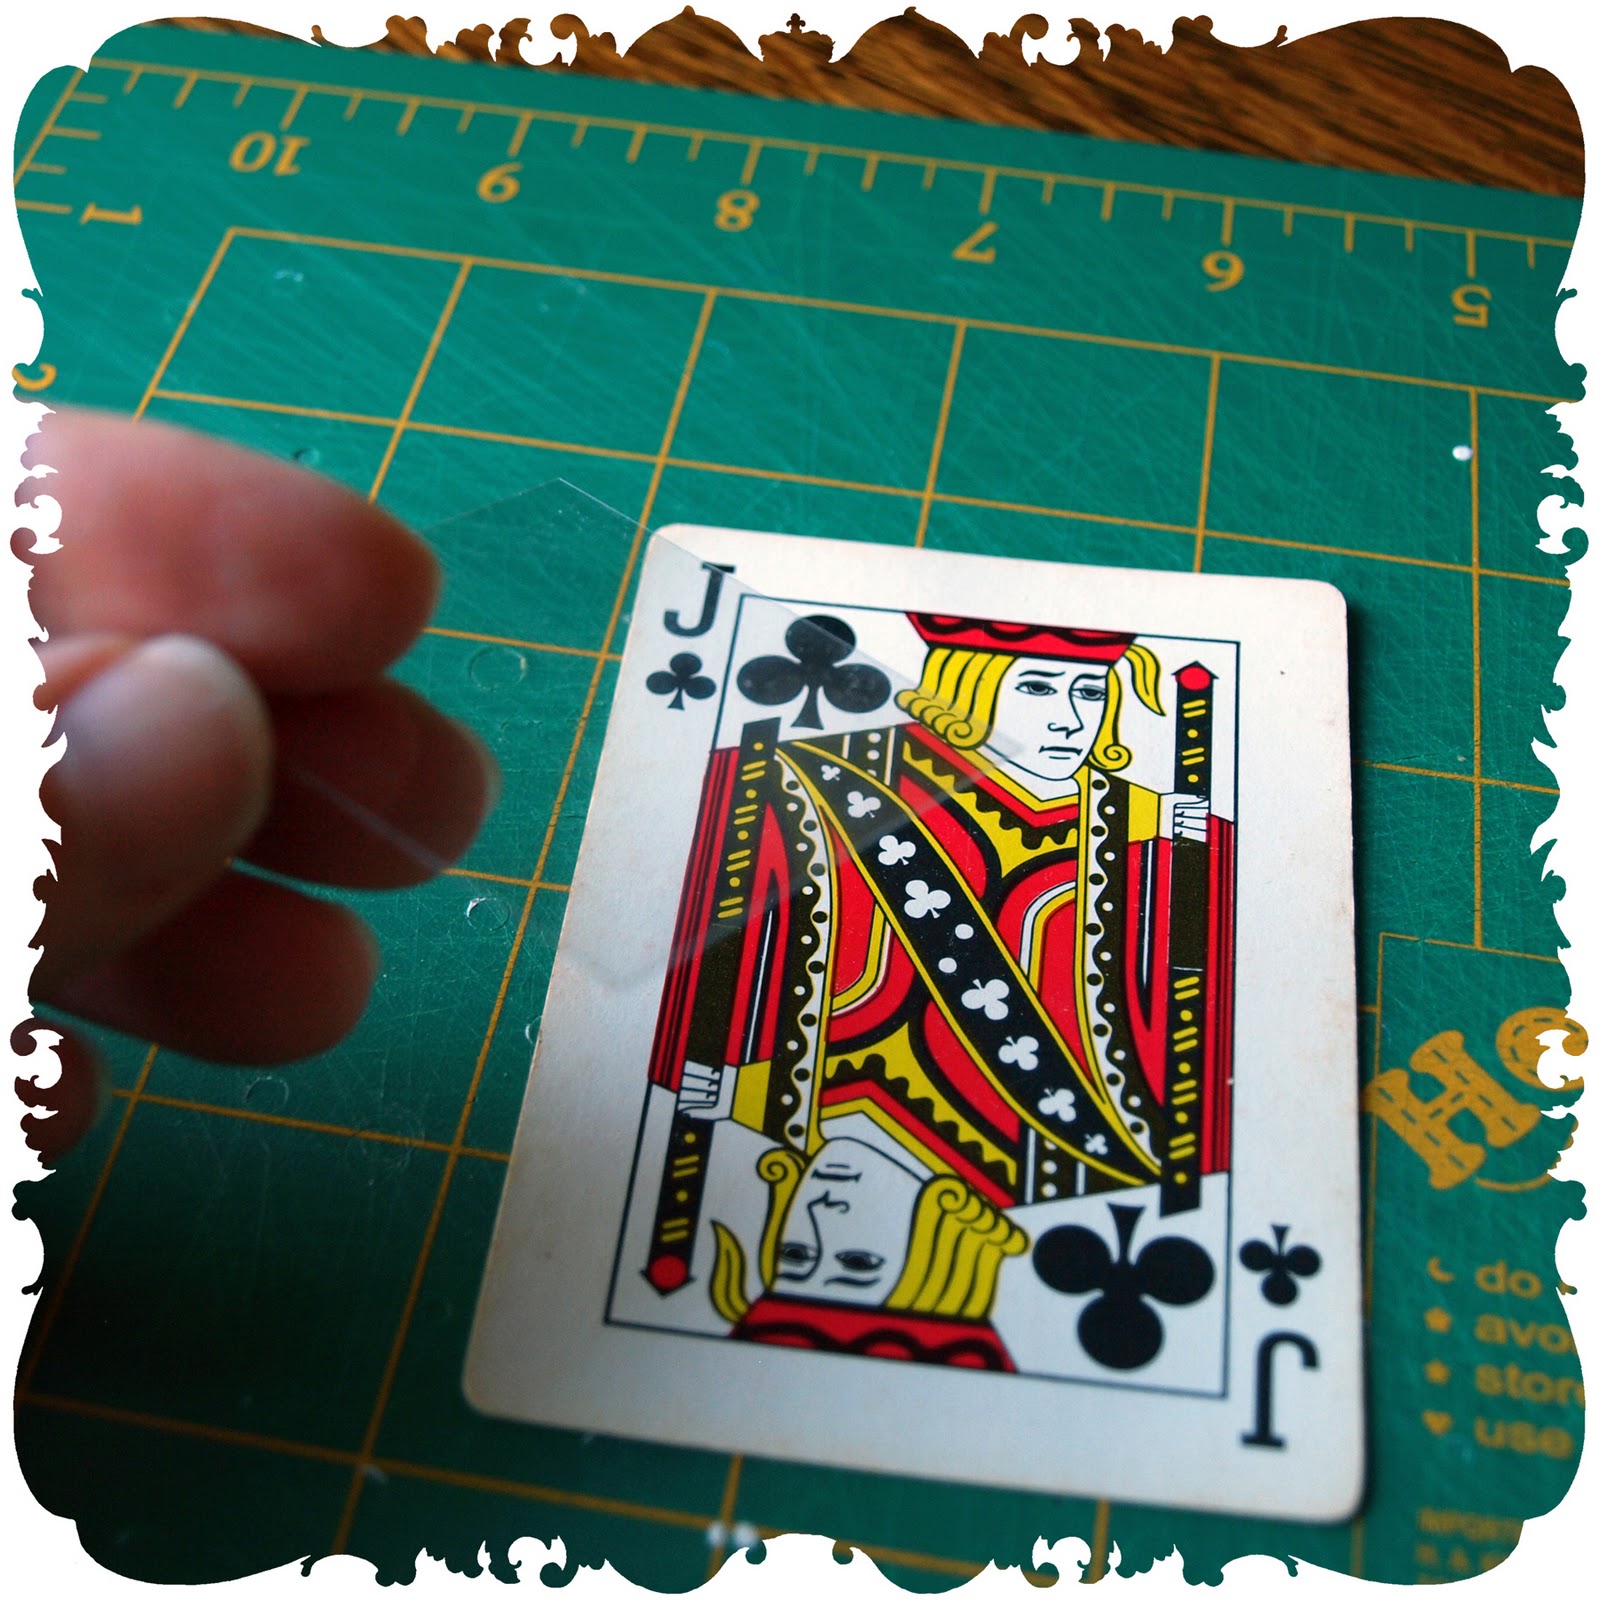
I started by selecting 4 cards from the deck - in this case, I choose the four Jacks. Then I cut the piece of acetate to the size of my wooden cube ... 1 3/4" by 1 3/4". I was then able to use the acetate over the cards to figure out how I wanted to cut out each card so that the suit was showing in an eye catching way. If you don't have a piece of acetate you could always cut a square out of the middle of a piece of paper and move
 the paper around to show where to crop the card. I cut each of the four Jacks out using my paper cutter. If you don't have a paper cutter you can trace around the acetate square like a template and cut the cards with scissors.
I liked the red and white design on this set of playing cards so I cut the last two cards for the sides of the cube out of cards that I didn't want to keep. If you are not crazy about the design on the back of your playing cards ... use some nice scrapbooking paper for a totally different look!
I glue two sides of the cubes at a time by applying the mod podge directly to the side of the wood block. After gluing the first card down, flip the cube over and paste the next card on the opposite side. I did both of the red suits first in this example.
You can set a couple of books on top of the cube to keep the top card flat while drying if you wish.
After about 10 minutes the glue should be dry. Using a fine nail file or sanding paper, sand all of the edges of cards that you have just glued down so that you trim the paper to exactly the size of the cube. You should have nice clean edges at this point. Continue to glue down the cards on the next two "opposite" sides ... I glued down the two black cards next.
After the glue has dried on the third and fouth cards, sand all of the edges. Now you are ready to
glue down the last two cards on the last two opposite sides ... repeat what we did before and finish by sanding all of the edges!
And now we are done! Wasn't that super easy ... once you've used up all of your face cards and aces you can experiment with the other cards in the deck ... if you didn't cut up too many of them to use on the sides. I think that these would make great gifts for anyone that you know who likes to play euchre!

I've got lots of other great things that I've been working on and will share with you shortly.

Oh and by the way, the reason why I've been busy is because I've making samples of some really cool projects to teach at Scrapbooking Queens in Mississauga ... you can check out my class dates here ... my first class is another game that I created for my daughter's 6th birthday (she will be 11 tomorrow!) ... here's a sneak peak of what I call my "friend"ship game ...