Showing posts with label chalkboard art. Show all posts

Mingle Magazine feature - Boho styled wedding

Wednesday, November 2, 2016

autumn Mingle magazine - entertaining inspiration

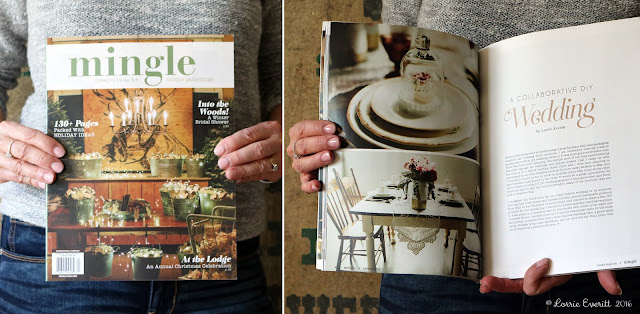
I am so happy to finally post about a styled boho wedding shoot I did earlier this year with a talented team of local wedding vendors. The styled shoot is currently featured in the autumn 2016 Mingle Magazine.

Mingle is full of creative ideas for unique gatherings. I'm all over the fall and holiday party ideas - there's a ladies wrap night and flower arranging lunch, cookie swap party, holiday prep party, santa's workshop party and hot chocolate and ice skating party. Oh my, I wish I was at all of these gatherings! 

autumn Mingle magazine - entertaining inspiration for creative get togethers

Our Boho wedding was featured on 7 pages (yeah!) but there are so many more photos and details that were not shown in the magazine that I'd like to share. So here you go ...

boho wedding inspiration | Lorrie Everitt Studio

Our photographer, Kat Williams from Attakat did such an amazing job. We were at The Warehouse Event Venue in Downsview Park. The white walls and polished concrete floor at the venue were like a blank canvas just waiting for us to make it our own. Toni from Confetti and Bows rents her huge 8' by 8' wall of handmade paper flowers and we used it to create the most amazing photo booth area.

boho wedding inspiration | Lorrie Everitt Studio

Doris from Love Lettering created the mirror/sign for the photo booth. Doris found the mirror in the trash and rescued it from a landfill. Doris is also the creative genius and maker behind PosecardsTM  - our awesome photo props.

boho wedding inspiration | Lorrie Everitt Studio

All of the wedding cakes and sweets were created by Caitlin from Cakelaine. Doris did the custom hand lettering on the chalkboard.  And if you are looking for guidance on how to easily add hand lettering onto chalkboards you can find my DIY tutorial here. 

boho wedding inspiration | Lorrie Everitt Studio

The paper lanterns, balloons, chalkboards, cake stands and cake topper were all from Creative Bag. I added the gold details to the "best day ever" cake topper and you can find my DIY tutorial here.

boho wedding inspiration | Lorrie Everitt Studio

These adorable Sugargirlee latex balloons from Creative Bag and are not only cute they are made in Canada and earth-friendly. The balloons will decompose as fast as an oak leaf in your backyard. I added white and gold tassels to one of the large hellium filled balloons.

boho wedding inspiration | Lorrie Everitt Studio

The paper goods were all created by Alicia from Alicia's Infinity. Alicia's beautiful watercolour illustrations were the inspiration behind all of the wedding details.

boho wedding inspiration | Lorrie Everitt Studio

The Perfect Table supplied all of our vintage and specialty tabletop and accent pieces. You can find the lace table runners here.

boho wedding inspiration | Lorrie Everitt Studio

Alicia also designs and creates custom wedding jewellery. I love this necklace that she created featuring one of her watercolour illustrations that match the wedding stationery. The necklace was packaged in a kraft jewellery box that was hand lettered by Doris for a Bridesmaid proposal gift.

boho wedding inspiration | Lorrie Everitt Studio

Our gift table set up featured a clear wishing well that Doris embellished with her beautiful hand lettering and illustrations.

boho wedding inspiration | Lorrie Everitt Studio

I created this vignette beside the wishing well with a something old, something new, something borrowed and something blue theme. A vintage bride and groom where placed inside a new glass apothecary container. And a borrowed family wedding photo were embellished with a blue ribbon and displayed in this new vintage inspired card holder.

boho wedding inspiration | Lorrie Everitt Studio

All of our beautiful floral arrangements were created by Jessica from Periwinkle Flowers. I added gold paint to white hobnail milk glass vases from Creative Bag. 

succulent favour in love mason jar | Lorrie Everitt Studio

I also have to thank my daughter Haley for being our "hand model" for the shoot and agreeing to wear whatever I put on her for the photo styling. This is the only picture that you can see more than her hands. 

I keep seeing the Autumn Mingle magazine in Michael's, Indigo and Whole Foods and I have to admit it makes me smile every time I see it!


BRIKA whimsical wreath workshop in the Makeful learning studio

Sunday, November 29, 2015


Last week I was invited to attend a workshop at the Makeful learning centre in BRIKA's Yorkdale popup store. The whimsical wreath workshop by DeLight Floral Design and My Little Secrets was fabulous. The supplies on hand were beautiful and everyone's wreath was truly one of a kind.


This photo was featured on BRIKA's Facebook page. My wreath (and hand) is on the left. Isn't the wallpaper in the background adorable!


I don't have space to hang seasonal wreaths in my home so I knew when I was creating my project at the workshop that I would have to do something a little more with it when I got home.


So the next day I gathered some supplies and figured out a way to display my whimsical wreath on the fireplace mantle using a hard cover book.


I had a plaid flannel ribbon scrap that was too small to tie as a bow but it just big enough to hang the wreath in place on the book. I folded the ribbon in half and looped it around the top of the wreath.


Then I simply stapled the ribbon in place to a couple of pages in the middle of the book.


The book had an embossed title on the cover so to cover it up and add little something extra to my wreath I glued a birch wood slice that I painted with chalkboard paint. I thought about writing a holiday message using chalk markers but my "hello" message will allow me to display my wreath well into the new year. 


If you have a crafty friend and you're looking for a fun evening to get your craft on you really need to check out the workshops at BRIKA.


These are some of the pics that I took at the BRIKA Yorkdale popup shop. If you like to buy handmade ... this is the place to be. There's a great mix of products by some very talented artisans. I loved the cafe and just past the cash desk is a diy area that you can gift wrap your purchases. It's brilliant!


The Makeful learning studio at the very back of the store is like a crafter's dream come true. The studio set up is so inspiring. Makeful is a new lifestyle TV channel that is all about celebrating the creativity within all of us! Whether you are into food, design or diy they have it all and it's in free preview right now. You can find out more about Makeful and the Makeful community on their website.

here's what my week looks like ...

Wednesday, July 29, 2015


chalkboard diy | Lorrie Everitt Studio

Do you have a difficult time trying to remember what everyone in your family is doing during the week? I use to before I created this easy diy project for my kitchen. 

I turned an over sized painting that I purchased for $10 at the second hand store into a chalkboard. I hung it in my kitchen in a spot that it would be easily seen and my family uses it to keep track of appointments, school events, games/practices, etc. 

For whatever reason, my husband really didn't want me to put this in the kitchen at first. But everyone that visits our home comments on it and asks us where they can get one ... so now my husband thinks it is a great idea.

chalkboard diy | Lorrie Everitt Studio

I painted the frame using a couple of coats of white chalk paint. I painted over the original painting using a couple of coats of Martha Stewart's chalkboard paint. Luckily the painting did not have a texture so I did not have to do any sanding before I painted the surface.

Tip: Allow the final coat of chalkboard paint to dry for about 24 hours before using it. You'll also want to condition the chalkboard surface by rubbing the side of a piece of chalk over the entire chalkboard. Clean off using a dry cloth.

chalkboard diy | Lorrie Everitt Studio

I knew that I didn't want to have to rewrite the days of the week on the chalkboard every week so I used a chalk marker to write each day of the week and the "good to know" line. I write the weekly notes in chalk. That way, when I erase the board with a dry cloth at the end of each week, everything comes off except for the words in chalk marker.

Even if you don't have great handwriting, it is possible to achieve perfect type on a chalkboard using chalk markers if you follow my handy instructions ...

how to write on a chalkboard like a chalk artist | Lorrie Everitt Studio

1. Gather your supplies: white transfer paper, a pencil, chalk markers, print out of your design/type (sized to fit your chalkboard), painter's tape and ,of course, a chalkboard.

I type out whatever words/design I want to put on my chalkboard on my computer first. That way I can play around with different fonts and the spacing.

Note: I print everything in the final size I need for my chalkboard, even if I have to cut up my words/design to print on a number of pages. You just tape them all together.

2. Cut your paper design out to fit your chalkboard so you can see where to place it. Use painter's tape to hold the paper in place and insert the white transfer paper in between the paper and the chalkboard. Make sure that the white transfer side is facing down towards the chalkboard. Now trace the letters (design) using a sharp pencil.

3. When you are finished tracing with the pencil it will look like this. 

4. Now you are ready to write using the chalk marker by going over the fine lines from your tracing. 

And that's it! If you can trace - you can do this.

Lorrie Everitt


have courage and be kind

Friday, March 13, 2015

chalkboard art with quote from Disney Cinderella movie | Lorrie Everitt Studio

I saw a trailer for Disney's new live action Cinderella movie last year at a movie theatre. As soon as I heard the words "have courage and be kind" I had to dig through my purse to find a piece of paper and a pen because I knew that this was the inspirational quote that I needed for a project I was working on for my youngest daughter's bedroom.

chalkboard art with quote from Disney Cinderella movie | Lorrie Everitt Studio

These are the words she sees every night before she goes to bed.

To create this I simply painted over an old framed canvas painting from the second hand store. The white paint on the frame is Martha Stewart's vintage decor chalk paint left over from painting my daughter's night stand. A couple of coats of Martha Steward chalkboard paint completely covered the original canvas painting. I worked out the type on my computer first and printed it out in sections so I could trace the final design onto the canvas. I used chalk markers so that the design would not rub off when we I dust. 

The Cinderella movie opens today in theatres and from what I have read and heard so far the movie looks like it is going to be amazing. I can't wait to see it, hopefully with one or both of my "princesses" or perhaps with my "Prince Charming".

I love the quote in today's (Toronto Star) from Lily James about the movie and her role as Cinderella. She was talking about the fact that she does not believe in the myth of Prince Charming and she said  "I don't think he comes and saves you. But I do believe in true love and I do believe in two people meeting and enriching each other and making each other feel like life is worth living." I believe that too and I think I may have to add that quote to the back of this piece!!


The End.


diy "feel better ' gift basket

Wednesday, March 11, 2015

diy "feel better" gift basket | Lorrie Everitt Studio

I put together this feel better gift basket for my sister-in-law a few weeks ago. Today I thought that I would share some of the diy projects I made to fill and decorate the basket. 

diy "feel better" gift basket | Lorrie Everitt Studio

My husband and I were in Barcelona last fall and I fell in love with an adorable little candy shoppe called Happy Pills. I borrowed their idea and filled a mason jar with lots of colourful and yummy candies. I added a paper tag to the jar with my directions .... "take two pills every 4 hours as needed". I knew that my sister-in-law would have lots of little visitors so this jar full of candy was for her & to share!

I have a thing for motivational quotes and chalkboards (if you don't believe me - check out my Pinterest boards) and instead of buying a get well card I made a button to add to the basket liner. This was a very simple project - I spray painted a large pin-back button with chalkboard paint and used a chalk marker to write out the Winnie-the-Pooh quote.

diy "feel better" gift basket | Lorrie Everitt Studio

I filled a linen bag with hair bands and ties and decorated the bag with another "chalk board button". 

Flowers are lovely but not always practical and can require additional care to water ... so I created this petite arrangement of (fake) succulents in an antique glass container. 

I found the wire basket with the canvas liner at Winners - it was the perfect size to hold magazines, books and all of my diy projects. 


Dr. Maya Angelou quote to live by

Thursday, May 29, 2014


Celebrated American poet and civil rights activist Maya Angelou, beloved for her inspirational thoughts, is in my thoughts today.

This is one of her best-known quotes. Words to live by. Pass it on.


Saturday, December 14, 2013


chalkboard bunting - {free} twenty thirteen and fourteen download | Lorrie Everitt

In my last blog post I showed you how to create your own chalkboard bunting using canvas banners, chalkboard paint and chalk markers. Today I'm going to give you the {free} download for the "twenty thirteen" graphics I used on my holiday bunting. 

I added my twenty thirteen chalkboard bunting to one of my fireplace mantle displays by tying it onto an antique frame. I used lots of white satin ribbon and wrapped it around the frame for a very casual look. 

chalkboard bunting - {free} twenty thirteen and fourteen download | Lorrie Everitt

I really dislike the fireplace mantle in our living room. It's on my list to change ... someday. I painted three antique frames in decorator's white to match our fireplace and leaned them against the wall for my display. I think that the style of the frames compliment the (ugly little) wood molding on the fireplace.

chalkboard bunting - {free} twenty thirteen and fourteen download | Lorrie Everitt

My mantle was pretty simple to pull together ... three white vintage frames (only one was decorated with bunting and a special ornament), pre-lit garland, burlap ribbon and a large letter "E".

As I was creating the download for the "twenty thirteen" graphics I was thinking that this bunting would be great for a New Years Eve party ... so I add "fourteen"! You can see my tutorial for making the chalkboard bunting on this post.


If you make a "twenty fourteen" bunting to use for a New Year Eve's party please let me know! I'd love to see pictures!


chalkboard bunting tutorial and free "Mr. & Mrs." download

Friday, November 22, 2013

chalkboard bunting tutorial by Lorrie Everitt | lorrieeverittstudio.blogspot.ca

Chalkboard + Love = Wedding {bunting}

Planning a wedding and looking for some diy ideas to personalize your special day? Here's a fun little project that you can make in an afternoon. Turn plain canvas bunting into a chalkboard bunting using Martha Stewart's chalkboard paint. Here's how I created mine ... 
chalkboard bunting tutorial by Lorrie Everitt | lorrieeverittstudio.blogspot.ca

Gather your supplies: 3 canvas or linen banners, Martha Stewart’sblack multi-surface chalkboard acrylic craft paint, foam brush, chalk, chalkboard marker, white tracing paper, ribbon or twine, paint brush optional.

Note: my template download was created to fit a large triangle canvas bunting shape - you may need to adjust the size of the template to fit your canvas bunting.

Step 1. Paint both sides of each canvas banner with two or three coats of black chalkboard paint. Allow to dry completely at least 1 hour between coats.

Step 2. Allow paint to cure completely at least 24 hours. Condition chalkboard canvas by lightly rubbing chalk over the surface and wipe with a soft, dry cloth to remove chalk.

Step 3. Download file for type and print out on regular paper. Cut out triangular shapes and place the type templates over each banner. Place tracing paper between the template and canvas banner. Trace the lettering with a pencil.

Step 4. Use a chalk marker to retrace the lettering on each banner. Chalk markers are available in a variety of different sizes. I wanted my chalk lettering to look like calligraphy so I used used a paint brush to apply the liquid chalk. Simply create a “puddle” of chalk liquid by pressing down on the chalkmarker on a smooth surface. You can see my tutorial to do this here.

Step 5. Tie ribbon or twine of your choice to each triangle to create the bunting.

The reason that I like to use chalk markers is that it can be removed with water if you make a mistake while you are working. Once the ink is dry it will not rub off when you touch it.  

https://sites.google.com/site/creativbagblog/holiday-2013/chalkbunting_mr%26mrs.pdf?attredirects=0&d=1

Download the template here.

Looking for more diy bunting ideas for your wedding? Check out this post from Weddingbells! It features four more of my diy bunting projects. 

http://www.weddingbells.ca/diy-wedding-ideas/6-easy-diy-wedding-bunting-projects-free-templates/?utm_medium=email&utm_campaign=Weddingbells+Newsletter+November+22+2013&utm_content=Weddingbells+Newsletter+November+22+2013+CID_80ae3ac2be11fb56b9b135042910639a&utm_source=Newsletters&utm_term=6%20Easy%20DIY%20Wedding%20Bunting%20Projects%20%20Free%20Templates


Maybe you are not planning a wedding  but love the idea of chalkboard bunting? Here's another idea for the chalkboard bunting!
chalkboard bunting tutorial by Lorrie Everitt | lorrieeverittstudio.blogspot.ca
I designed this bunting to use in a photograph with my daughters for our holiday cards. It is going to be hanging on the fireplace mantle in our family room very soon! 
I will share the template for the words "twenty thirteen" in my next post if you are interested.