DIY tissue paper fringe garland

Sunday, November 27, 2016


I know that most people are in the process of decorating for winter holidays right now but I just had to share this adorable DIY project. I have been creating these festive tissue paper fringe garlands for a December birthday party and not only are they super easy to make but they are inexpensive party decor option.


All you need are a few different colours of tissue paper, scissors and a stapler. That's it.


I recommend using a minimum of four different colours of tissue paper. You will need one piece of tissue paper in each colour for each garland. My tissue paper sheets are 20" x 30".


Step one. Cut the tissue paper layers into strips 5" wide by 30" long.


Step two. You need to staple all four layers of tissue paper together. Staple along the centre of each strip about 5" apart. You may want to fold the tissue paper layers in half first so you will have a better idea of where to add the staples.


Step three. Cut fringes on both sides of the tissue paper strips. 
Tip: I found that by folding the tissue paper in half and cut the fringes on both sides at the same time I saved a lot  of time. Just be careful not to cut to far into the centre.


Step four. Now you are ready for the fun part. Simply twist the tissue paper at the centre and watch the different colours on the fringes take shape. 


Here's a closer look at the twisted tissue paper. Don't worry about the staples because they kind of disappear when the tissue paper is twisted.


You can staple the garlands together to make the garlands as long as you wish. For less than five dollars I created 54' of fringe garland using a total of twenty sheets of tissue paper (6 sheets each of 4 different colours).

If you wanted to make these for a holiday party, just select tissue paper colours to match your holiday decor!


Gift wrapping inspiration using your wrapping paper scraps

Sunday, November 20, 2016

gift wrapping inspiration using wrapping paper scraps | Lorrie Everitt Studio

What kind of holiday gift wrapper are you? Do you wait until the very last minute to wrap everything? Or are you like me and start wrapping as soon as the Christmas tree is up? I spend a lot of time trying to make every gift look beautiful so I can't wait to start putting them under the tree right away. I consider the gifts to be part of my holiday home decor. 

When I use wrapping paper during the holidays, I try to select a minimum of three different papers in the same colour story. One is usually holiday themed - like the gold and white hand lettered print above. One will be have a simple everyday graphic like the confetti dot paper. My third wrapping paper is always a solid colour. 

After wrapping my boxes, I am left with a pile of wrapping paper scraps that I turn into small elements to embellish my gifts.

gift wrapping inspiration using wrapping paper scraps | Lorrie Everitt Studio

Create your own mini envelopes to hold little notes. Use complimentary wrapping papers to make your envelopes. Open a mini envelope to use as a template and simply trace the pattern onto wrapping paper scraps, fold and tape it together.

gift wrapping inspiration using wrapping paper scraps | Lorrie Everitt Studio

I have been making paper bows for a number of years. They are so easy and fun to make and it's possible to make them using wrapping paper. Simply trace the pattern for the paper bow and follow my DIY tutorial here. You can download my paper bow template here

You may have noticed that I used wrapping paper to decorate just the lid of this box. This is a great idea to use up your scraps and because the wrapping paper does not have to be torn off the box to open it, the box can be reused many times. I attached the box on the side of the lid so that this gift can easily be stacked under the tree.

gift wrapping inspiration using wrapping paper scraps | Lorrie Everitt Studio

I love to take photos and I always try to add a few to my gifts to work as gift tags. This accordian folded paper pop is a great way to use up small scraps of paper.  You can find my tutorial for making these paper pops here.

gift wrapping inspiration using wrapping paper scraps | Lorrie Everitt Studio

A band of wrapping paper was used to decorate a plain white gift box. Using bands of wrapping paper on boxes like this not only save you time but you save money by not having to use as much paper. I created another mini envelope for this gift using the printed wrapping paper.

gift wrapping inspiration using wrapping paper scraps | Lorrie Everitt Studio

Here's one more gift with a wrapping paper band and a mini envelope. I am totally in love with the "happy holidays" Posecard that I tucked into this gift ... 

gift wrapping inspiration using wrapping paper scraps | Lorrie Everitt Studio

the Posecard becomes a extra gift and can be used to take selfies and family group pictures during the holidays. 

I hope that you will save your wrapping paper scraps and try some of these simple DIY gift wrapping projects. You can find more of my wrapping paper ideas for you holiday home decor here.


gift wrapping inspiration using wrapping paper scraps | Lorrie Everitt Studio


DIY cork coasters for the holidays

Thursday, November 10, 2016

diy cork coasters | Lorrie Everitt Studio

Looking for a simple holiday gift project? How about these custom holiday coasters.

diy cork coasters | Lorrie Everitt Studio

I created these four coasters in less than an hour using digital graphics and a font that I purchased from Creative Market. I put one initial on each coaster design so everyone in my family would have their own coaster.

diy cork coasters | Lorrie Everitt Studio

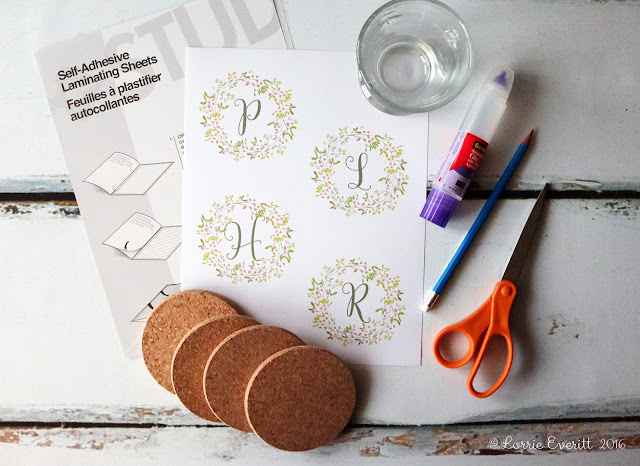
Here's what you will need to create these yourself: cork coasters, laminating sheets, scissors, pencil, glue and a glass (a little smaller than your coasters).

diy cork coasters | Lorrie Everitt Studio

After designing each coaster, I printed them out on card stock. Before laminating the paper, you need to cut out the designs into circles that are slightly smaller than your cork coaster. I used a drinking glass as a template to draw circles with a pencil around my art.

diy cork coasters | Lorrie Everitt Studio

Follow the instruction on your self laminating sheets to laminate the paper circles. The next step is to cut out the laminated coaster designs. Keep in mind as you are cutting that you need to leave a clear border around each circle so that the paper remains laminated.

diy cork coasters | Lorrie Everitt Studio

The last step is to glue your laminated art on to the cork coasters.

I created these holiday coasters as part of a #makefulchallenge. I received the cork coasters in the mail from Makeful and was instructed to embellish them any way I wanted. You can see my entry into the contest here.

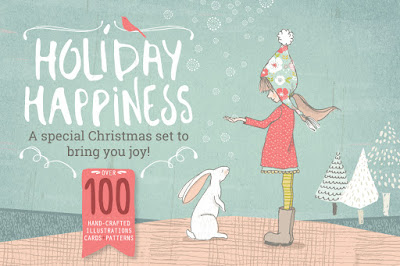
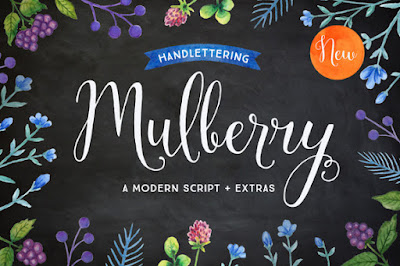
The holiday graphics bundle from Creative Market is called Holiday Happiness by Lisa Glanz and the font is called Mulberry .

Holiday Happiness digital graphics bundle by Lisa Glanz on Creative Market

Mulberry font from Creative Market

You could also create these coasters using photographs, wrapping paper or decorative scrapbooking papers. Stay tuned for more holiday gift giving and decorating projects.


diy cork coasters | Lorrie Everitt Studio

Mingle Magazine feature - Boho styled wedding

Wednesday, November 2, 2016

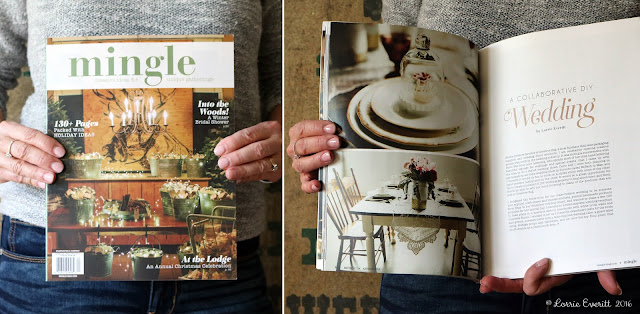
autumn Mingle magazine - entertaining inspiration

I am so happy to finally post about a styled boho wedding shoot I did earlier this year with a talented team of local wedding vendors. The styled shoot is currently featured in the autumn 2016 Mingle Magazine.

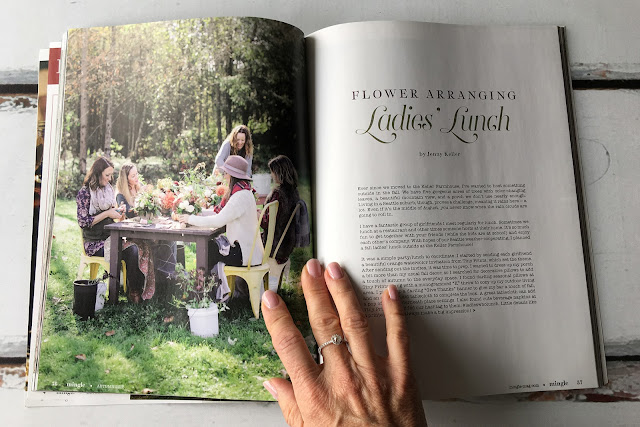
Mingle is full of creative ideas for unique gatherings. I'm all over the fall and holiday party ideas - there's a ladies wrap night and flower arranging lunch, cookie swap party, holiday prep party, santa's workshop party and hot chocolate and ice skating party. Oh my, I wish I was at all of these gatherings! 

autumn Mingle magazine - entertaining inspiration for creative get togethers

Our Boho wedding was featured on 7 pages (yeah!) but there are so many more photos and details that were not shown in the magazine that I'd like to share. So here you go ...

boho wedding inspiration | Lorrie Everitt Studio

Our photographer, Kat Williams from Attakat did such an amazing job. We were at The Warehouse Event Venue in Downsview Park. The white walls and polished concrete floor at the venue were like a blank canvas just waiting for us to make it our own. Toni from Confetti and Bows rents her huge 8' by 8' wall of handmade paper flowers and we used it to create the most amazing photo booth area.

boho wedding inspiration | Lorrie Everitt Studio

Doris from Love Lettering created the mirror/sign for the photo booth. Doris found the mirror in the trash and rescued it from a landfill. Doris is also the creative genius and maker behind PosecardsTM  - our awesome photo props.

boho wedding inspiration | Lorrie Everitt Studio

All of the wedding cakes and sweets were created by Caitlin from Cakelaine. Doris did the custom hand lettering on the chalkboard And if you are looking for guidance on how to easily add hand lettering onto chalkboards you can find my DIY tutorial here

boho wedding inspiration | Lorrie Everitt Studio

The paper lanterns, balloons, chalkboards, cake stands and cake topper were all from Creative Bag. I added the gold details to the "best day ever" cake topper and you can find my DIY tutorial here.

boho wedding inspiration | Lorrie Everitt Studio

These adorable Sugargirlee latex balloons from Creative Bag and are not only cute they are made in Canada and earth-friendly. The balloons will decompose as fast as an oak leaf in your backyard. I added white and gold tassels to one of the large hellium filled balloons.

boho wedding inspiration | Lorrie Everitt Studio

The paper goods were all created by Alicia from Alicia's Infinity. Alicia's beautiful watercolour illustrations were the inspiration behind all of the wedding details.

boho wedding inspiration | Lorrie Everitt Studio

The Perfect Table supplied all of our vintage and specialty tabletop and accent pieces. You can find the lace table runners here.

boho wedding inspiration | Lorrie Everitt Studio

Alicia also designs and creates custom wedding jewellery. I love this necklace that she created featuring one of her watercolour illustrations that match the wedding stationery. The necklace was packaged in a kraft jewellery box that was hand lettered by Doris for a Bridesmaid proposal gift.

boho wedding inspiration | Lorrie Everitt Studio

Our gift table set up featured a clear wishing well that Doris embellished with her beautiful hand lettering and illustrations.

boho wedding inspiration | Lorrie Everitt Studio

I created this vignette beside the wishing well with a something old, something new, something borrowed and something blue theme. A vintage bride and groom where placed inside a new glass apothecary container. And a borrowed family wedding photo were embellished with a blue ribbon and displayed in this new vintage inspired card holder.

boho wedding inspiration | Lorrie Everitt Studio

All of our beautiful floral arrangements were created by Jessica from Periwinkle Flowers. I added gold paint to white hobnail milk glass vases from Creative Bag

succulent favour in love mason jar | Lorrie Everitt Studio

I also have to thank my daughter Haley for being our "hand model" for the shoot and agreeing to wear whatever I put on her for the photo styling. This is the only picture that you can see more than her hands. 

I keep seeing the Autumn Mingle magazine in Michael's, Indigo and Whole Foods and I have to admit it makes me smile every time I see it!