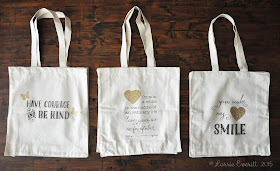
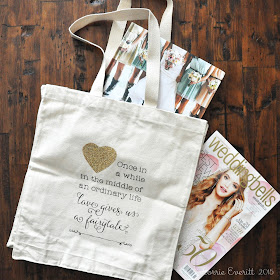
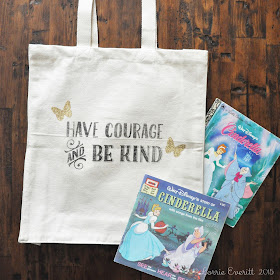
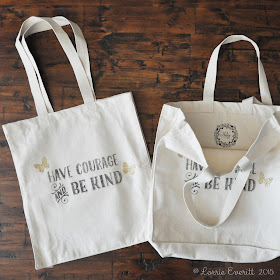
I bought a half a dozen of plain canvas tote bags before Christmas after seeing a bunch of adorable canvas tote bags with great quotes on them at Indigo. If you are like me, you see something in a store that you like, take a look at the price tag and say to yourself "I can make that". Then you go out and stock up on supplies but never seem to get around to making that awesome project. Well, I finally got around to embellishing my canvas bags and I'm really happy with how they turned out.
I used iron on transfers and iron on glitter on each bag. They were so easy to make and best if all - there was no sewing, no gluing and no mess.
Here's how I created these bags:
A. Find a quote or saying that inspires you. I looked to my Pinterest board for quotes and sayings that I have been collecting for projects like this.
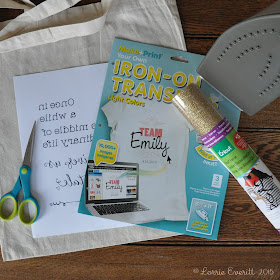
B. Use any word editing program you have to create the design for your iron on transfer. I worked in Illustrator to create mine, but you could also do this in Photoshop, Word or whatever you feel comfortable using. Some iron on transfers offer online support that allows you to create the art to use on their products - like this one.
Note: I knew that I wanted to add some glitter iron on shapes to my design so I kept that in mind when I was setting up the type.
C. Print your iron on transfers on a laser printer. Follow the instructions on the package to ensure the best results for your transfer.
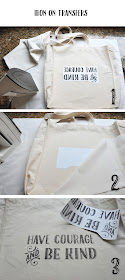
1) Most iron on transfers require you to print in "mirror image mode". You will iron the transfer paper with the white side up so I cut out the transfer to remove most of the excess white space so it is easier to work out placement of the transfer before ironing.
2) Place an old pillowcase over the transfer before ironing and follow the instructions for ironing on the transfer.
3) Some iron on transfers recommend peeling off the transfer sheet while hot and others recommend peeling after cooling for a minute. Either way - peel off the sheet slowing and check your transfer ... it is often possible to go back and iron again to fix any problems but you need to do it before completely removing the transfer sheet so take your time on this step for best results.
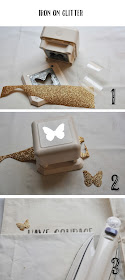
D. I think that the iron on glitter gives this project a little something special. The iron on glitter material is so easy to use and I used my paper punches to create perfect heart and butterfly shapes for my bags.
1&2) My secret to using paper punches on the iron on glitter material is to remove the clear protective layer before punching for a cleaner cut.
3) The packaging instructions tell you how to iron on the glitter shapes. I was careful when I was ironing the glitter shapes to the bags so as not to iron over the lettering again - just in case!
Iron on transfers are not inexpensive and even if they were, I hate to waste my supplies, so I created smaller designs (with my daughter's names) to add into the blank areas of my transfer sheetsnbefore printing. I ironed the smaller designs to the inside of some of the bags as an added touch.
This would be an easy diy project for a destination wedding to use as guest bags.
Like the fonts that I used to create my designs? Find them here ...
Caferus (normal, basic, shadow, inline)




Fantastic!
ReplyDeleteUnfortunately most ended up with patches where the screen had dried up with paint, Canvas Tote Bag
ReplyDelete