bag headers for holiday gift giving

Tuesday, December 6, 2011

Here's an easy little packaging project for the holidays that I hope you will try out. I love to create simple paper headers and attach them to clear plastic bags .. they are perfect for party loot bags and teacher/class gifts. In my examples, I used the lip-n-tape bags from Creative Bag because I like that you can reopen the bags if you need to and they come in lots of different sizes.

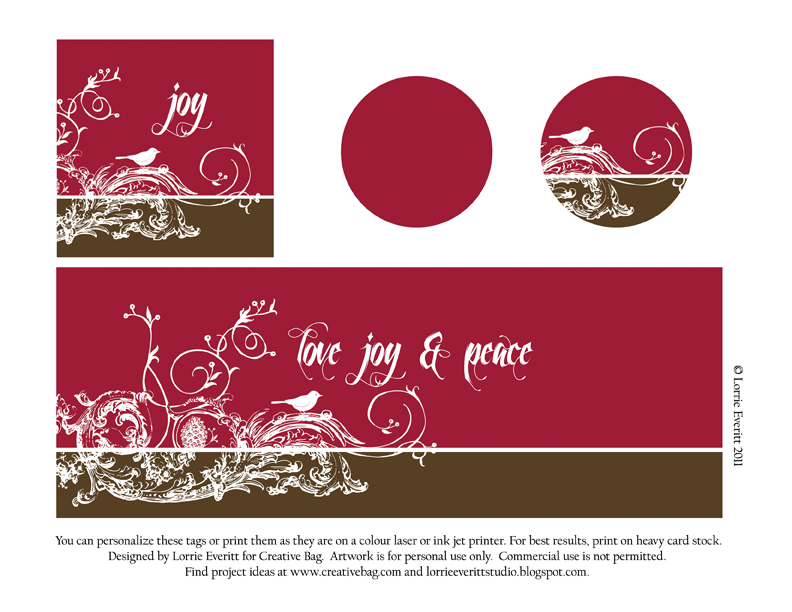
I created another freebie for you to use if you'd like to make some of these yourself. Again the art is for personal use - no commerical use. You can download it by clicking on the link under the photo. I designed the art so that you could personalize the header on the front and/or back using graphic software. I'll tell you more about adding a handwritten message on the back in a minute.
So let's get started! First you will need to print my download on your colour ink jet or laser printer on white heavy weight card stock. These are the tools that I used to create my bag header: paper cutter (if you don't have one you can use scissors), pencil, ruler, bone folder, scoring tool (optional) and a stapler.
The first step is to score the folded edge of each of the headers. You want to use a paper scoring tool if you have one or the pointed edge of a bone folder. The dotted lines indicate where you will need to fold. Line your ruler up along the dotted lines and gently score the paper. Once that is done, you are ready to cut out the headers on the paper cutter. The solid crop marks on the art indicate where to cut. Note: if you do not have a paper cutter, use a ruler and pencil to outline the headers and cut with scissors. Next you will fold the headers in half where you scored the paper. Go back ove the folded edge of the paper with the bone folder to create a clean flat edge.
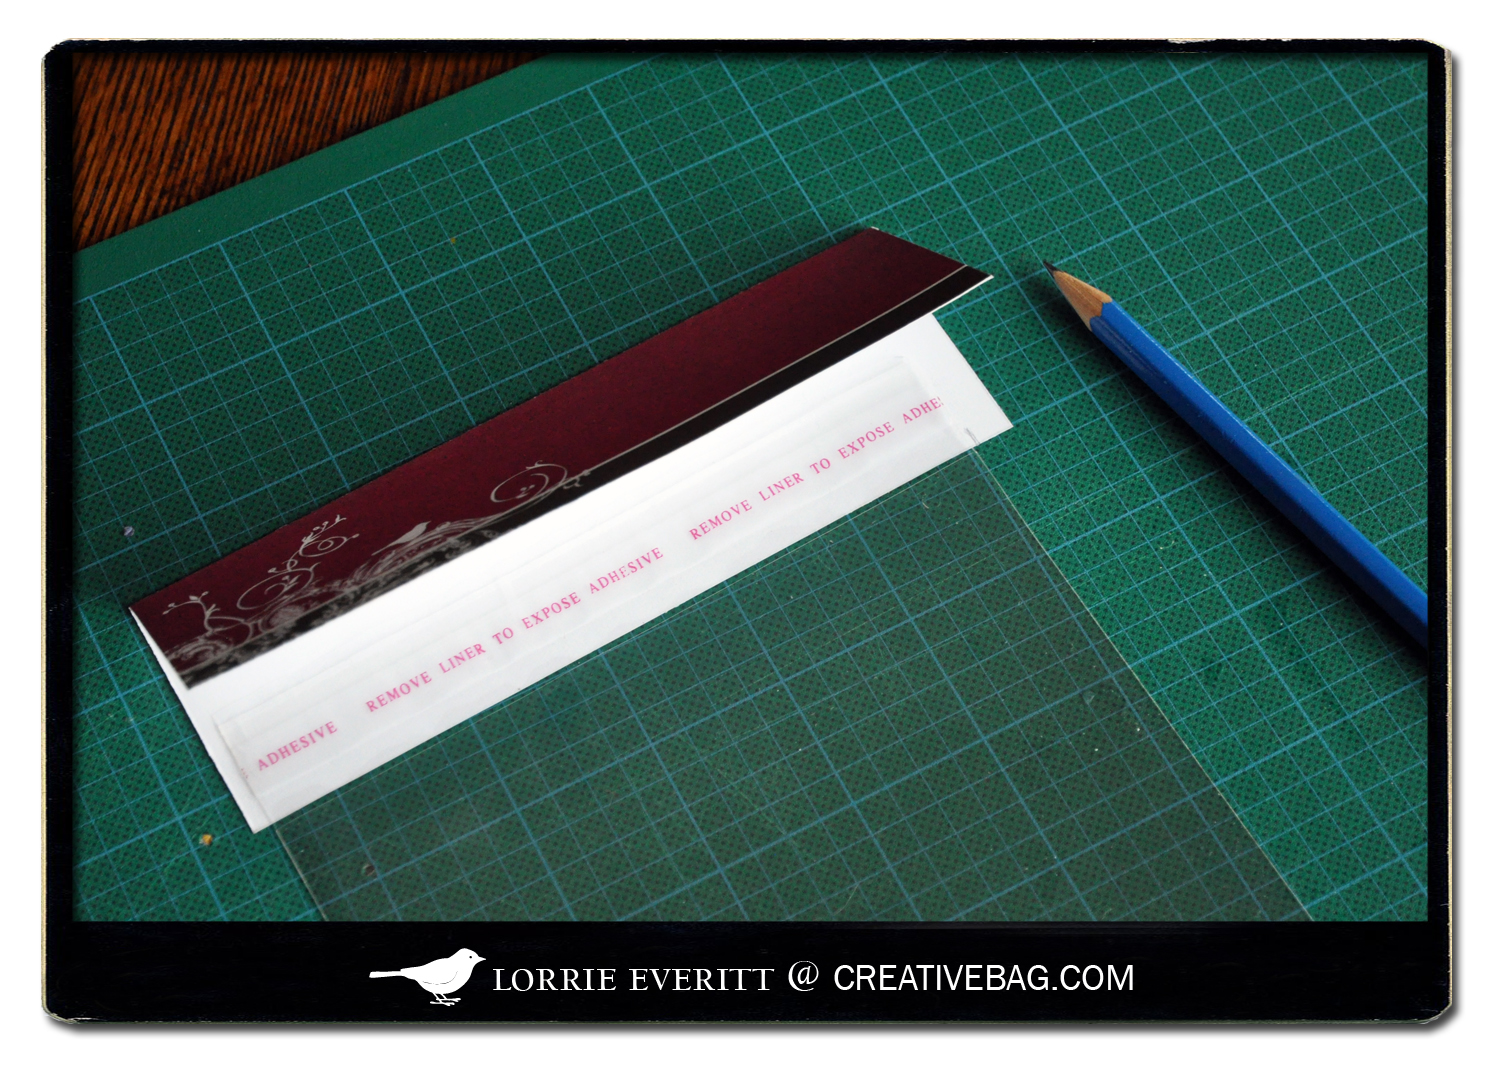
I designed the header so that it could be adapted to fit a number of different bag sizes. You can trim the right side of the header to fit the width of the clear bag you are using if the header is too wide. As you can see, I used a pencil to mark how wide I needed my header to be for my clear bags ... I wanted the header to be slightly larger than the bag. Cut the header using the paper cutter and you are now ready to add the "goodies" to your clear bag.
I left space on the back of the header to add a handwritten message if you want. I would suggest doing this before stapling the header to the bag. Once you have added your goodies to the bag you will want to seal the bag. Then simply add the header to the top of the bag so that the clear bag is sandwiched in between the folded header. Then staple the header and bag together. I placed three staples on the header near the bottom edge - one along each bottom corner and another one in the bottom middle.
I often make these for friends in our neighborhood and attach them to their doors as a little surprise during the holidays. The kids love them at Halloween! You can see that I personalized the header with our family name. I also added a hole and ribbon so that I could easily tie them onto a door handle.
Just to give you another idea for these bag headers ... I've used them in previous years for non-food items like mini calendars (see above), packages of handmade cards and picture cds!

I hope that you are having a wonderful, creative day!!

holiday gift containers {part one}

Thursday, November 24, 2011

Hello everyone! I've got some exciting news to share. I started working {part-time} at Creative Bag this fall and they recently asked me to be a guest blogger for them. I'm thrilled to be able to share my packaging and wedding themed projects on their blog and I hope that you will pop over and visit me there too! There will be project ideas, tutorials, lots of inspiration and the occasion {free} download! My first blog post should be up by the end of the week.  

So let's get started with one of my favourite ways to "wrap up" a gift using a clear tin pail ...
Creative Bag has a great selection of tin containers.  There are so many different shapes and sizes available that the hardest part is figuring out which one  to use. For this project, you will need a 3"x 4" clear tin pail - a gift card fits perfectly inside this size.  I used a patterned paper inside the pail to decorate the container and to hide the gift.

The pattern paper is actually something that I created to fit the 3"x4" pail and to share with you.  You can download my pdf file by simply clicking on the link under the picture.  Please note that the art is for personal use only and cannot be used for commercial use. 
You can personalize the my pdf file with your own message in any graphic design software.  I've included a second version to download with the words "love, joy and peace" for those of you that would like a generic holiday message. 
Here's what you will need for this project: a 3"x4" clear tin pail, assorted ribbons, some clear rhinestone stickers, scissors, single hole punch, scotch tape, two-sided tape, a piece of twine and of course, my download.  The first thing you need to do is print the pdf file on a colour inkjet or laser printer on a heavy white cardstock.
The next step is to cut out the rectangular band and two circles. You will not need the square tag for this project but hang onto it for another day.  Cutting Tip: I like to use a paper cutter to cut straight edges but if you don't have one, scissors work fine too.
The easiest way to insert the paper band into the pail is to roll it first and let it open up inside the container.  You can gently twirl the paper around until the design is positioned where you want.  I like things to stay in place so at this point I added a tiny piece of tape to the inside of the paper band.
Now we will add the paper circle with the bird design to the tin top.  Here's where you can get a little creative by adding a couple of small clear rhinestones to the design.   The next step is to add a few pieces of two-sided tape to the back of the paper circle, peel the adhesive tabs off the tape and position the paper in the centre of the tin top.
I like to tie lots of assorted ribbons to the pail handle. I select my ribbon colours based on the colours in the papers and the metal colour of the tin (in this case: red, white, brown and silver) and I always mix ribbon textures (organza, satin, gross grain).  Cut the ribbons so that they are about 6 to 7 inches long. You will also need a 9" piece of twine.
You may have noticed a small washer attached to the handle of your pail. I hope that you didn't cut it off and forget where you put it. That little washer is used to open the lid of your pail if you haven't already figured that out.  We will attach it to the handle of the pail first so that it will hang the down the lowest - it should be long enough to easily reach the lid when attached.
Now the fun begins, simply tie the ribbons to the handle - there is no right or wrong way to do this so just start tying! I don't find that it is necessary to knot the ribbons - I just tie once!
Once you have all of the ribbons on the handle, group them together on one side. This will help the handle to stand up.  At this point you should trim the ends of all of the ribbons .. angle, straight ... whatever you like.
The last thing that you will want to do is add the plain red circle tag. You will have to add a hole with a hole punch and finish with a thin ribbon for hanging. It is best to write on the tag before you tie the tag onto the handle.  I will often make a bunch of these containers and leave the tag inside until I am ready to add the gift.
Here's another picture of this project using the second download with the "love, joy and peace" message.  Just remember you can add your own message to the plain design ... for example: "happy holidays from the {your} family" ... using your favourite graphic software program.

 I love these containers because nobody throws them out ... they are either re-gifted or reused as storage containers.
And here's one more picture of this project using scrapbooking or wrapping papers instead of my download. You can add lots of other elements to decorate the container such burlap ribbon and snowflakes (all available at Creative Bag). I'll do another post in a couple of days showing you how to decorate these clear tin containers with patterned papers so that you can recreate this project  anytime of the year ... think birthday parties, wedding favors, teacher's gifts!
I hope that you will check back here for more holiday inspiration in the next few weeks.  And if you get a chance to pop over to Creative Bag  ... come back here and leave me a comment. I'd love to hear your comments.
 I am working with Creative Bag's Wedding division (I'm smiling right now) and I am so excited about some of the new product lines that we will have in stock over the next few months. Check out my wedding board on pinterest  and you'll see how much I am in love with all things wedding right now!!
I hope you have a happy {creative} day!

Tee shirt scarf tutorial

Saturday, November 5, 2011

Here's an easy upcycling project that will turn your favourite tee shirt into your new favourite scarf!

Here's how to make a fringed scarf:
1. All you need for this project is a tee shirt and a pair of scissors. But if you are a bit of a perfectionist (like me) ... you may also want to use a disappearing ink fabric marker and a ruler.

2. Start by cutting straight across both layers of the tee shirt just under the arms. *You can see that I drew a straight line with my fabric marker before I started cutting.
3. Now you are ready to start cutting the fringes. Turn the tee shirt around so that you do not cut the finished edge of your tee shirt. Start your fringes about 1" from a side seam. You will create your fringes by cutting straight up the front of the tee shirt to about halfway. *Again, I used my ruler and fabric marker to draw a line half way up the fabric so that my fringes would all be the same length.
You can make the fringes as wide as you would like - just keep in mind that the fabric will curl at the sides.
4. Continue cutting all the way around the tee shirt. Take your time so that your fringes are all similar in size and length.

5. Now you are ready to wear your tee shirt fringed scarf!

I'm going to make some more of these with my teenage daughters so that I can keep this one for myself. I think that this would make a great project for a girl's crafting party.

upcycled magazine rack

Saturday, October 29, 2011

I've been inspired by some of the diy projects that I've pinning to my "restyled projects" board on pinterest and thought that I'd share one of my recent restyled projects with you.

This upcycled magazine rack was a metal rack that my Mother-in-law "rescued" from the garbage at an electronics store ... I thought that I had some "before" pictures of this to show but I must have deleted them from my camera. The metal rack was in good shape and I my Mother-in-law thought that she and Grandma would like to be able to use it in the kitchen to hold cooking magazines ... they just didn't like the advertising that was on the rack and thought that I could do something with it.
Here's the front and side views of the rack. I covered everything that was originally painted black on the rack with pages from an old dictonary using gel medium. I didn't cover the silver/chrome parts because I thought that they looked fine. I antiqued the dictonary paper with distress inks (vintage photo) to give the piece an aged look.
Here's a close up of the bottom front of the rack.
I printed an art poster print at Costco and used gel medium to attach the poster to the front panels of the rack. I distressed the poster using Tim Holtz distress inks so that it would blend into the dictonary papers on the sides. The collage art  was created on my computer using my own digital elements and some digital scrapbooking papers that I purchased. 
I wanted the birds to stand out a little bit so I covered them with "glossy accents" by Inkessentials.
Because the rack was metal I thought that it would be cute to include some paper flower magnets. The magnets are decorative and functional. They display recipe cards and shopping lists.
There are lots of great tutorials on how to make paper flowers online ... there are some on my pinterest boards if you want to try to make them yourself.  I used gel medium to attach the paper flowers, paper leaves and some ribbon & lace scraps to wooden game pieces. FYI - my magnets of choice are rare earth magnets ... just keep them away from your computer and credit cards.
Here's one more shot showing the top of the rack with three of the magnets and the gift tag I attached.

I have a couple of other restyled projects that I am just about finished that I will share with you next time! Are you working on any restyling projects for your home? If so, I'd love to know about them ... I'm always looking for new ideas to add to my pinterest boards. Happy crafting!

pendant trays with glass inserts - tutorial

Friday, October 14, 2011

I'm totally in love with pendant trays and glass inserts right now. There are so many different pendant tray shapes for necklaces, earrings and rings and don't even get me started on all of the different colours of metal. The vintage copper is my favourite at the moment.

Here's a little tutorial on how to use the pendant trays and glass inserts to make your own jewellery!
It is almost the same as my glass tile tutorial here but we do a couple of different things at the end.

Let's gather our supplies first! You will need a pendant tray and glass insert, something to use as art (I create my own digitally and print the jpeg file at Costco), glossy accents (or your favourite brand of diamond glaze), E-6000 glue, an xacto knife and small emery board. I work on a self healing matt and I use wax paper to protect the matt when I am using the diamond glaze or glue.
The first step is to add a small amount of diamond glaze to the back of your glass insert. The back of the glass is the flat side if you have a puffy glass insert. You want to cover the entire back of the glass insert but do not add too much diamond glaze to cause it to drip down the sides.

NOTE: You do not want any air bubbles in the diamond glaze so DO NOT shake the bottle (ever). I also suggest that you turn the bottle upside down before you start so that any air bubbles move to the top. If your diamond glaze does not flow easily, use a pin to clear the tip.

Next you are going to flip your glass insert over and place it on top of your art. Do not press down on the glass. You can gently slide the glass over the art to position it. It is important that you watch the positioning of your glass for the next 10 to 15 minutes to make sure that it does not slide while it is drying. The diamond glaze will take many hours to dry ... I usually start these at night and let them sit overnight before I start the next step.
Once your piece is completely dry you are ready to cut the excess paper from the glass. Use an x-acto knife to cut around the shape of your glass insert. If you have any excess diamond glaze on the sides of the glass you can use the x-acto knife to scrap it off at this point. Then use your small emery board to sand any extra paper from the glass ... you can see more details on how to do that here in my glass charm tutorial.
I like to add a thin coating of diamond glaze to the back of my glass tile at this point. No one will see it but I think that it protects the art. It doesn't need to be thick and don't worry if you have any air bubbles. Once this is dry (in a few hours) you are ready to add the glass insert to the pendant tray.
Apply a small dab of E-6000 glue to the centre of the pendant tray. Place your completed glass insert into the tray. Take some time to position your glass insert so that it is the way you want it to look and then press down on the glass insert. Leave your piece to dry for an hour or so. 
Once the E-6000 is dry you are ready to add a chain and wear your new necklace. This same technique for the pendant trays works for earrings and rings as well. Again, this is another "additive" project ... once you make one everyone will want you to make one for them too ... which is fine because you will love making these and they make great gifts!

I have a bunch of these blank pendant tray kits for sale at Scrapbook Queens.
They are also sold in the jewellery section of better craft stores and of course at bead stores! 

Have a great weekend.

new jewellery findings

Tuesday, October 11, 2011

I have been super busy this fall with lots of projects on the go. I just need to find some time to organize my photos and my thoughts so I can share a few of them with you.

I feel like a kid in a candy store with some of my new jewellery findings. I'm especially excited about my new pendant trays for necklaces, earrings and rings. I've also got some amazing glass domes that are perfect for making your own paper weights ... I'm thinking teacher's gifts at the moment. 

I'm putting together another little tutorial to show you how to use the pendant trays with the glass inserts ... I will post it later this week.

Scrapbook Queens has my new jewellery findings and glass domes in stock now.


I'm also working on class projects using my jewellery findings and glass domes for holiday gift giving classes. The glass domes make wonderful paper weights and I was thrilled to find the perfect box to hold my paper weights at Creative Bag.

The picture above is a close up of my little gift box for the glass dome paper weight. The small mod box from Creative Bag was plain ... so of course I had to make it my own with paper and ribbon scraps.  I think that I will have to  include one of these gift boxes as a part of the paper weight class ... they were just too much fun to make. 

I'll let you know when my class projects and dates are finalized. You can see more information about my classes here .

Hoping that you have a happy and creative week!

tea time with my scrapbooking supplies

Tuesday, September 20, 2011

I love tea. Decaf Earl Grey with lactose free milk is my favourite.

This is a tea box that I decorated at the cottage a few years ago. It was just a plain wooden tea box and I'm not really sure where I got it from. It was not an antique or I'd remember everything about it.

I used my scrapbooking papers and some embellishments to decorate the outside and inside of the box.
This is the outside of the box. I used modge podge to glue all of the scrapbook papers to the box. If I was making it again today I would have used gel medium instead of modge podge but either will work. I sanded the edges of the paper to give the box an aged look but also to make the corners tidy.
I didn't do a lot of decorating on the outside lid of the box because the box is usually open when I use it for company and when it is not in use it's in the cupboard. The picture in the metal frame is the sunset in front of our cottage ... my favourite place and time to sit and drink my tea.

 Here is the inside of the box ... you can see that I stained the wood ... it would have taken too long to add scrapbook papers to each of the dividers and I figured that they would be covered with the tea bags most of the time so it was not really worth the time or paper. I found scrapbook papers with numbers on them that fit perfectly in each little section (I love numbers).

 This is my favourite part of the box and the reason I wanted to decorate it. I used a picture of my oldest daughter when she was 3 years old to decorate the lid. She loved to play tea with her stuffed animals ... she had a play house at our old cottage and she would pull all of the wicker furniture out of the play house and set up a tea party under our umbrella. I loved those days.

I had to be very careful when I chose elements to attach to this layout because I didn't want them to fall off or get hit by the tea bags.

I've been using this tea box at the cottage for about 5 years. I really should look for another tea box so I can make one for home. I'd love to find a picture of myself and my grandmother drinking tea together when I was smaller ... that would be a great keepsake.

I hope that if you have one of these boxes hanging around in your home that you will think about personalizing it with something that makes your heart sing.

I'm teaching this weekend at Scrapbook Queens in Mississauga and I am hoping that some of the new scrapbook papers for Fall and Holiday have arrived! I'm starting to think about Christmas gifts already. Have a great week!!