PAGES

Sunday, March 27, 2016

personalize your clear phone case using sharpie markers


personalize your clear phone case using oil based sharpie markers | Lorrie Everitt Studio

I love my new iphone.

I have never had an iphone so it was kind of a big deal for me.

When I decided to finally purchase an iphone I knew that I wanted one in rose gold.

I HAD to have a rose gold and I waited two weeks for it.

After waiting for so long to get my phone I realized that I didn't want a phone case that covered up the rose gold finish. So I purchased a clear case. My clear case is okay. It does it's job which is to protect my phone but it's B-O-R-I-N-G. So after a couple of weeks, I decided to personalize it myself.

personalize your clear phone case using oil based sharpie markers | Lorrie Everitt Studio

This is such an easy diy project and you can do it in an afternoon. If you can trace - you can do this.

personalize your clear phone case using oil based sharpie markers | Lorrie Everitt Studio

Gather your supplies: clear phone case, extra fine tip white sharpie oil based marker, paper, pencil, extra fine tip black sharpie marker and a light box. If you don't have access to a lightbox you can use a piece of glass from a picture frame and a light source to create your own. 

personalize your clear phone case using oil based sharpie markers | Lorrie Everitt Studio

I drew out my design in pencil first. You can trace around your case with a pencil to make sure that your design will fit properly. Once you have your rough design worked out use an extra fine tip black sharpie marker and go over your pencil sketch to create your final art.

personalize your clear phone case using oil based sharpie markers | Lorrie Everitt Studio

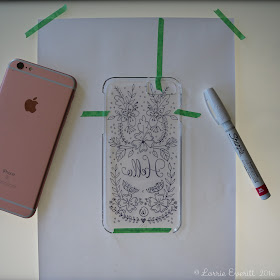
I wanted my design to be on the inside of my case so it would not scratch off easily. Because I have lettering in my design, I had to reverse my finished art. I flipped my paper over on the lightbox so I could see the design from the back. Then I positioned the phone case on top of the paper and used painters tape to keep everything in place for the next step.

personalize your clear phone case using oil based sharpie markers | Lorrie Everitt Studio

This was the fun part - tracing my design onto the phone case using the white sharpie marker. I actually practiced a few times with the paint marker on scraps of acetate before I traced out my phone case. It helped me to get the feel of the markers and to see how long it took for the paint to dry. 

Tip: I am right handed so I started to draw out my design at the top left side and worked my way across and then down so that I did not smudge the ink as I was tracing.

personalize your clear phone case using oil based sharpie markers | Lorrie Everitt Studio

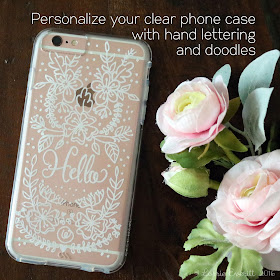
When you are done flip the case over and take a look at your design. You can add some extra doodles at this point if you need to. I thought that the space under "Hello" needed a little something so I added some additional dots.

I let the paint dry for about 15 minutes before I put the case on my cell phone. 

personalize your clear phone case using oil based sharpie markers | Lorrie Everitt Studio

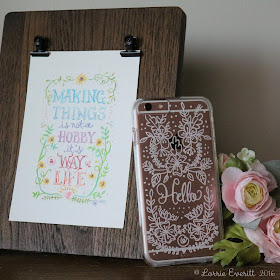
And there you go! One personalized cell phone case.

personalize your clear phone case using oil based sharpie markers | Lorrie Everitt Studio

I'm going to be entering this project into the Makeful weekly challenge tonight. I know that I have some very creative followers and I'd love to see your projects at Makeful too. Leave me a comment here or on Instagram if you have joined Makeful - I'd love to see what you are making too.

Wednesday, March 23, 2016

diy party decor favourites and a couple of ideas for how to display them


Do you like to host parties? I do. I love party decorations and diy party decor projects. I have a few favourite diy party projects that I tend to make over and over because they are not only easy to make but they are also inexpensive.

 I am always trying to come up with new ways to display my party decorations so that I am not marking my walls or furniture and I'm going to share a couple of my ideas with you today. So let's get this party started ...


My number one go to diy party decoration - tissue paper pompoms. Tissue paper comes in so many colour options and best of all it is inexpensive. There are so many ways to make tissue paper pompoms. They can be hung from the ceiling or mounted flat to the wall, change up the size, use different colours of tissue to create an ombre effect or cut the ends like I did to create tissue paper flowers. 

When you combine tissue paper flowers with other large paper decorations you can create an amazing party backdrop. This is how I created my tissue paper flower pompoms:


1. You will need 6 sheets of tissue paper. The size of tissue is up to you so make these as large or small as you want. You will use two sheets each of three different colours to recreate my sample.
2. Accordion fold all of the tissue paper as shown above until you are left with one bundle of tissue about 1" wide.
3. Separate the three colours and cut each color as shown above - longest (outside) tissue has a pointed edge, middle tissue is shorter and has a rounded edge, and the shortest (inside) tissue has a fringe edge.
4. Open all of the tissue paper bundles and layer them together as shown.
5/6. Refold the tissue paper layers and add a twist tie to the centre as shown.
7. Open the tissue paper to create your flower one side at a time. 
8. The back of this pompom is flat for hanging on the wall.
 

A  neutral backdrop of kraft, white and gold paper party decorations gets a pop of colour with these pink tissue paper flower pompoms. I could easily remove the tissue paper flowers and replace them with pompoms in a different colour to reuse this backdrop for another party.


My secret for displaying this large grouping of paper party decorations was this large piece of pegboard. The paper decorations were tied to the board using baker's twine. I can set this display up days before the party and all I have to do is lean the pegboard against the wall when it's time to set up for the party. No nails or hooks required.


Tissue paper tassel garlands are my other go to diy party decoration. They are simple to create and you can make the garlands as long or short as you'd like. I also love that the garlands are extremely light so it makes displaying them a breeze. 

I came up with this way to display my tissue paper tassel garlands so that I don't have to worry about using tape on my walls or furniture. Here's what you will need: mason jars, wooden dowels, sand and clothespins.


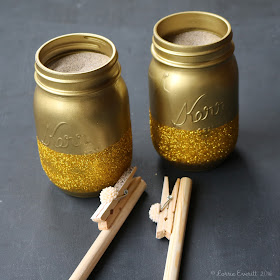
I spray painted my mason jars gold and and added a band of gold glitter so that you would not see the sand inside of the jars.


I could have just used plain wood clothespins but I decorated mine with scraps of decorative paper and resin flowers.


I glued the clothespins to one end of the wood dowels as shown above. Put one wood dowel into each mason jars that has been filled with sand. 


Clip the tissue paper tassel garlands to the wood dowels as shown above and space the jars so that the garland hangs nicely. Depending on the length of the dowels, you can add this display to a table top or where ever you want!


Tissue paper tassel garlands are easy to create. These ones were created using Martha Stewart's ombre tissue paper but you can do this same technique with solid or printed tissue paper as well.


You can cut your tassels by hand or you can use the Martha Stewart tassel cutter like I did to get even cut tassels. You can check out this Martha Stewart YouTube video to see this amazing tool in action.


Here's a really quick look at how to make a tassel: (left to right) cut the edges of your tissue as shown, roll the tissue and then twist at the middle. Fold the tassel in half and then twist once more to create a loop for hanging.


I wanted to add a little glitter to my tassels so I used gold glitter tape just below the loop. The glitter tape does not stick to itself very well so you will have to use a little adhesive on the end of the glitter tape. 


You can cover the entire pegboard with decorations if you want. Just remember to leave one edge of the pegboard flat so it will sit on a flat surface.